Premier | Pre-Payments
Description
Resolution
Selling a Pre-Payment
- A “Pre-Payment” can be sold either through “Departures” or “Client Sale”. It must be sold under the client’s name that will be using the “Pre-Payment”.
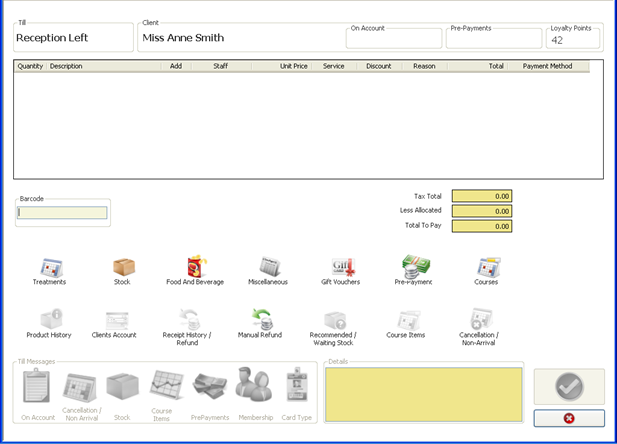
- When on the client billing, screen click on the “Pre-Payment” icon (see Figure 1).
Figure 1
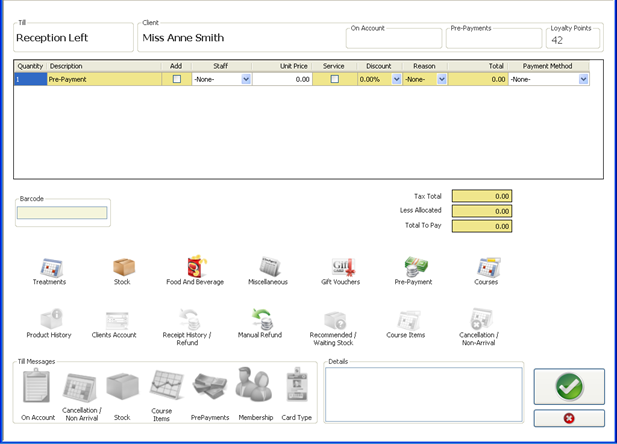
Once you have clicked on the “Pre-Payment” icon the following line will be added to your client’s bill (see Figure 2).
Figure 2
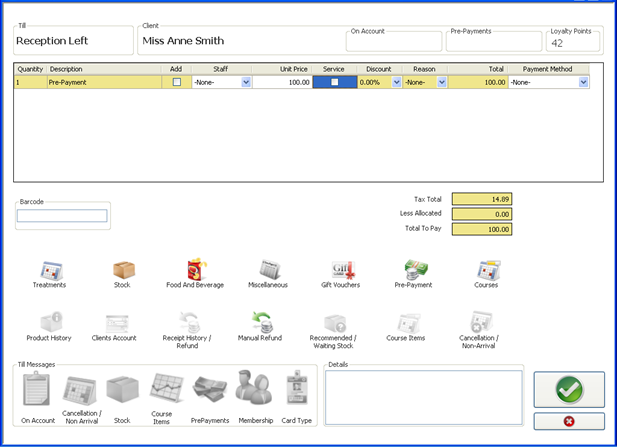
- Enter the required amount the client wishes to purchase in the “Unit Price” box.
- Press “Enter” on your keyboard and this amount will now appear on the client’s bill (see Figure 3).
Figure 3
- “Green Tick”.
- On the “Payment Allocation” screen input how the client is paying for the pre-payment and then “Green Tick”.
- To view the pre-payment that has been sold; on the main “Reception” screen, click on the “Clients” icon (see Figure 4).
Figure 4
- Input the “Surname” of the Client who has purchased the Pre-Payment.
- Select the relevant client from the list that is populated.
- “Green Tick” to open the client card.
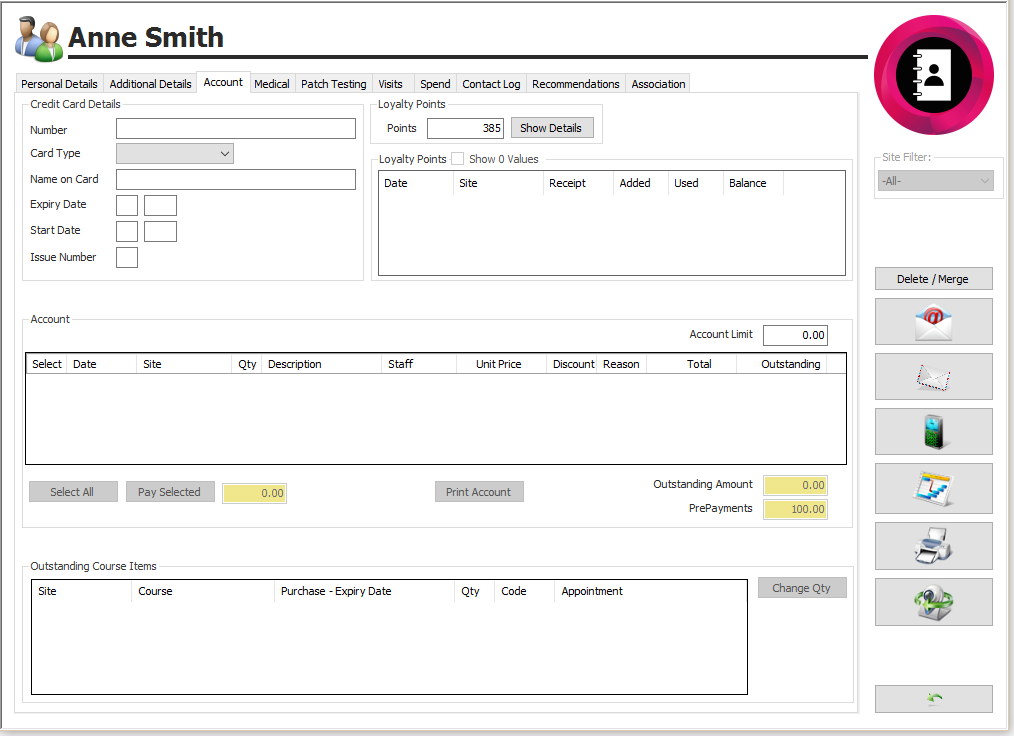
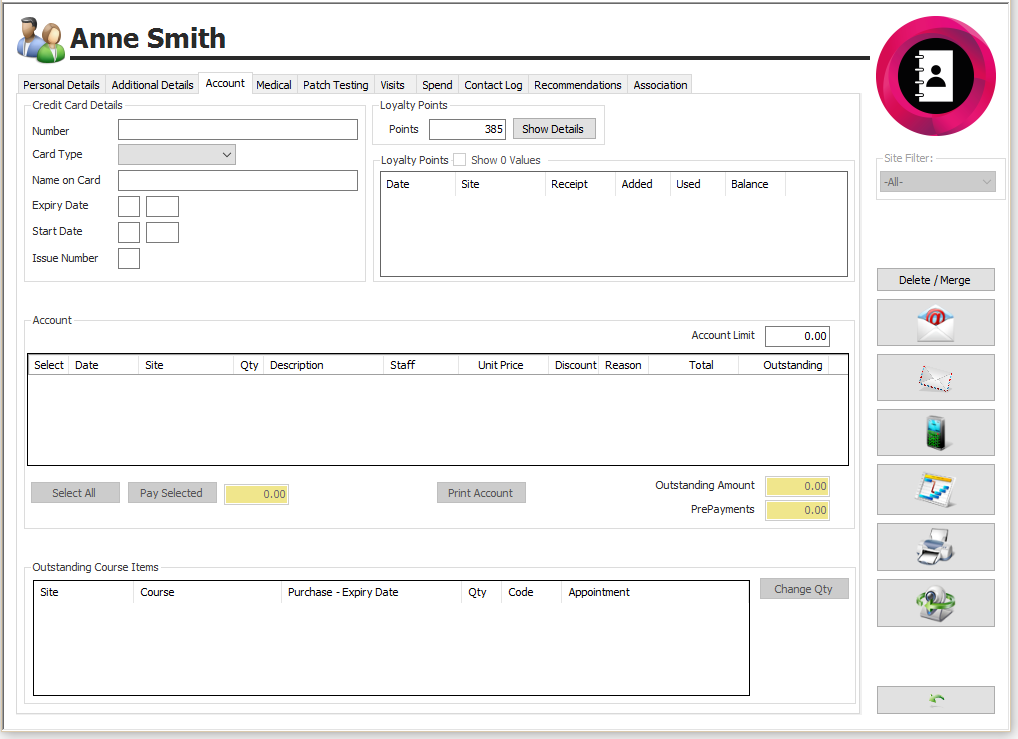
- Select the “Account Tab”.
- You will now see the amount of the pre-payment that has been sold in the Pre-Payments box (see Figure 5).
Figure 5
Redeeming a Pre-Payment
Once a “Pre-Payment” has been sold to a client it is now classed as a method of payment. It can be redeemed against any appointment or stock item. If the “Pre-Payment” is for something specific ensure you put notes on the “Client Card” detailing this.
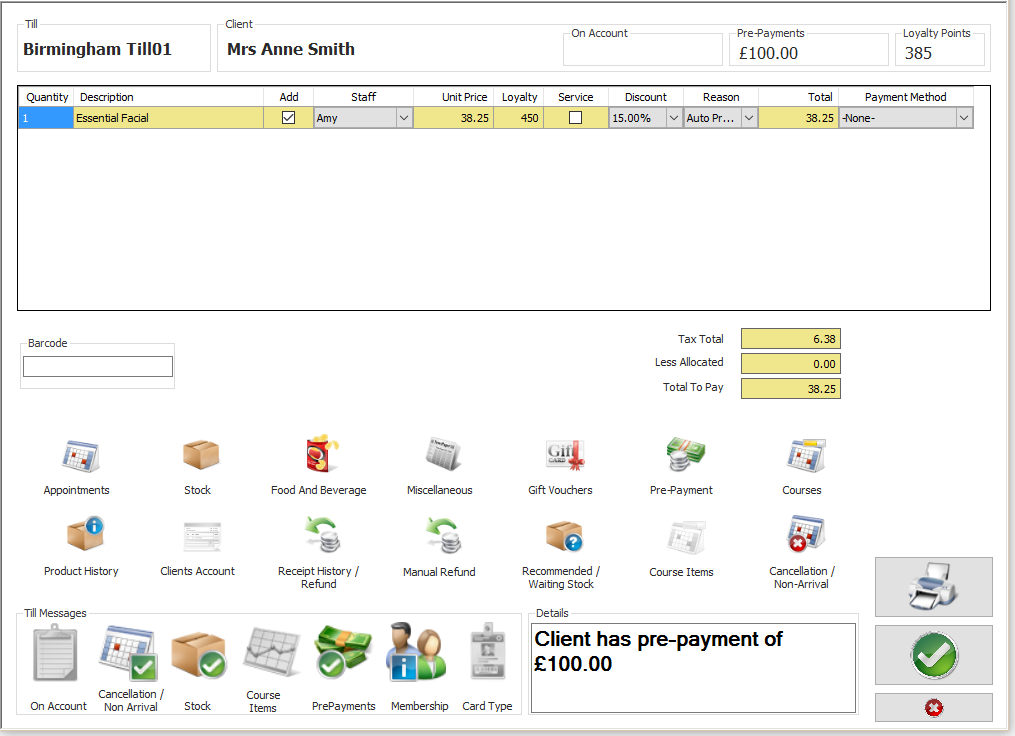
When on the client billing screen - either through “Departures” or “Client Sale” it will state that the client has a pre-payment and the amount is located at the “Top”. Also, the “Pre Payment” button will be highlighted within the “Till Message” section which you must click on before the “Green Tick” is highlighted and a message will now appear stating the client has a pre-payment and the amount of the pre-payment (see Figure 6) you will now be able to “Green Tick” and move onto the “Payment Allocation” screen.
Figure 6
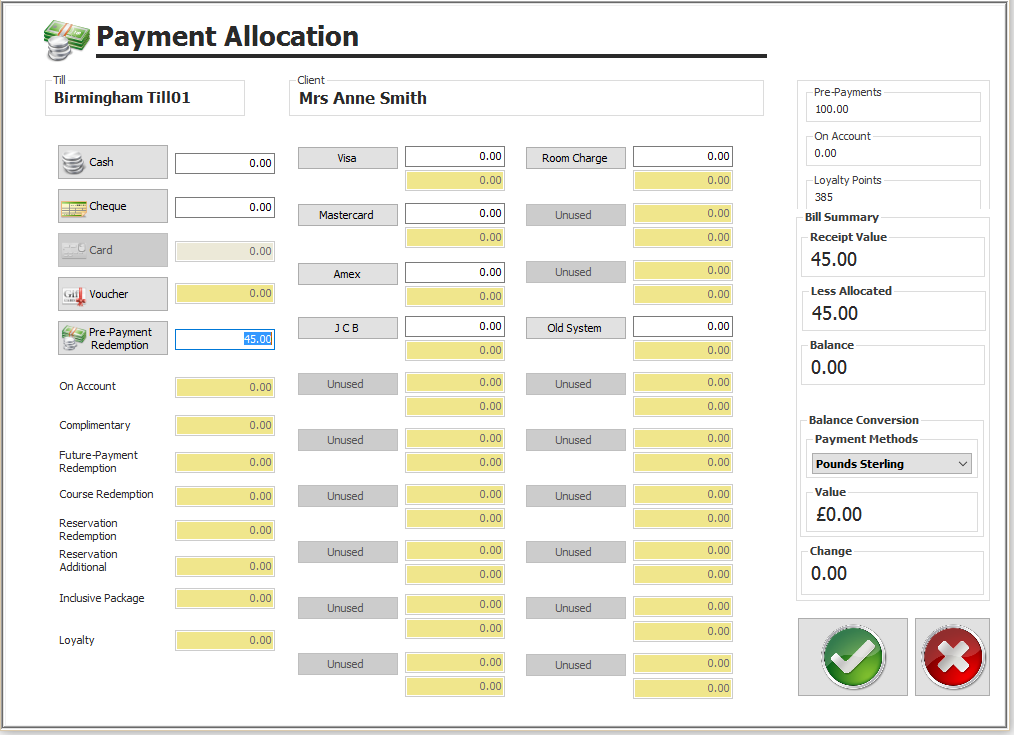
- Once on the “Payment Allocation Screen” ensure that you click on the “Pre-Payment Redemption” icon (see Figure 7).
Figure 7
- The required amount will now be automatically inputted into the pre-payment redemption box. If there is not enough “Pre-Payment” for the entire bill a screen will prompt you to say “Not enough pre-payment available for this bill”. Click onto “OK” and then allocate the remainder of monies due to another payment method i.e. “Cash”, “Cheque” or the relevant “Card” payment.
- “Green Tick”.
Refunding a Pre-Payment
In extreme situations, you may be required to refund a pre-payment if this is the case then click on “Client / Member Sale” (see Figure 8).
Figure 8
- Input the “Surname” of the client who is requiring the pre-payment to be refunded.
- Select the relevant client from the list that has been populated.
- “Green Tick”.
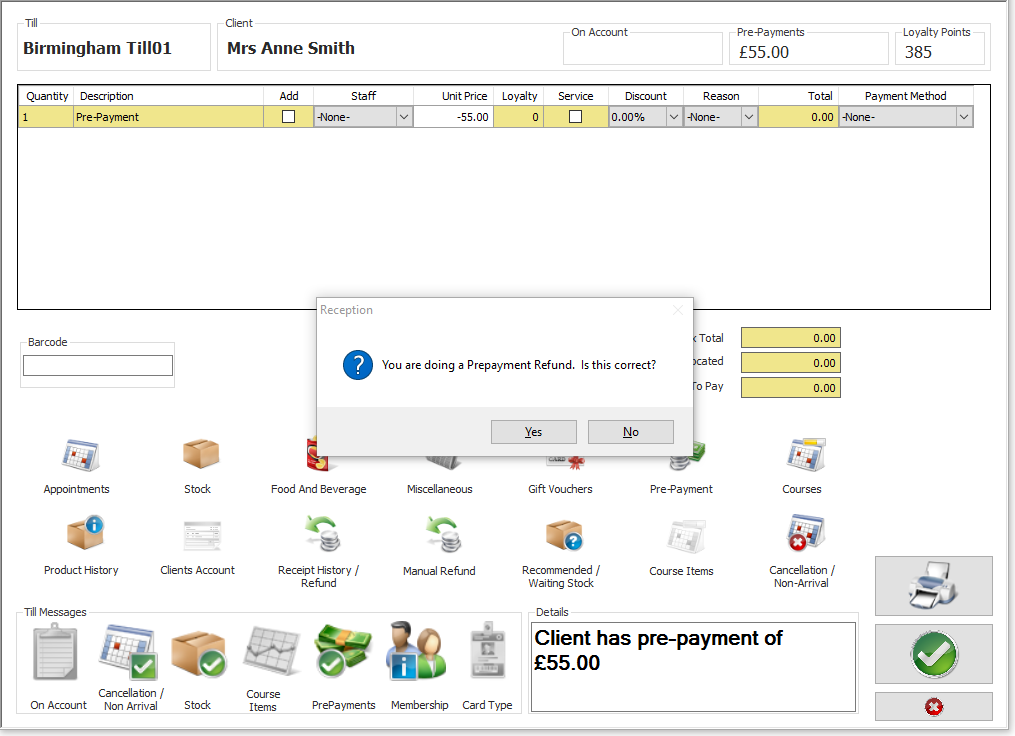
- Click on the “Pre-Payment” Icon (see Figure 9).
- In the “Unit Price” box input the amount that you wish to refund ensuring that it has a “Minus” sign inputted before the amount.
Figure 9
- Press “Enter” on your keyboard .
- A box will appear stating “You are doing a pre-payment refund, is this correct?” Click on “Yes”.
- Click on any “Till Message” icons that are highlighted.
- “Green Tick”.
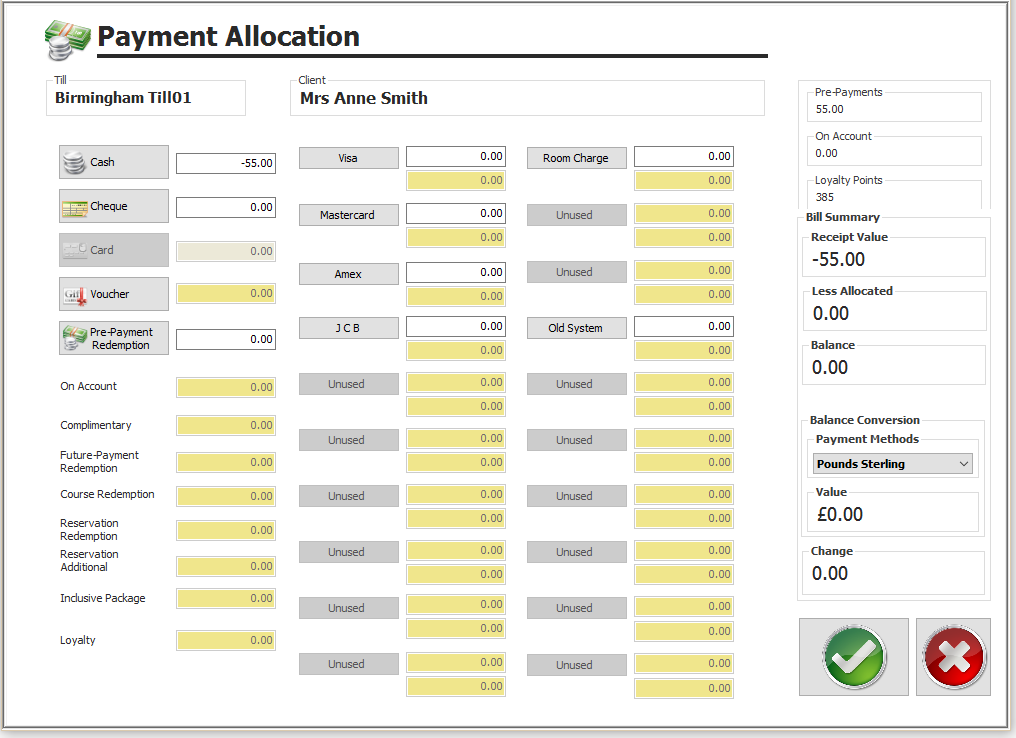
- On the payment allocation screen the amount that is required to be refunded will appear in the preferred payment method ( this has already been defined within your site settings). If you wish to change this click on the required way in which you wish to refund the client for example “Cheque”, or select the relevant “Card” (a pre-pay refund is generally refunded using the same payment method in which the pre-payment was initially purchased, in the example below we are refunding to “Cash” see figure 10).
Figure 10
- “Green Tick”.
By looking at the “Client Card”, under the “Account Tab” you will now see that this client does not have any Pre-Payment left to spend (see Figure 11).
Figure 11
Related Articles
Premier | Future Payments
Description The future payment facility enables an appointment which is already booked to be paid for in advance. Resolution Selling a Future Payment In “Reception” click on “Future Payments” (See figure 1). Figure1 Search for your client. Select ...Premier | Appointment Pre-Selections
Description The Appointment view pre-selection setup allows viewing your diary differently: for example you may have a fitness team and a spa team and instead of looking at a diary view of all staff you are able to look at just the fitness team or ...Premier | Direct Debit Processing
Description Monthly payment can be processed and collected via direct debit or by processing a standing order, this section covers the creation of the direct debit collection file. Resolution In "Administrator" or via "Manager" click onto “DD / SO ...Premier | Departures
Description When the client has finished their appointments and has come to pay they need to be departed in the system. Resolution Select the “Departures” icon (Figure 1). Figure 1 You will now be presented with the following screen (see Figure 2). ...Premier | Courses
Description Courses are used to sell multiple appointments in advance and track usage on the day of the appointment. Typically the value of appointments included in a Course are at a reduced value due to purchasing these in bulk, therefore on ...
