Premier | Marketing
Description
The Marketing section of your Premier software allows you to specify a select group of clients that you wish to target for a particular mail shot. Once the clients have been selected you then have the option to mail merge, email merge or text the clients.
Resolution
In “Administrator” - if multi-site - or “Manager” - if single site - click onto “Marketing, see figure 1.

Figure 1
You will have the option of selecting an existing campaign or create a new one.
- If you opt to create a new Marketing Campaign, click the Green Plus. You will then be presented with the following screen, see figure 2.
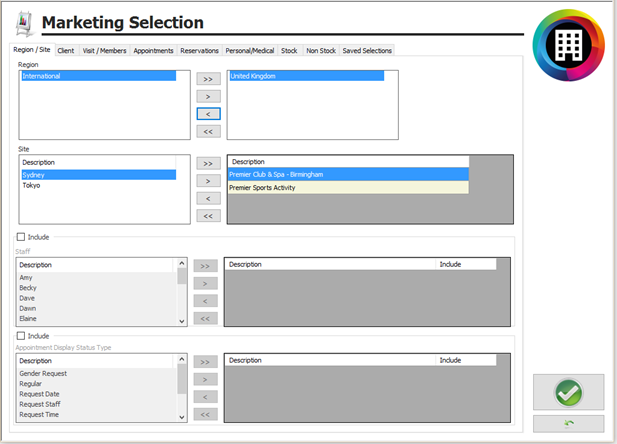
Figure 2
You will notice that you have several Tabs along the top and they are “Region / Site”, “Client”, “Visit / Members”, “Appointments”, “Reservations”, “Personal / Medical”, “Stock” and “Non Stock”, these are the different areas which can be included in the search criteria, we will look at each section separately.
Region / Site
- If using Administrator, you are able to select a “Specific” region or select “All” regions. If you wish to select a single site, highlight the relevant site and then click the “Single Arrow”, if you wish to select “All” sites click the “Double Arrow”.
Depending on the regions selected, the relevant sites will automatically appear in the “Sites” box located underneath the region box.
If using Manager, your site will be pre-selected.
- You are then able to state if you wish the information generated to include “Staff Members” or “Appointment Display Status Types”.
- Ensure the “Include” button is ticked.
- Simply highlight the relevant staff member and use the “Single Arrow” to select one staff member or the “Double Arrow” to select all staff members.
- Repeat the above process to allocate “Appointment Display Status Type”.
- For examples see figure 3.
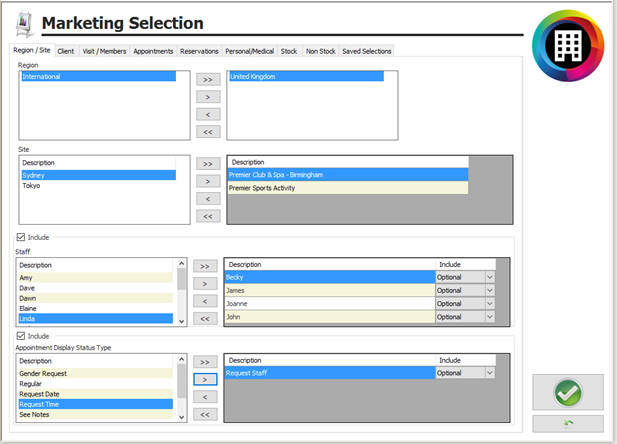
Figure 3
Client
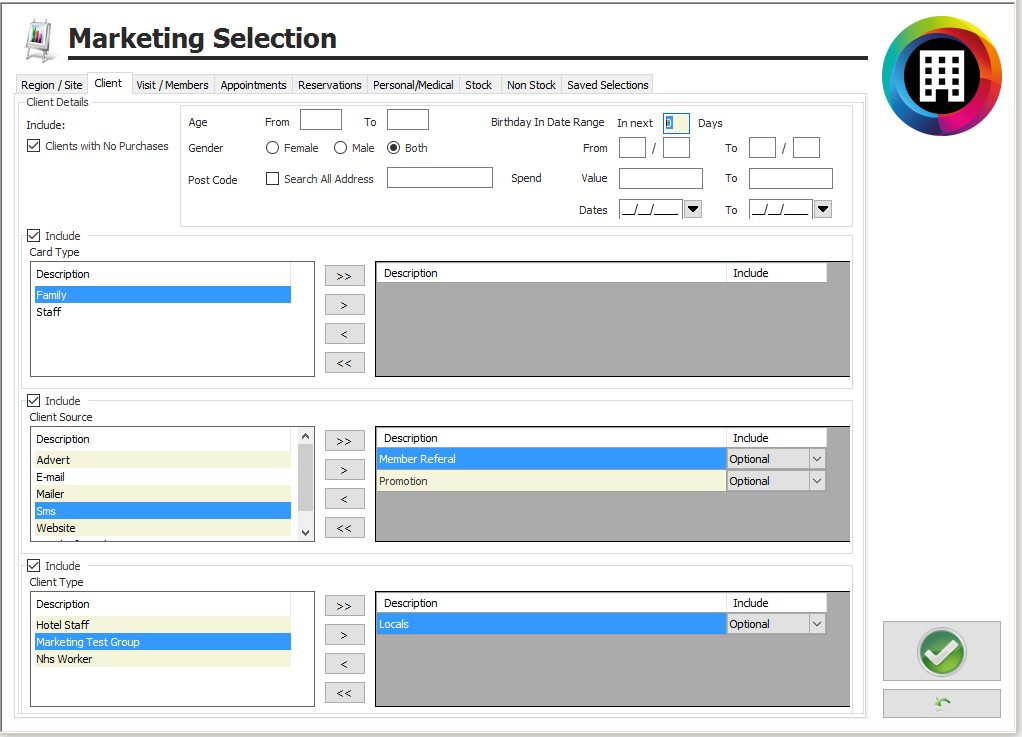
This section allows you to specify the client information that you require to be included within your search.
- If you wish to include those who have not yet visited the spa, ensure the “Clients With No Purchases” box is ticked.
- If you wish to include those clients who have not opted in for GDPR marketing, un-click “Only clients opted-in to marketing”. This should only be done when marketing is being used for internal purposes, or for service call type communications.
- You are also able to input a “Age” Range. Select from “Male” or “Female” clients or “Both”. Enter a “Birthday in Date Range” to potentially select clients automatically or use a From and To date for specific birthdays. Enter a range of “Spend” values over a From and To date range. Enter a “Postcode”.
- If you wish to include “Card Types” ensure the “Include” box is ticked and then select the relevant card types.
- If you wish to include “Client Sources” ensure the “Include” box is ticked and then select the relevant sources.
- If you wish to include “Client Types” ensure the “Include” box is ticked and then select the relevant client types.
For examples see figure 4.
Figure 4
Visit / Members
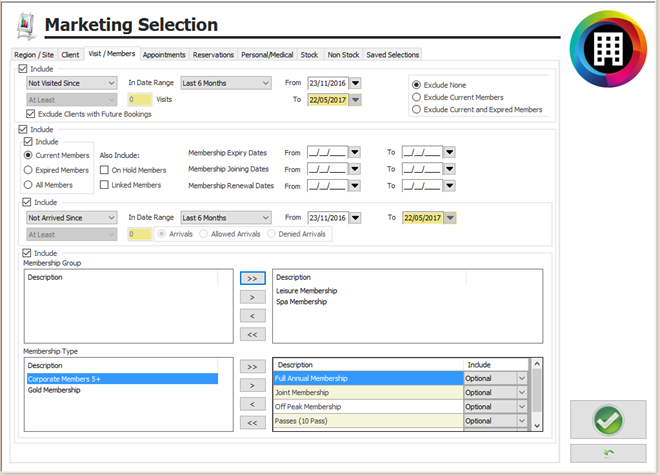
The Visit tab allows you to include “Visits” over a “Date Range” as well as a useful range of membership options.
- You can select “All” dates, or select from “Pre-Defined Dates” by clicking onto the “Downwards Arrow” located at the end of the box containing “All”, or you can input your own date range simply by clicking onto the “Downwards Arrow” located next to the “From” and “To” dates (this produces a calendar, select the required date).
- You are also able to include clients that have “Visited Between”, “Visited Since”, “Not Visited Between”, “Not Visited Since”, “First Visit Between”, “First Visit After” and “Last Visit Between”.
- You can also select how many visits the clients have had, from “At Least”, “No More Than”, “Exactly” or “Between” and then enter a number of “Visits”.
For examples see figure 5.
Figure 5
Appointments
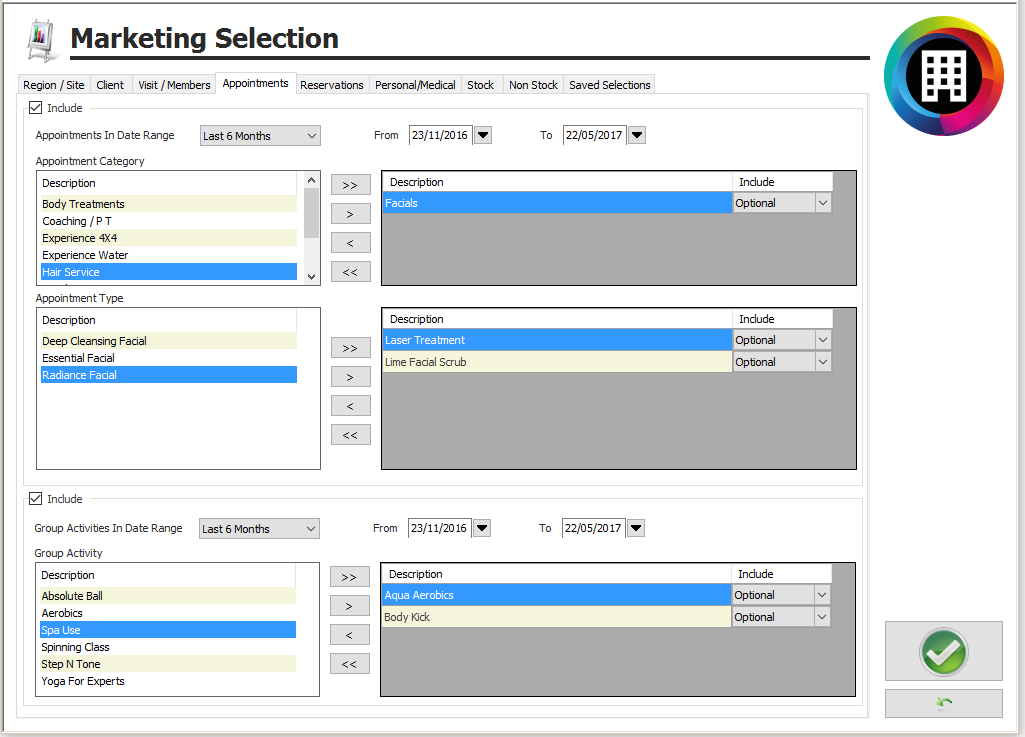
The appointment tab allows you to include any appointments that the client may have had.
- The “Include” button will need to be ticked before any of this section can be selected.
- You can select “All” dates or select from “Pre-Defined Dates” by clicking onto the “Downwards Arrow” located at the end of the box containing all, or you can input your own date range simply by clicking onto the “Downwards Arrow” located next to the “From” and “To” dates (this produces a calendar, select the required date).
- “Appointment Category” lets you select the relevant appointment categories that you wish to include the search. Once selected, you will then be able to select from the “Treatments” already allocated to that category.
- By clicking onto the second “Include” button, you are able to include “Group Activities” , you can select “All” dates or select from “Pre-Defined Dates” by clicking onto the “Downwards Arrow” located at the end of the box containing all, or you can input your own date range simply by clicking onto the “Downwards Arrow” located next to the “From” and “To” dates (this produces a calendar, select the required date).
For examples see figure 6.
Figure 6
Reservations
The “Reservations” tab allows you to select from the different packages that you allow your clients to book, this will include both “Day Packages” and “Overnight Packages”.
- The “Include” button will need to be ticked before any of this section can be selected
- Select the relevant packages, the “Single Arrow” will select one package the “Double Arrow” will select all packages.
For examples see figure 7.
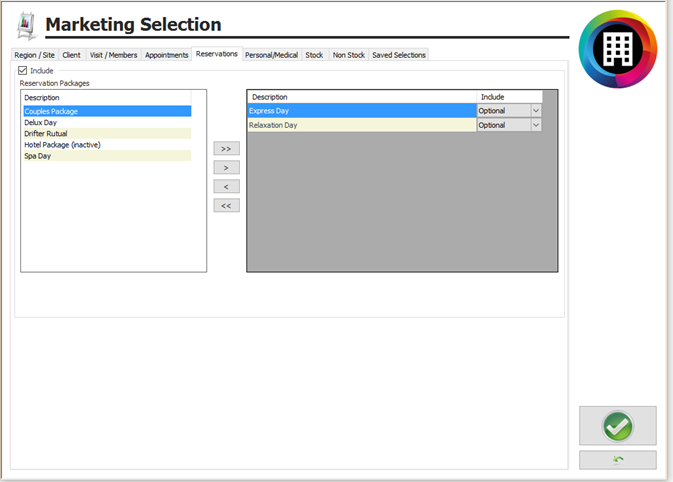
Figure 7
Personal / Medical
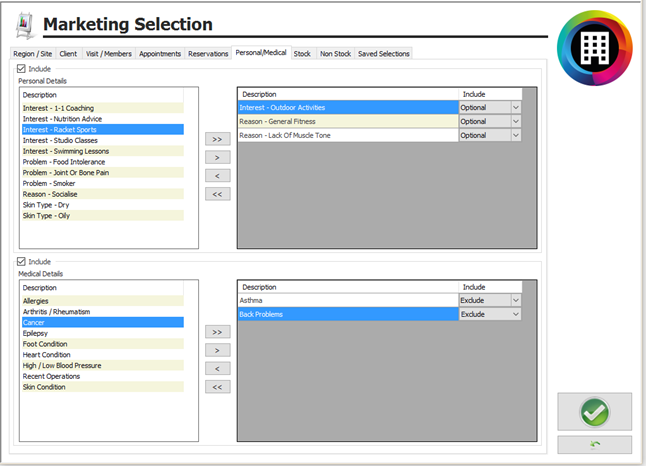
This section allows you to select from any “Client Personal Details” or “Medical Types” that have been allocated to a client.
- If you wish to include “Personal Details” ensure that the “Include” button is ticked and then select from the personal details that are listed.
- If you wish to include “Medical Details” ensure that the “Include” button is ticked and then select from the medical types that are listed.
For examples see figure 8.
Figure 8
Stock
This section allows you to include any clients that have purchased retail items from you.
- Ensure that the “Include” button is ticked.
- You can select “All” dates or select from “Pre-Defined Dates” by clicking onto the “Downwards Arrow” located at the end of the box containing all, or you can input your own date range simply by clicking onto the “Downwards Arrow” located next to the “From” and “To” dates (this produces a calendar, select the required date).
- Move across any “Manufacturers” that you wish to include in the search.
- When you have moved across the required “Categories” a list will automatically appear in the “Stock Items” box. Select the required items and move them across.
For examples see figure 9.
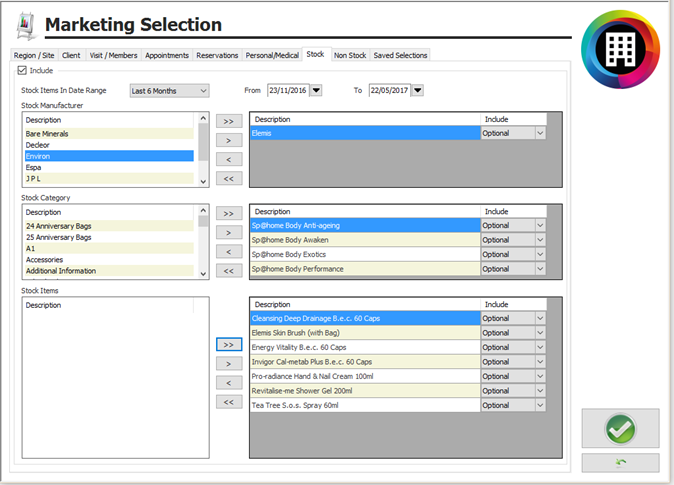
Figure 9
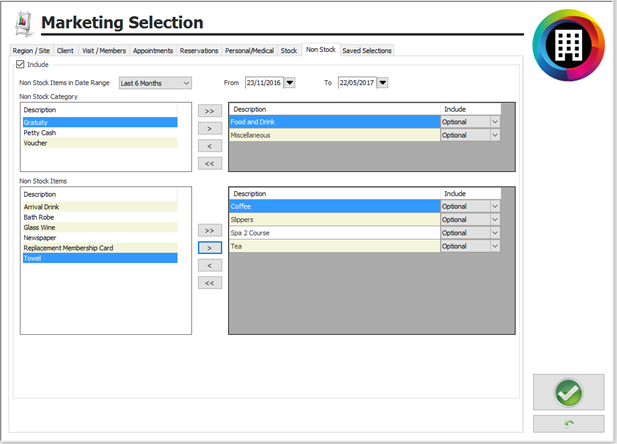
Non Stock
This section allows you to include any items that have been purchased which are not allocated using stock.
- Ensure that the “Include” button is ticked.
- You can select “All” dates or select from “Pre-Defined Dates” by clicking onto the “Downwards Arrow” located at the end of the box containing all, or you can input your own date range simply by clicking onto the “Downwards Arrow” located next to the “From” and “To” dates (this produces a calendar, select the required date).
- When you have selected the required “Non Stock Category” a list will automatically appear in the “Non Stock Items”. Select the required items and move them across.
For examples see figure 10.
Figure 10
- Once you have selected the relevant criteria click onto the “Green Tick”.
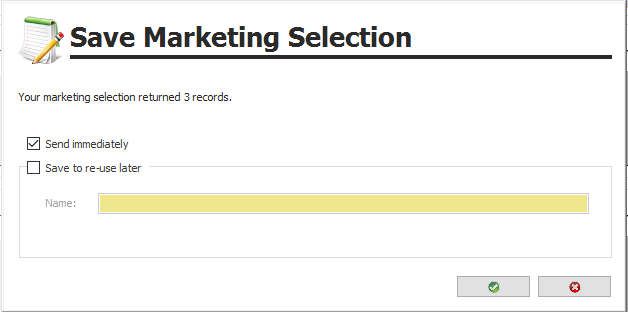
- You will then get the following message, see figure 11, click “Green Tick”.
Figure 11
The above message states how many clients fall into the categories that you have selected within your search.
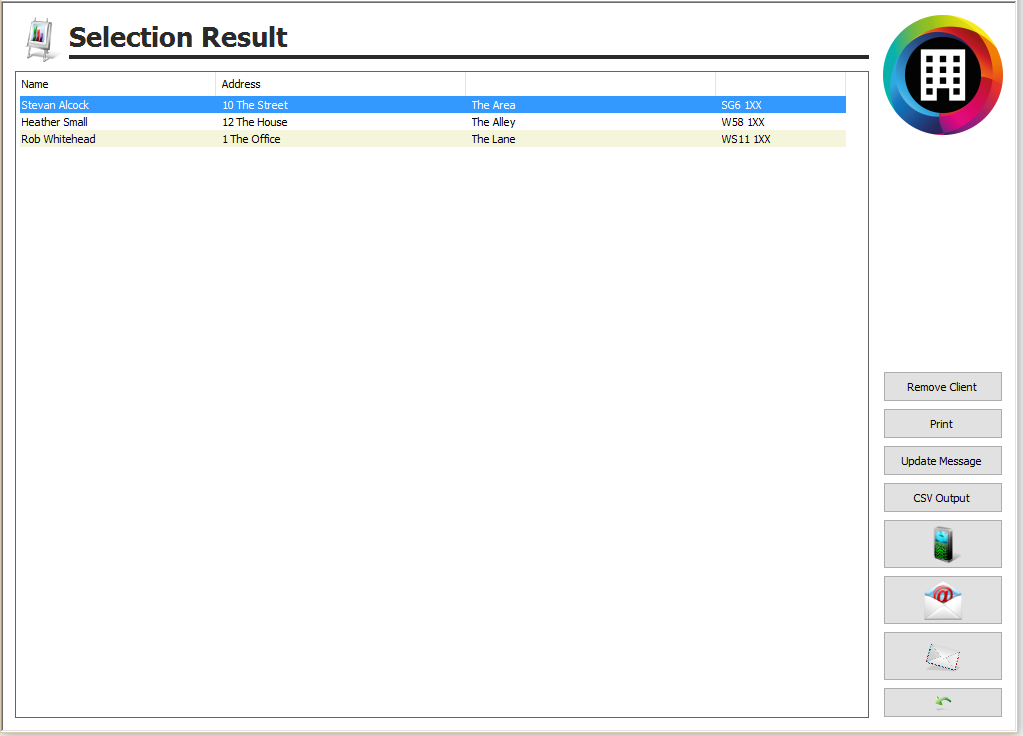
- Once you have clicked onto “Yes” the following screen will appear, see figure 12.
Figure 12
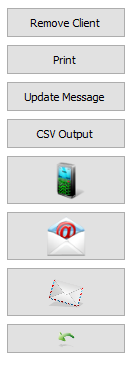
You now have several options that are available to you, see figure 13.
Figure 13
- “Remove Client”; this allows you to select any client and “Remove” them from the search criteria.
- “Print”; this allows you to “Print” out all client details.
Update Message
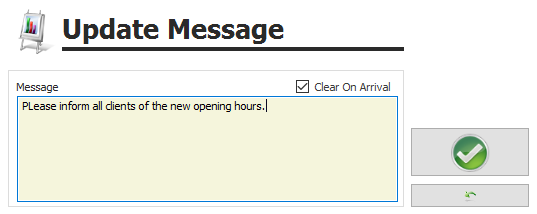
- Click “Update Message”, this screen allows you to type in a message that will automatically appear when you arrive any client from the search criteria. By ticking “Clear On Arrival” the message will only appear the next time the client arrives. If you wish the message to appear each time the client arrives, do “Not” tick this box.
- Once you have typed entered your required message, click the “Green Tick”, See figure 14.
Figure 14
CSV Output
- To export elements of your database, click “CSV Output”.
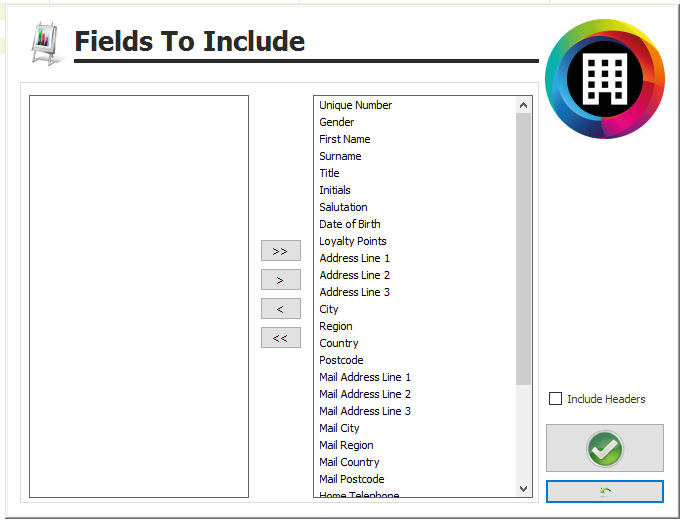
You will now be presented with the following screen, see figure 15.
Figure 15
- The above screen shows you which “Fields” that you wish to “Include” within your search, any fields not required highlight and use the “Single Arrow” to move them from the “Right Hand” side to the “Left”.
- Click “Green Tick”.
Text Messages
- Once you have selected your criteria click on the
button and the following screen will appear, see figure 16.
Figure 16
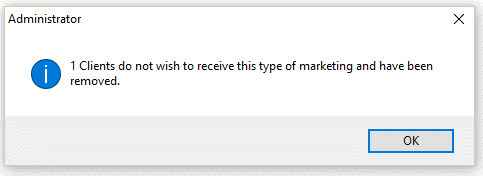
- This message tells you how many clients within your search criteria do not wish to be contacted via SMS and they will be automatically removed.
- Click “OK”.
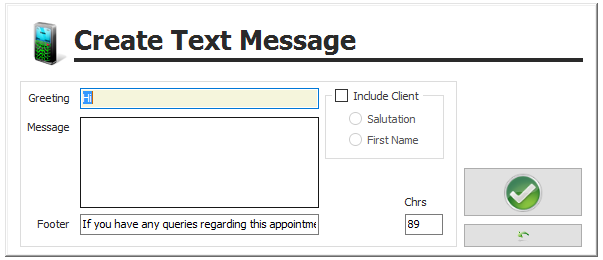
You will now be presented with the following screen, see figure 17
Figure 17
- Type in the message that you require to send, if you want to include the client’s salutation then ensure the ”Include Salutation” box is ticked.
Please note that a basic text message has a maximum of 160 characters, any characters over and above this number will result in either the message not being sent, or two text messages being sent and subsequently your being charged for both.
- The footer is automatically inputted depending on the information that you have previously inputted within your “Site Settings”.
- Once the text message has been generated, click the “Green Tick”.
- The system will automatically tell you the clients that have invalid mobile numbers, no mobile number and if your text message is over 160 characters.
- Once ready click onto “Send Message”.
Emails
- Once you have selected your criteria please click onto the button
and the following screen will appear, see figure 18.
Figure 18
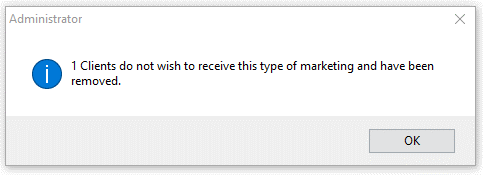
This message tells you how many clients within your search criteria do not wish to be contacted via Email and they will be automatically removed.
- Click “OK”.
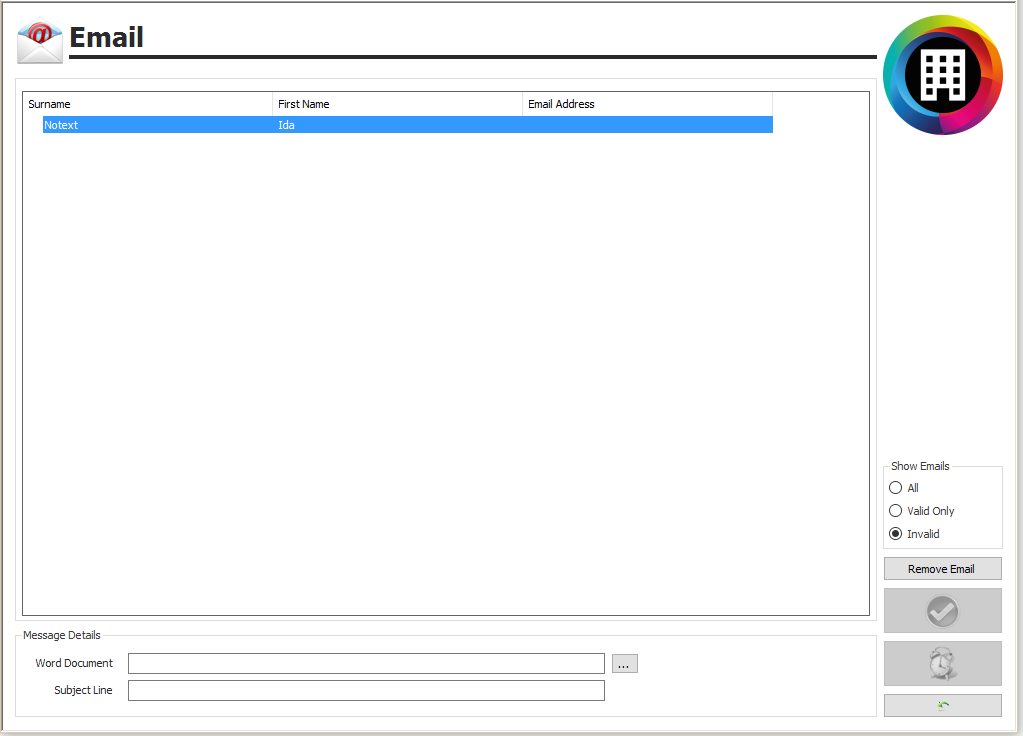
The following screen will appear, see figure 19.
Figure 19
- In the example above, the list of clients shown have an “Invalid Email” address. To resolve this, click onto the “Valid Only” option and a list of clients will be populated showing their email addresses.
- If you require to remove a client highlight the client name and then click onto “Remove Email”.
- Input the “Subject Line”.
- To insert the word document, which you will have previously created, click the box located at the end of the “Word Document Box”. Locate the relevant word document and then click to insert it, making sure it shows in the “Word Document Box”.
- Click onto “Send Emails”.
Related Articles
Premier | Automated Marketing and Reports
Description With version 2.2 onwards Premier Core includes automated marketing, automated reception reporting and automated appointment reminders and confirmations. A small number of changes have been made to the system to support this: The 2 ...Prmeier | SMS Text Reminders
Description SMS Text Reminders Resolution SMS TEXT MESSAGING The following screen will appear (see Figure 1): Figure 1 “Greeting” – input the greeting that you wish to start the text message with. “Include Salutation” – tick this box if you wish to ...Premier | Creating and Sending Emails
Description Creating Templates and Configuring your System Technical Information In all installations there will be a degree of technical setup required in order for the integrated email merge facility to function. The level of complexity will depend ...Premier | Email Settings
Description This guide will help you to diagnose and resolve email settings you may be experiencing. Email settings are managed by your IT provider and they will be the ones to assist with obtaining updated settings if required. Premier Core ...Premier | Email Service Provider Setup
? Summary This article will guide you through process of turning on Premier's new email service provider. This may be required due to a planned change from Microsoft relating to SMTP and basic authentication. Starting March 1, 2026, Microsoft will ...
