Premier | Global Membership Renewals
Description
Global Membership Renewals
The Global Membership Renewal function within Core by Premier, allows you to renew single payment term members as a group.
This applies to all members who make a single payment for their membership, and which unless renewed will expire at the end of the length of membership; e.g. annual and 6-month memberships.
The Passes membership type is excluded from Global Membership Renewal.
Groups of members can be selected by Site - if you a multi-site business, Membership Type, and their current expiry dates.
The function will therefore suit both sites where memberships renew throughout the year and you are perhaps looking to run this function monthly, as well as - and possibly be even more relevant to - sites with an annual year end date to their memberships; i.e. Golf Clubs.
Having selected your group of members, the renewal process will then extend their expiry dates and create a payment line - initially marked as unpaid. A renewal notice with an invoice can then be automatically generated and emailed to each member or an invoice print run completed, for you to post the invoices out to your renewing members.
As the members then make their payments, you simply follow the standard operating procedure and process the payment in Membership Payments, and on the Payments tab of their Members Details, mark the payment line, that has already been created, as paid.
Use the Members’ Payments report with Paid and Unpaid ticked to monitor payments received or that are still outstanding.
The Global Membership Renewal function will automatically update the members:
o Expiry Date,
o Payments and History tabs in Members Details,
o Guest Passes, and
- Loyalty Points.
Resolution
Global Membership Renewal
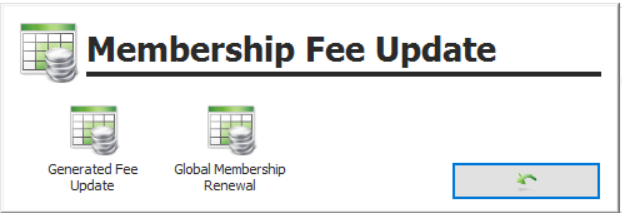
- In Manager, or if you are a multi-site business - Administrator, click Membership Fee Update.
Figure 1
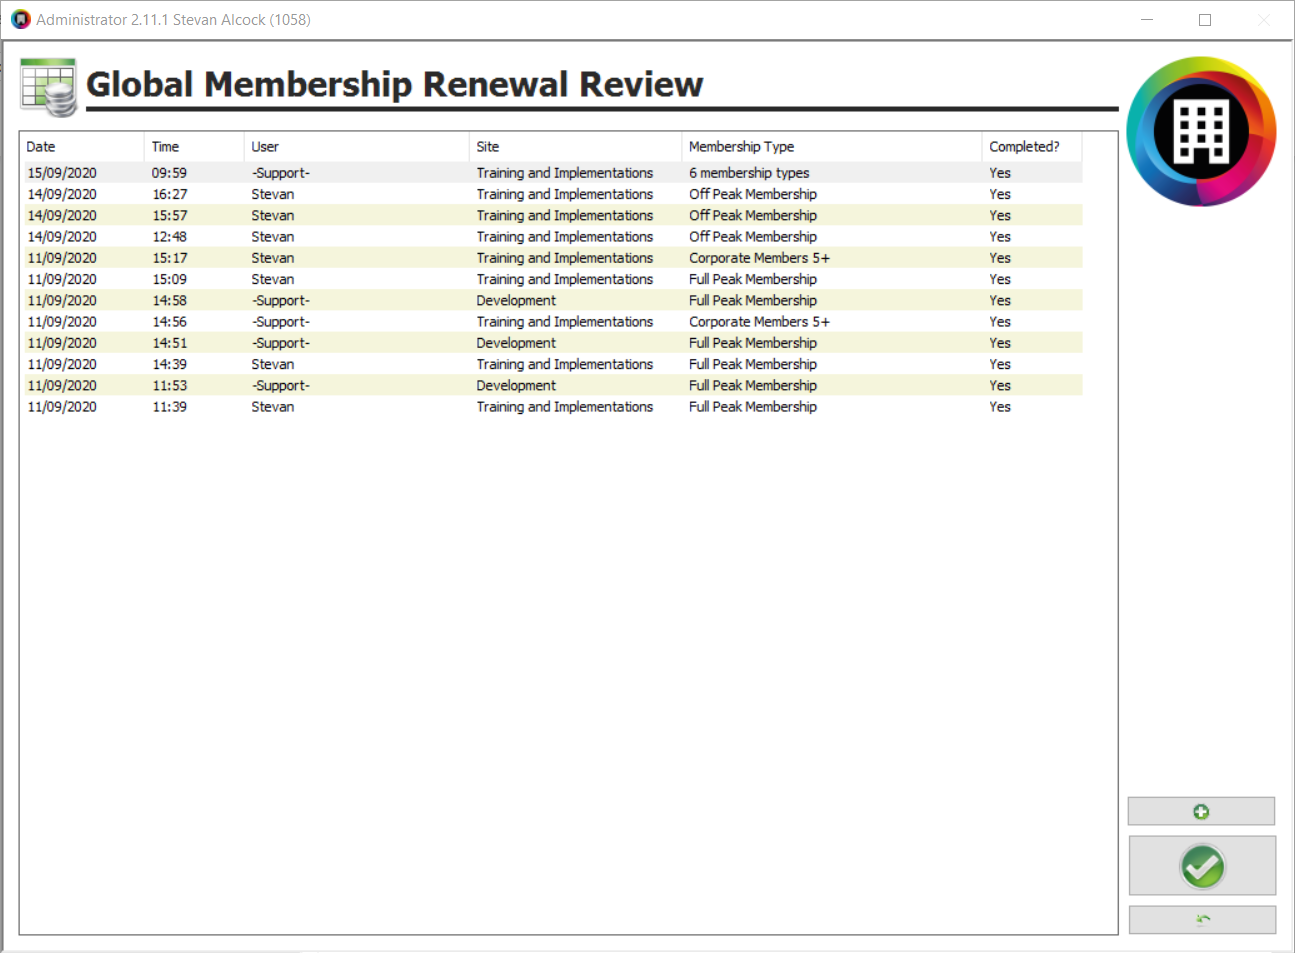
- From the Membership Fee Update menu, select Global Membership Renewal.
Figure 2
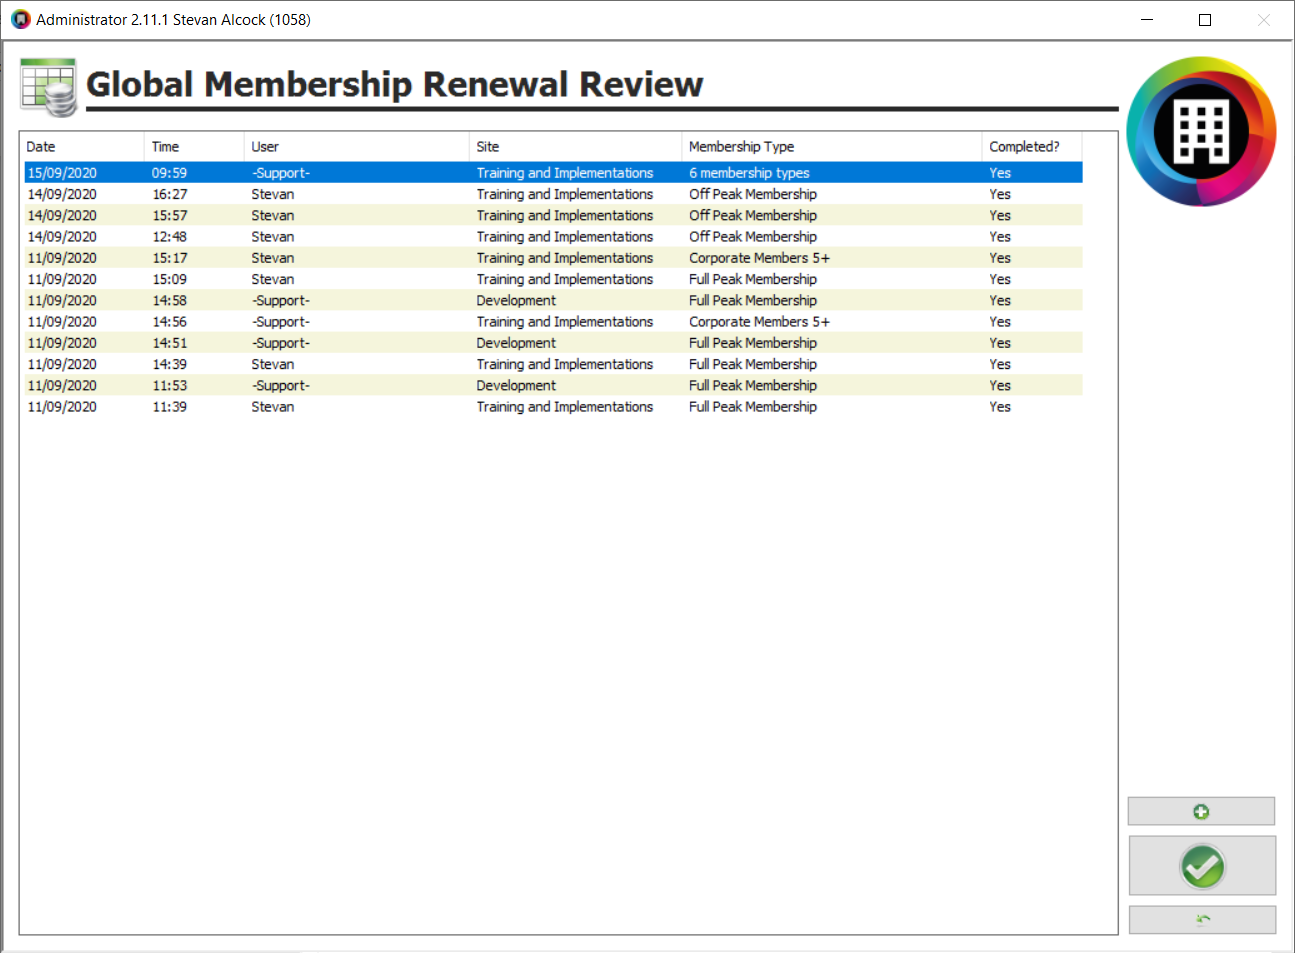
The Global Membership Renewal Review screen will display, see figure 3, listing all current and previous global renewals.
Figure 3
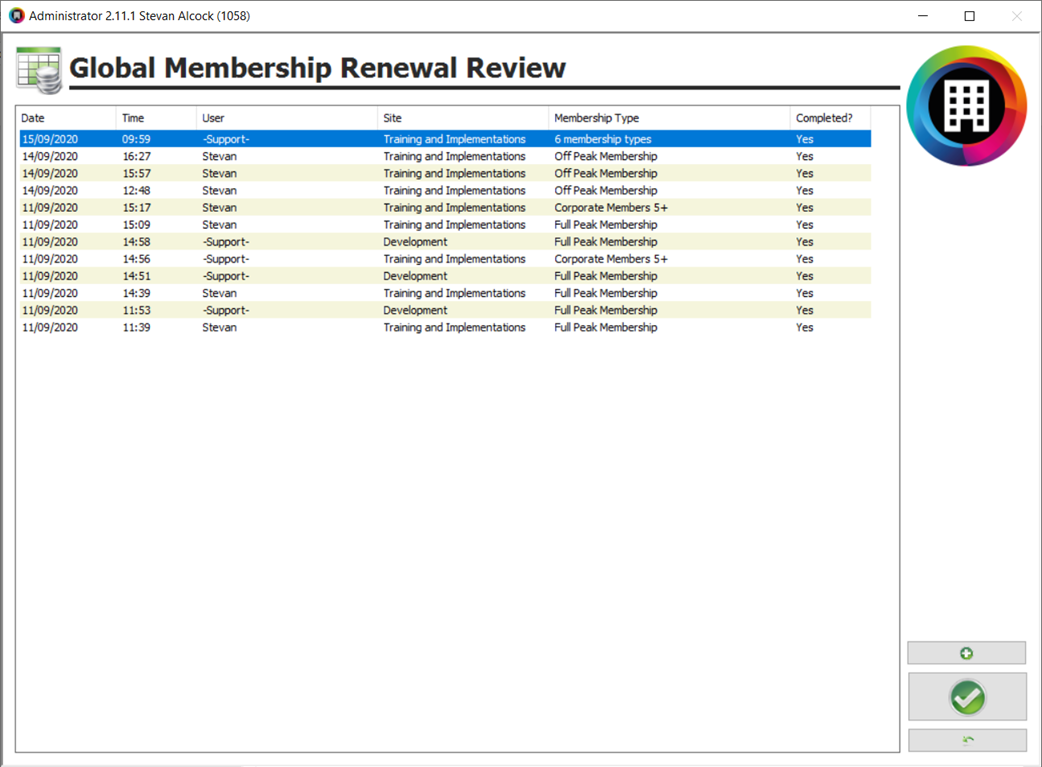
- To review or complete an existing run, click on the required run in the list displayed, and then click the Greenü.
Figure 4
You can see if a particular renewal run has been completed or not on the column headed Completed.
Yes, denotes that the renewal has been run.
To check to see if Emails have been sent or letters printed informing the members of their renewals, check the Notified By column within the Global Membership Renewal screen itself.
Creating a new Global Membership Renewal
- From the Global Membership Renewal Review screen, click the Green+, figure 5.
Figure 5
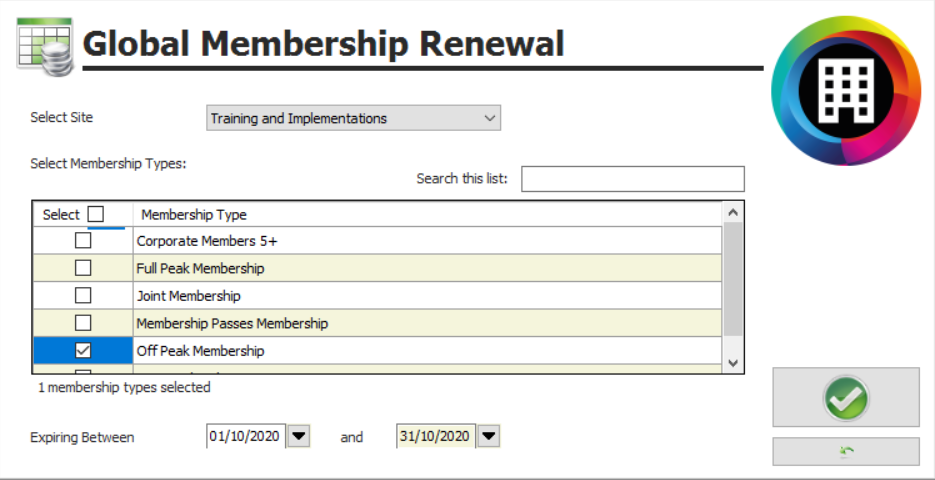
Figure 6 will display, asking for the information required to identify the group of members to be renewed.
Figure 6
Enter the following required details:
- If you are a multi-site business and using Administrator, select the relevant site from the list provided. If you are using Manager, your site name will have automatically been identified.
- Select the relevant Membership Types from the list provided. Tick the Select box alongside their names, figure 6. Or to start by including all members and then if required un-tick those that you do not want to amend, tick the tick box adjacent to Select, in the column heading.
The list of Membership Types will only include the currently active types allocated to the selected site.
- Enter the required date range for the member’s current expiry dates.
- Click the Greenü.
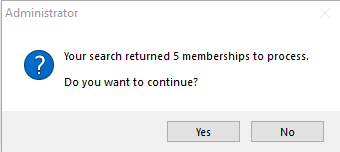
A check message will display.
Figure 7
- Click Yes, to continue the process.
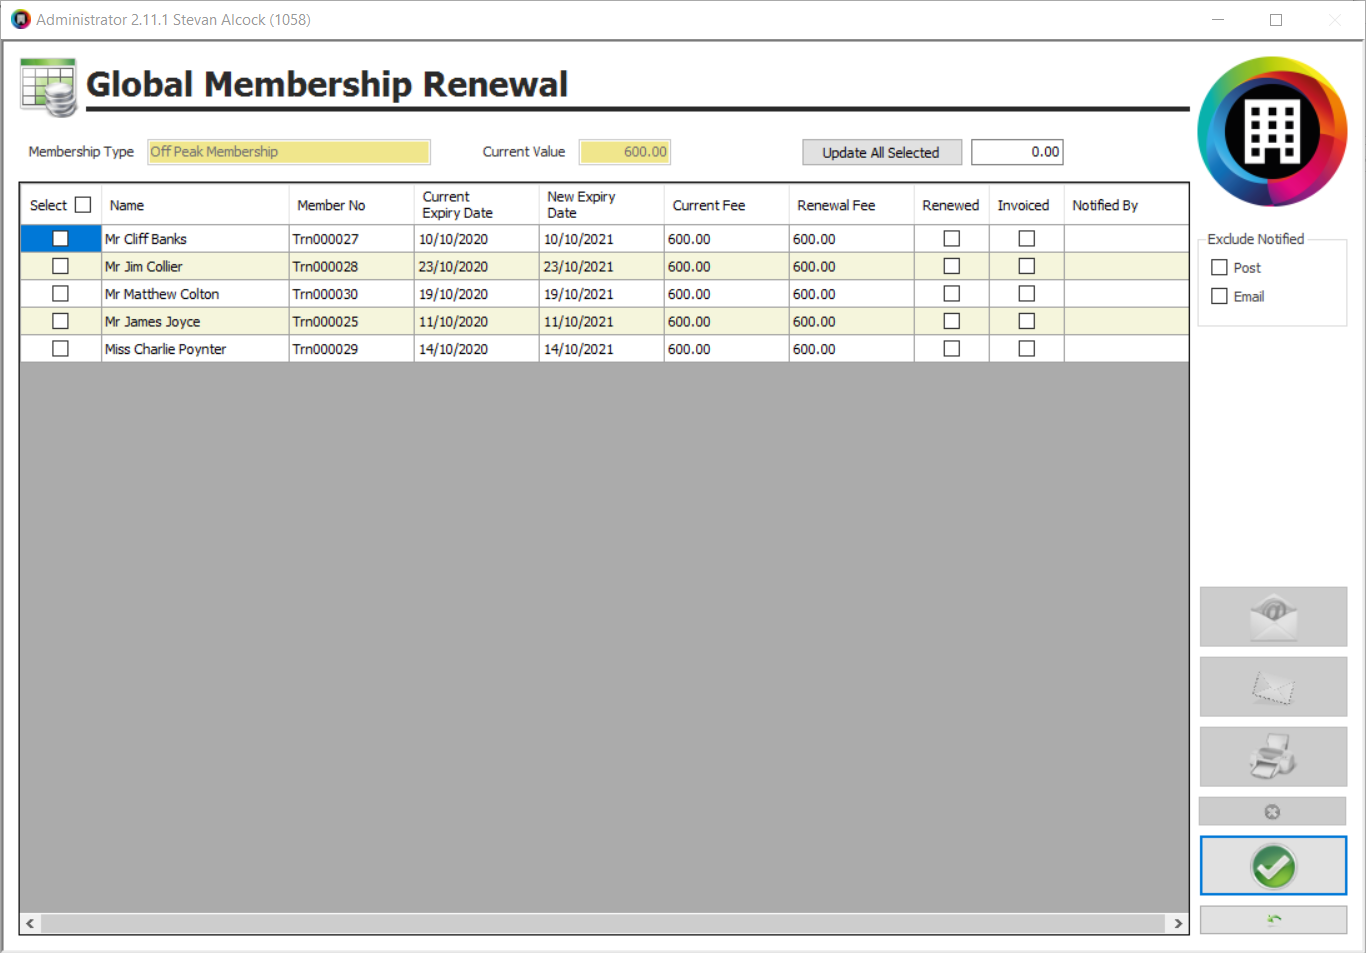
A list of the members within the selected group will display, figure 8.
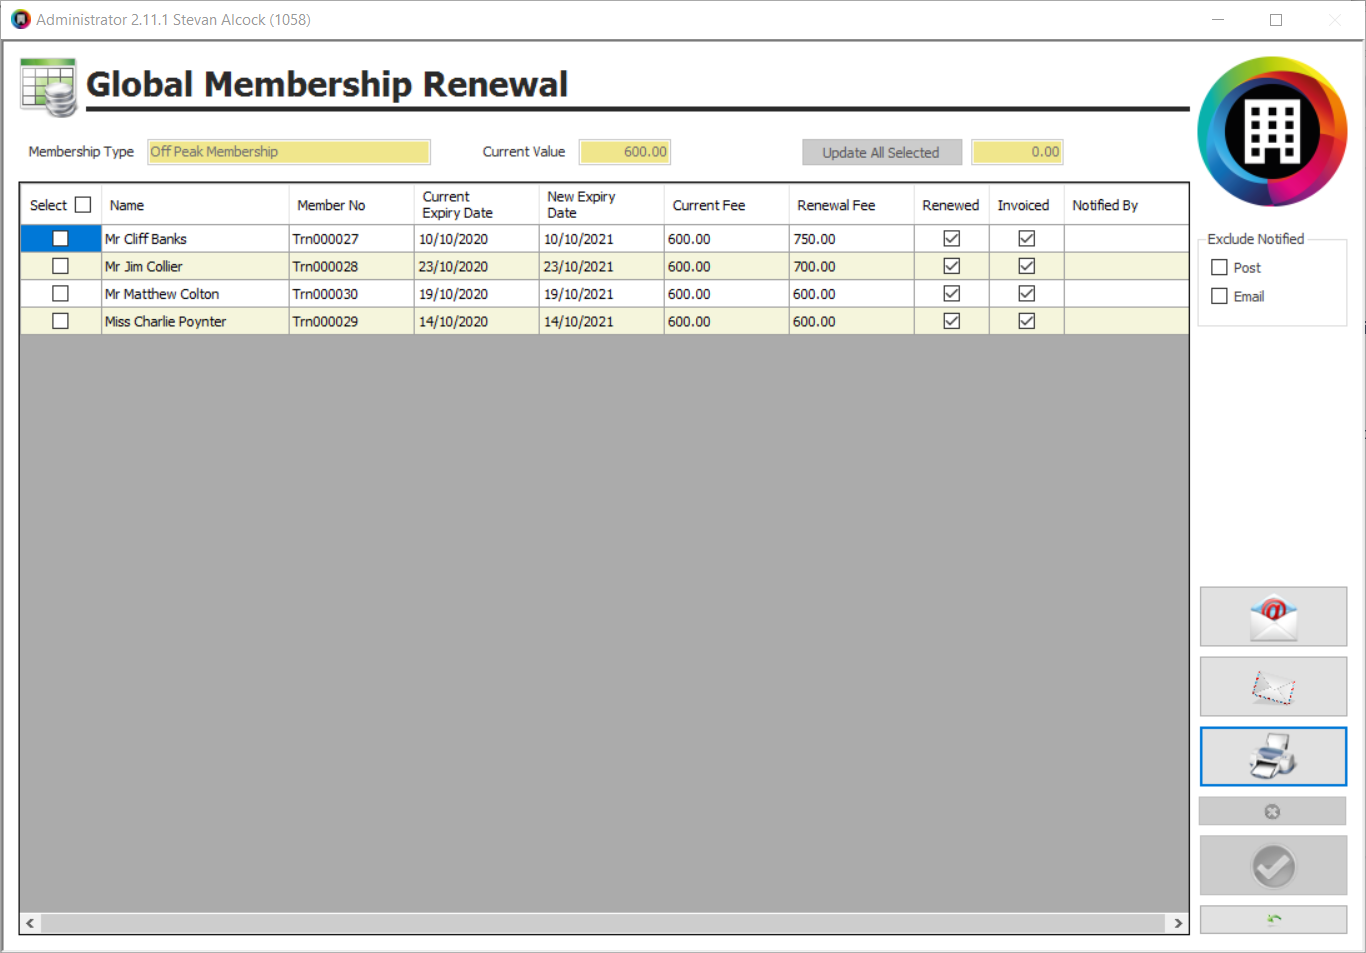
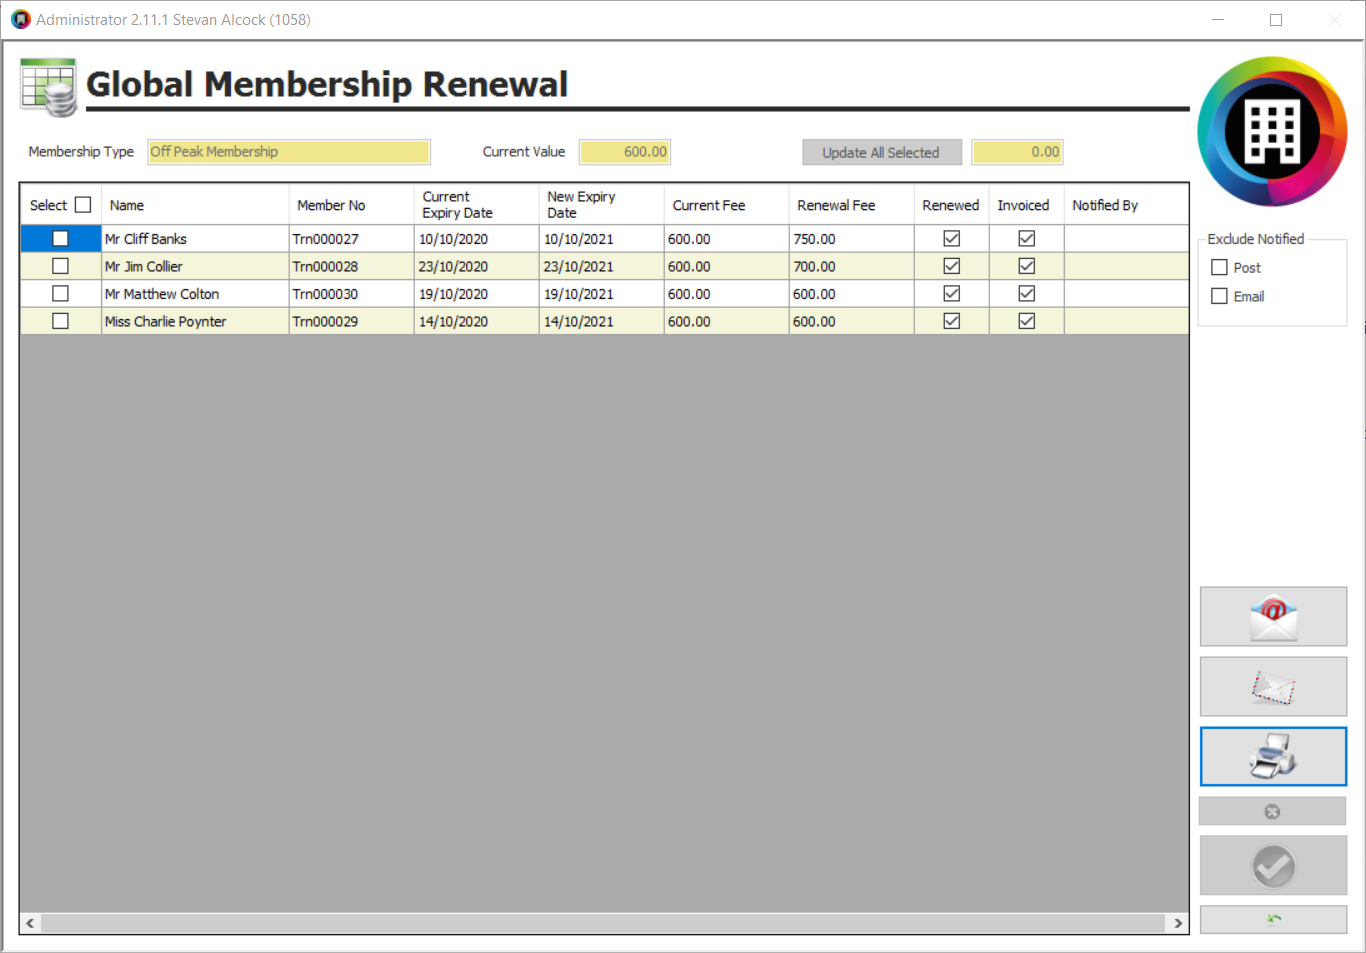
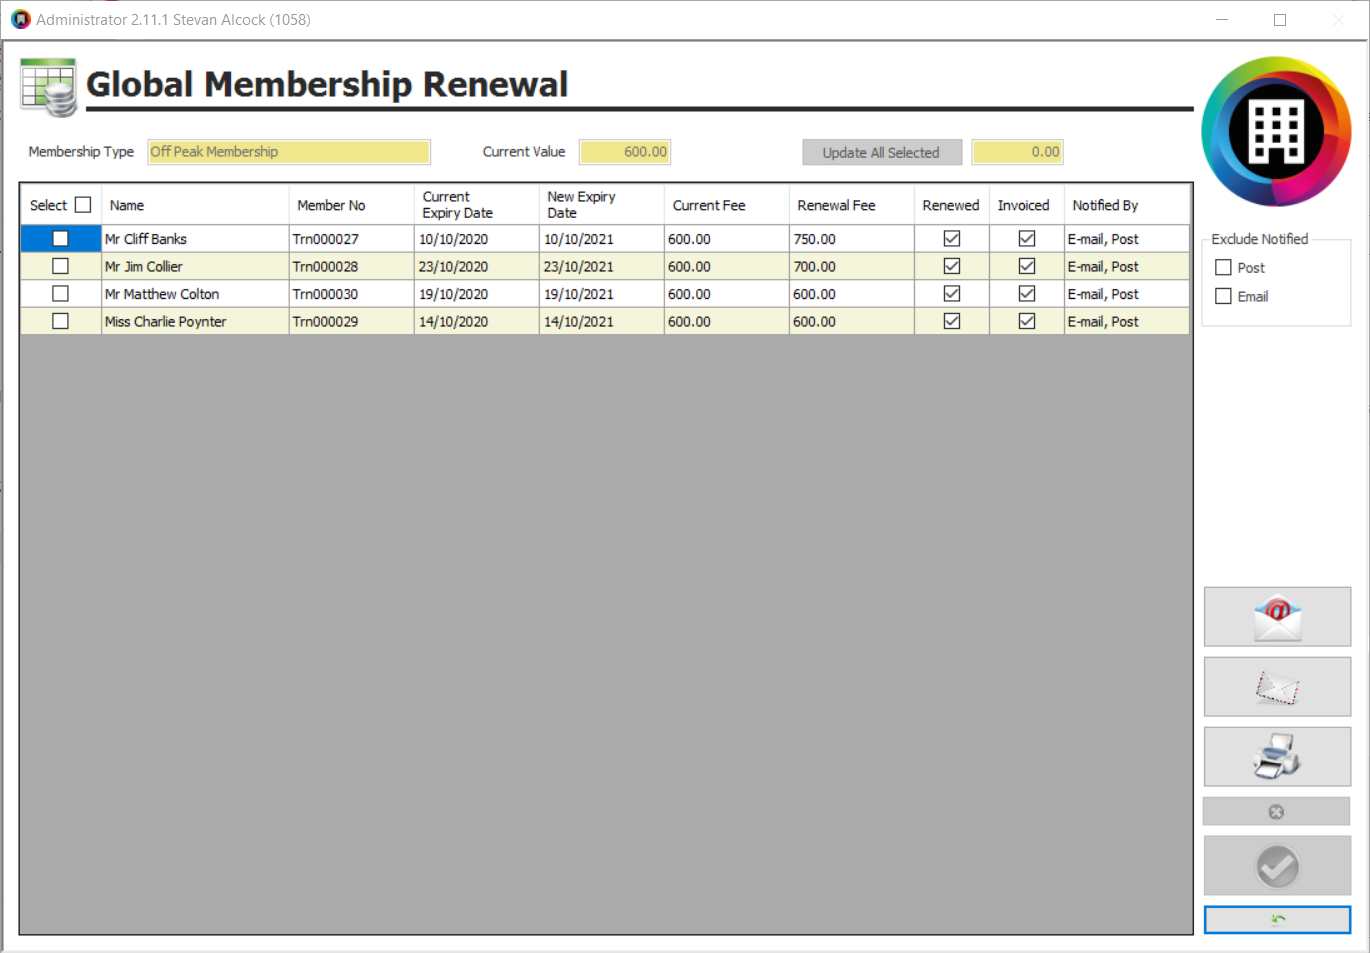
This is the main work screen for the Global Membership Renewal process; where you can vary the Renewal fee for particular or selected members and then go on to generate invoices, as well as email and post renewal notices.
Figure 8
The screen tabulates the following key details for the selected members:
- Their Current Expiry Date, prior to renewal.
- Their New Expiry Date will have been produced by extending the Current Expiry Dates by the Length of the membership, as configured on the Site Details tab of the selected Membership Type. So, an annual membership will have a New Expiry Date of 12-months after the Current Expiry Date.
- Their Current Fee will be the fee last paid by that particular member, perhaps allowing you to identify any previously discounted memberships.
- Their Renewal Fee will be the same as the Full Fee on the Site Details tab of the selected Membership Type.
To amend the Renewal Fee
Two methods are available to change a member’s renewal fee, depending on how many members need theirs changing.
If the default Full Fee needs changing, then this can be done on the Site Details tab of the selected Membership Type.
- To amend the Renewal Fee for a selected few members:
- Click on the Renewal Fee for the appropriate member and the box will highlight in blue.
Figure 9
- Type in the actual Renewal Fee you will be charging that member.
Figure 10
- Repeat this process until you have adjusted all the required Renewal Fees for all the necessary members.
- To vary the Renewal Fee for a number of members:
- Tick the Select box alongside their names, figure 11. Or to start by including all members and then if required un-tick those that you do not want to amend, tick the tick box adjacent to Select, in the column heading.
Figure 11
- Enter the actual Renewal Fee you will be charging these members in the box to the right of Update All Selected, see figure 12.
Figure 12
- Click Update All Selected, figure 13.
Figure 13
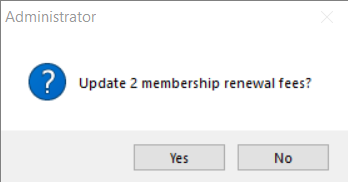
A check message will display.
Figure 14
- Click Yes, to continue the process.
The Renewal Fee for the selected members will change to match that entered adjacent to Update All Selected.
Figure 15
To remove a Member from the Renewal
To remove members from the list prior to running the Global Renewal.
- Tick the Select box alongside their names, figure 16. Or to start by including all members and then if required un-tick those that you do not want to delete, tick the tick box adjacent to Select, in the column heading.
Figure 16
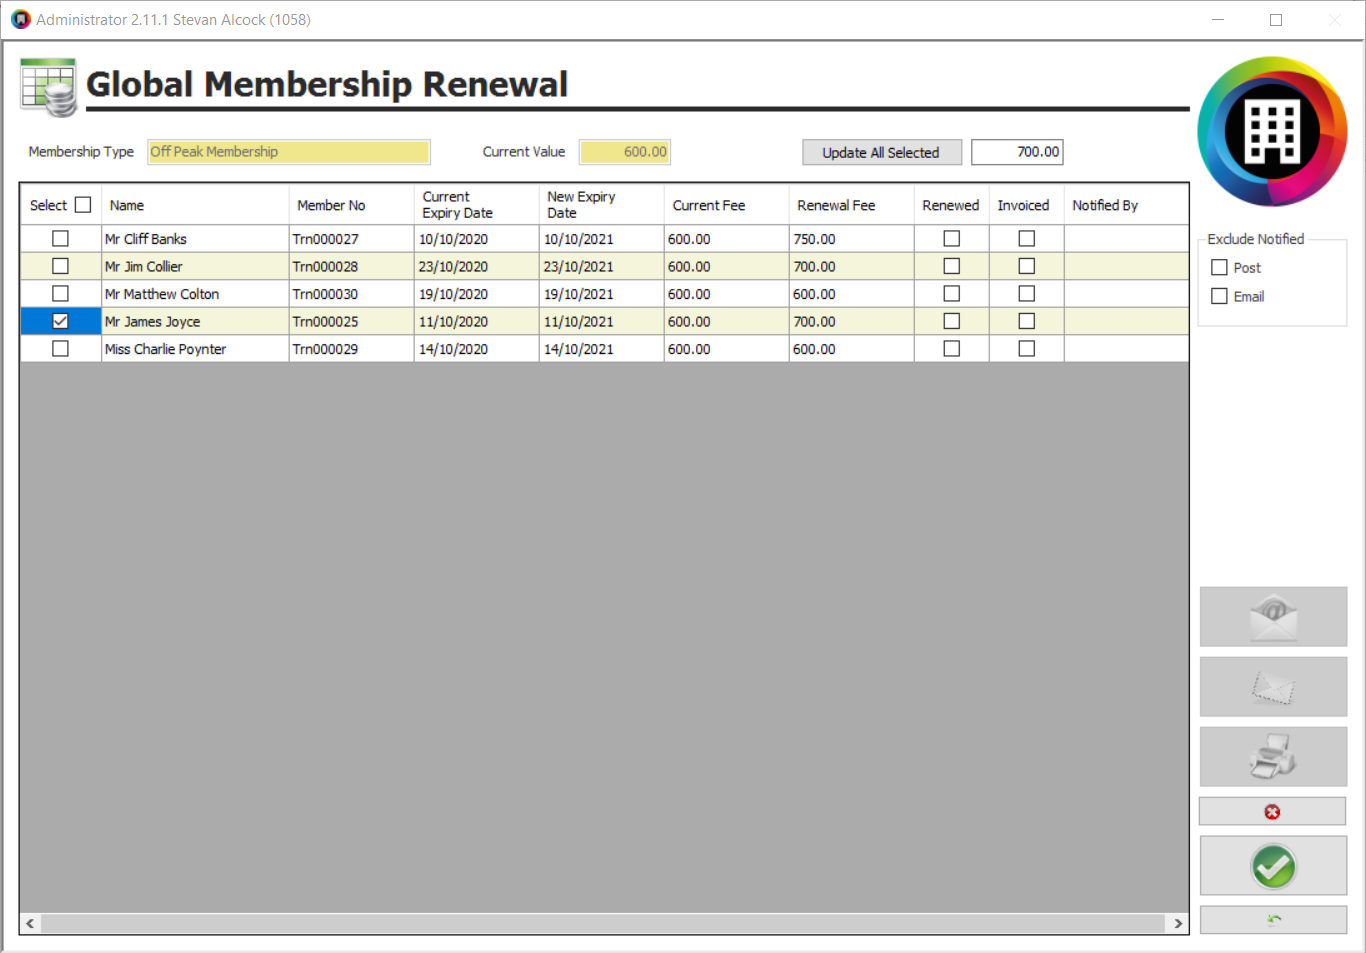
- Click the Red X, see figure 17.
Figure 17
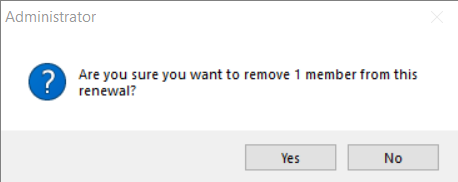
A check message will display.
Figure 18
- Click Yes, to continue the process.
The member will be removed from the Global Membership Renewal screen.
If you remove all the members from the run, you will see a message confirming that the run is now empty and has been deleted.
To Renew the Memberships
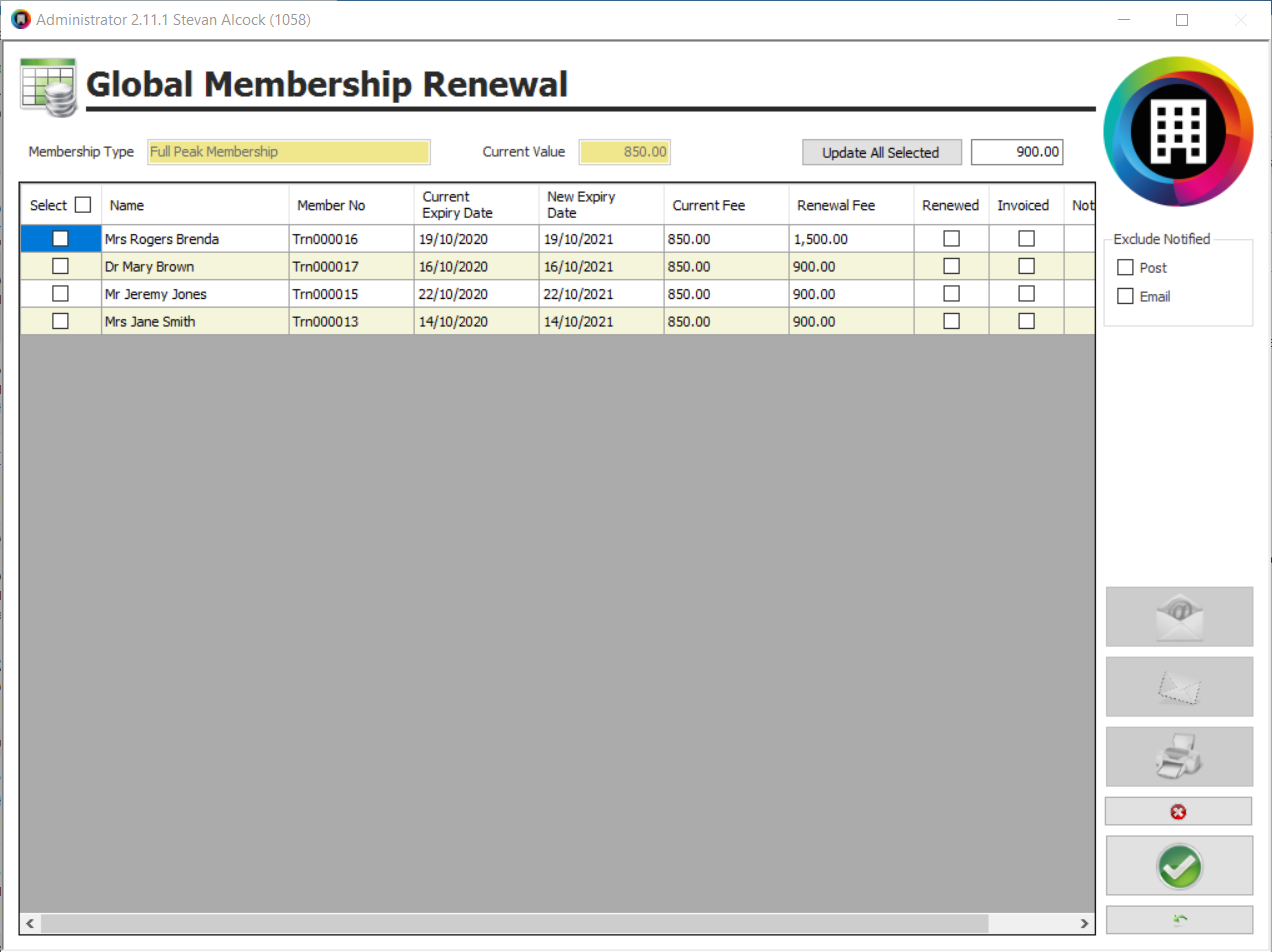
Once you have checked through the list of members and their renewal rates and made any required amendments to the renewal fees you can apply the renewal.
- Click the Greenü, see figure 19.
Figure 19
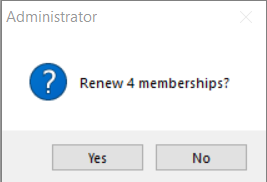
A check message will display.
Figure 20
- Click Yes, to continue the process.
A processing screen will display.
Figure 21
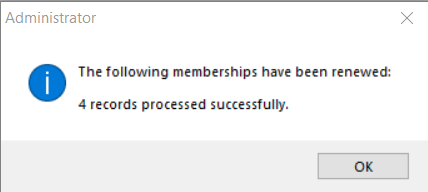
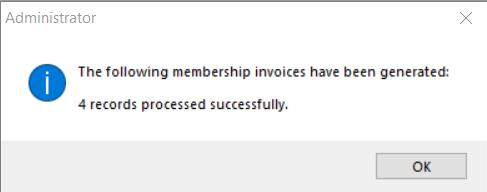
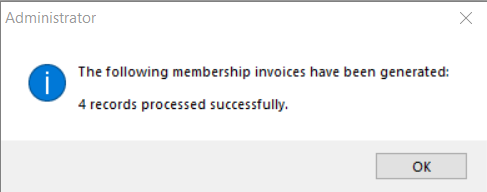
After which a confirmation screen will appear.
Figure 22
- Click OK.
Ticks will now appear in the Renewed column on the Renewal screen, see figure 23.
Figure 23
Results of the Global Membership Renewal in Members Details
Your Core by Premier system will now be anticipating receipt of the member’s payments and has effectively rolled their membership on for another term.
An invoice will probably now be produced, and ultimately the payment will need to be processed; however, the renewal has now largely been completed.
As well as the ticks stating the progress made in Global Membership Renewals, on the member’s record in Members Details, the following tabs will have been updated to show the Renewal.
Payments
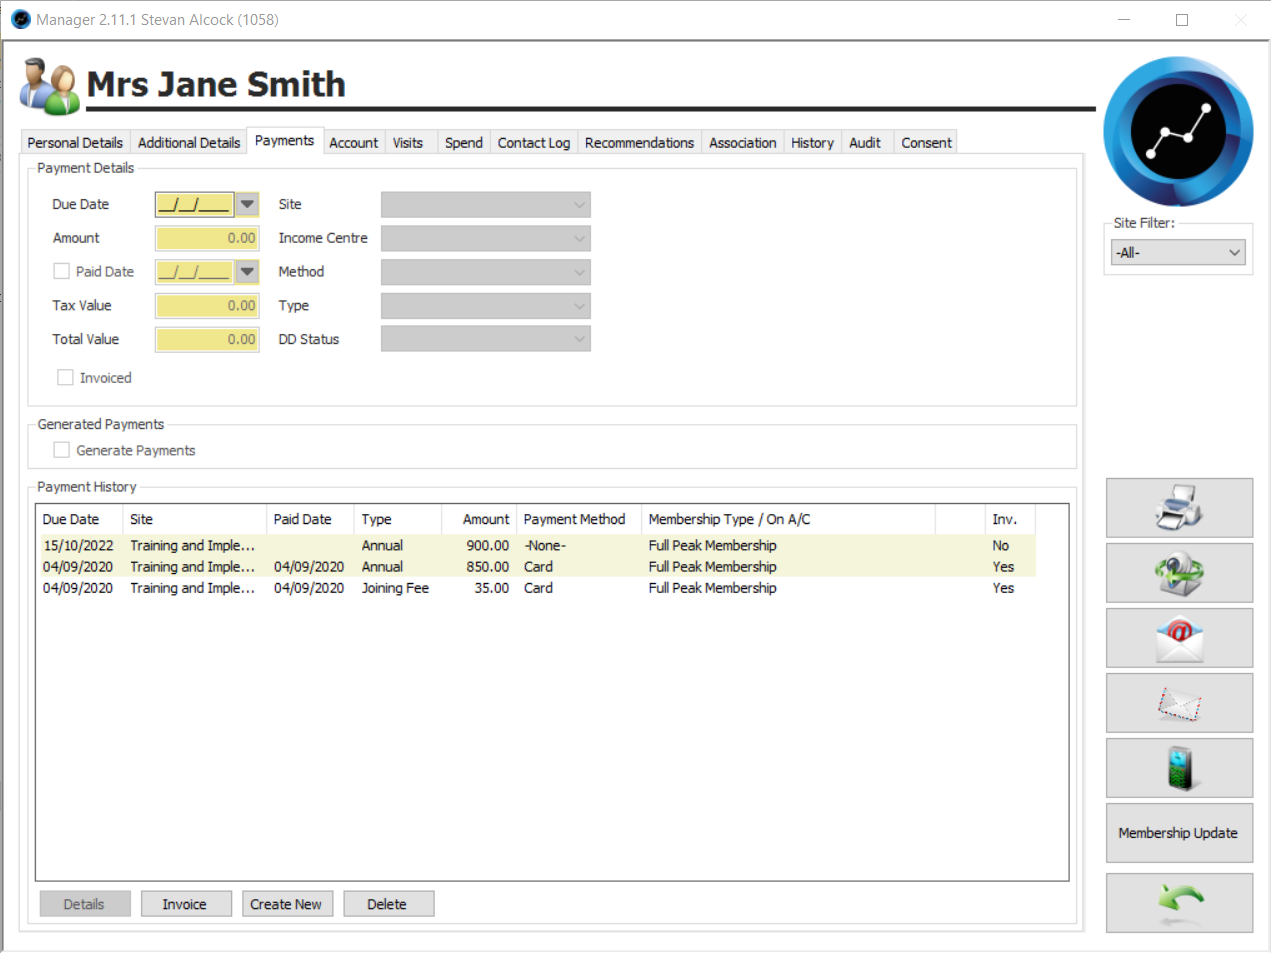
On the Payments tab, a new payment line has been created, see figure 24.
A summary will show in the Payment History table. When the payment line is selected in the Payment History table, the relevant information will also display in the Payment Details section.
Figure 24
This tab shows the Due Date for the payment - which will be the date for the start of the new term of membership - i.e. the day after the old expiry date, and the Renewal Fee - Amount.
As no payment has yet been received; the Paid Date column is blank, and there is no tick in the Paid Date tick box in the Payment Details section. The Payment Method will currently show as “-None-“.
An invoice has not yet been produced; hence the Inv. column shows “No”.
History
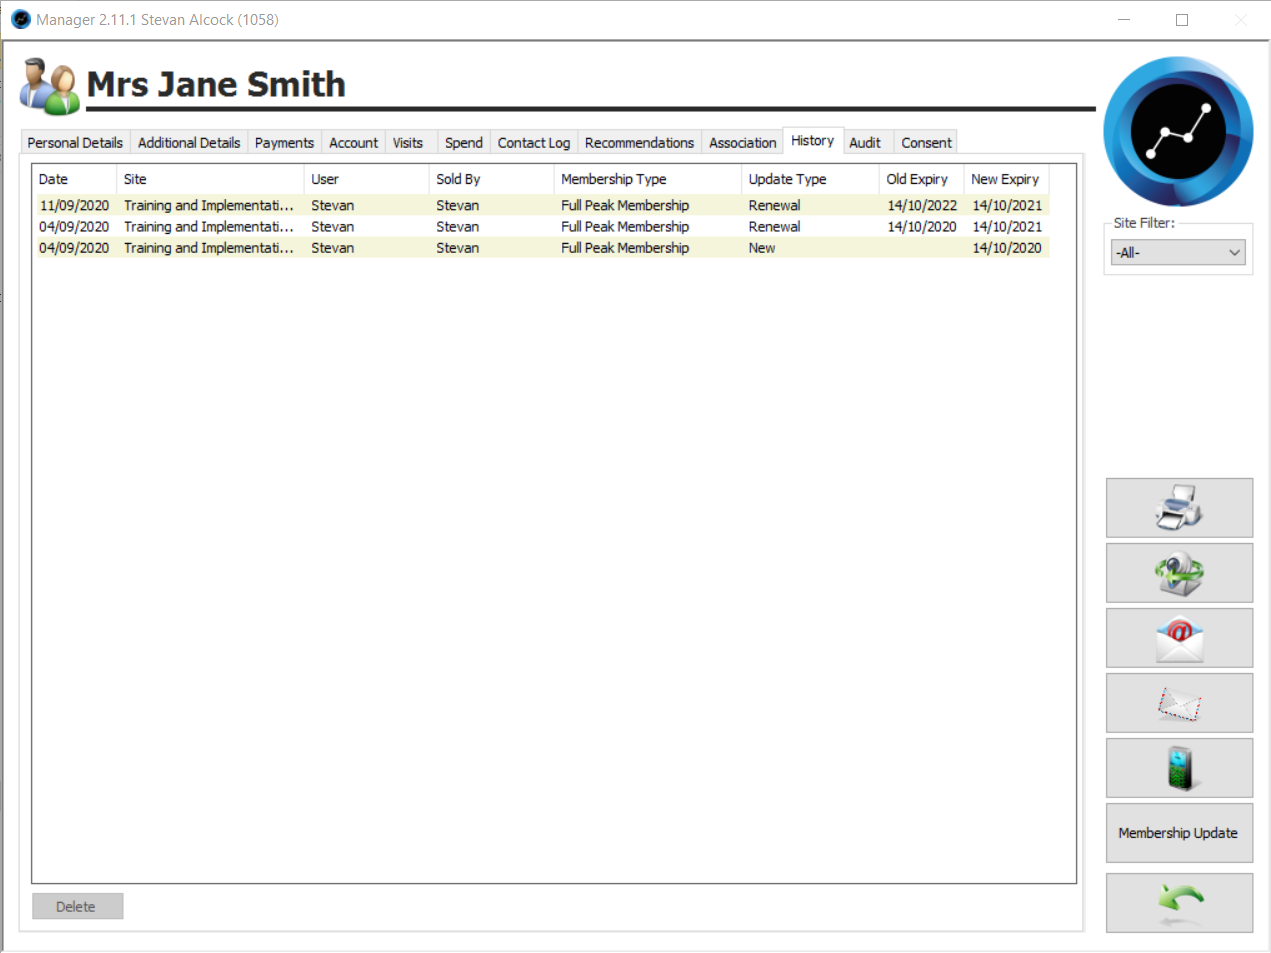
On the History tab, a new history line has been created, see figure 25.
Figure 25
This shows the date that the renewal was completed - Date - the user who processed the renewals - User and Sold By - as well as the correct Update Type - Renewal - and Old Expiry and New Expiry dates.
Personal Details
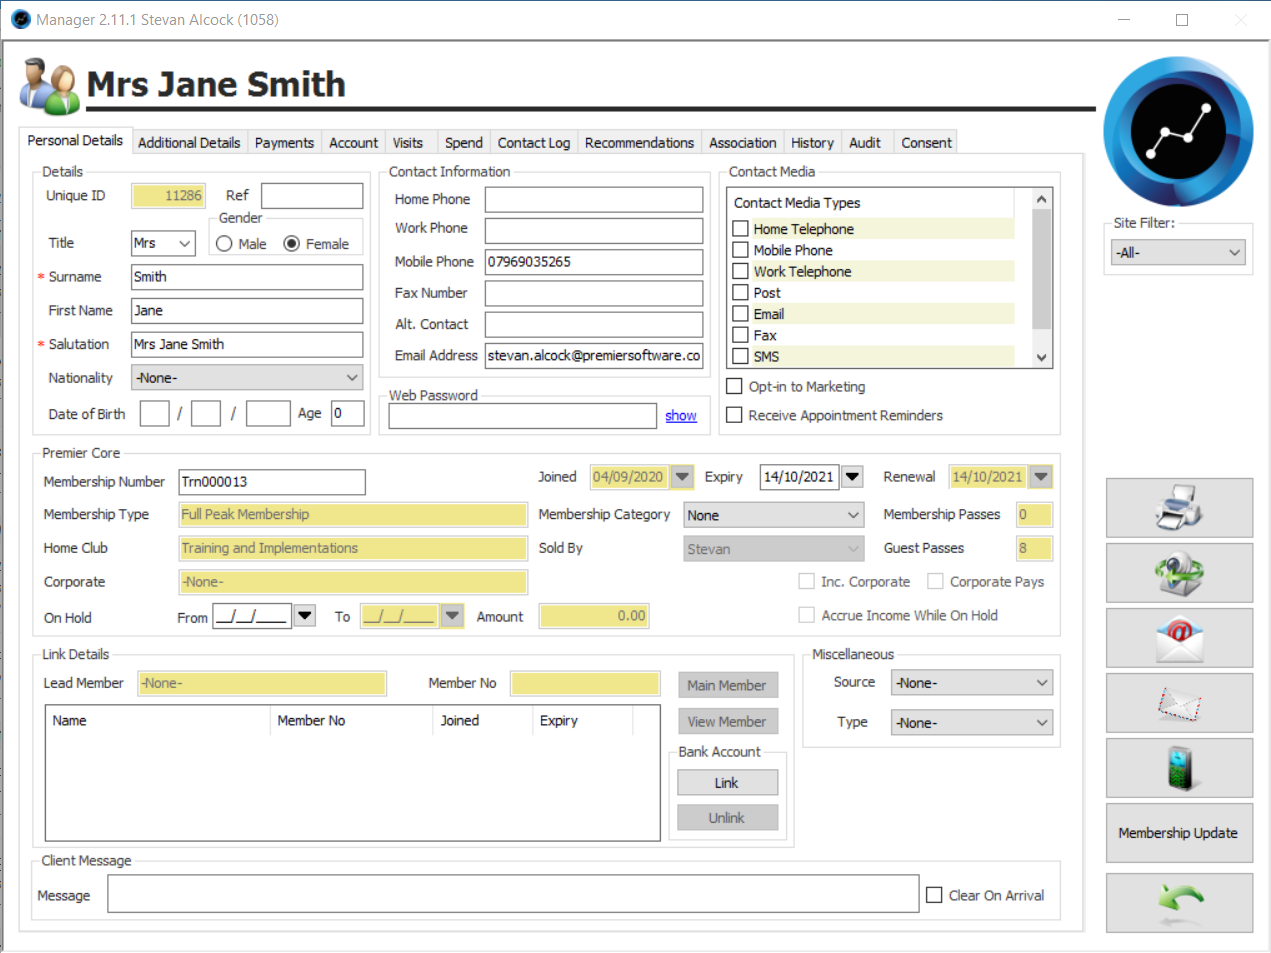
The Personal Details tab will show changes to the member’s expiry date and the number of Guest Passes available to them.
Figure 26
The Expiry Date will have updated to become the new expiry date.
The number of Guest Passes available to the member will have automatically reset to the default number as configured on the Site Details tab of the selected Membership Type. Thereby replacing any passes that they have used during the old membership term.
Loyalty Points
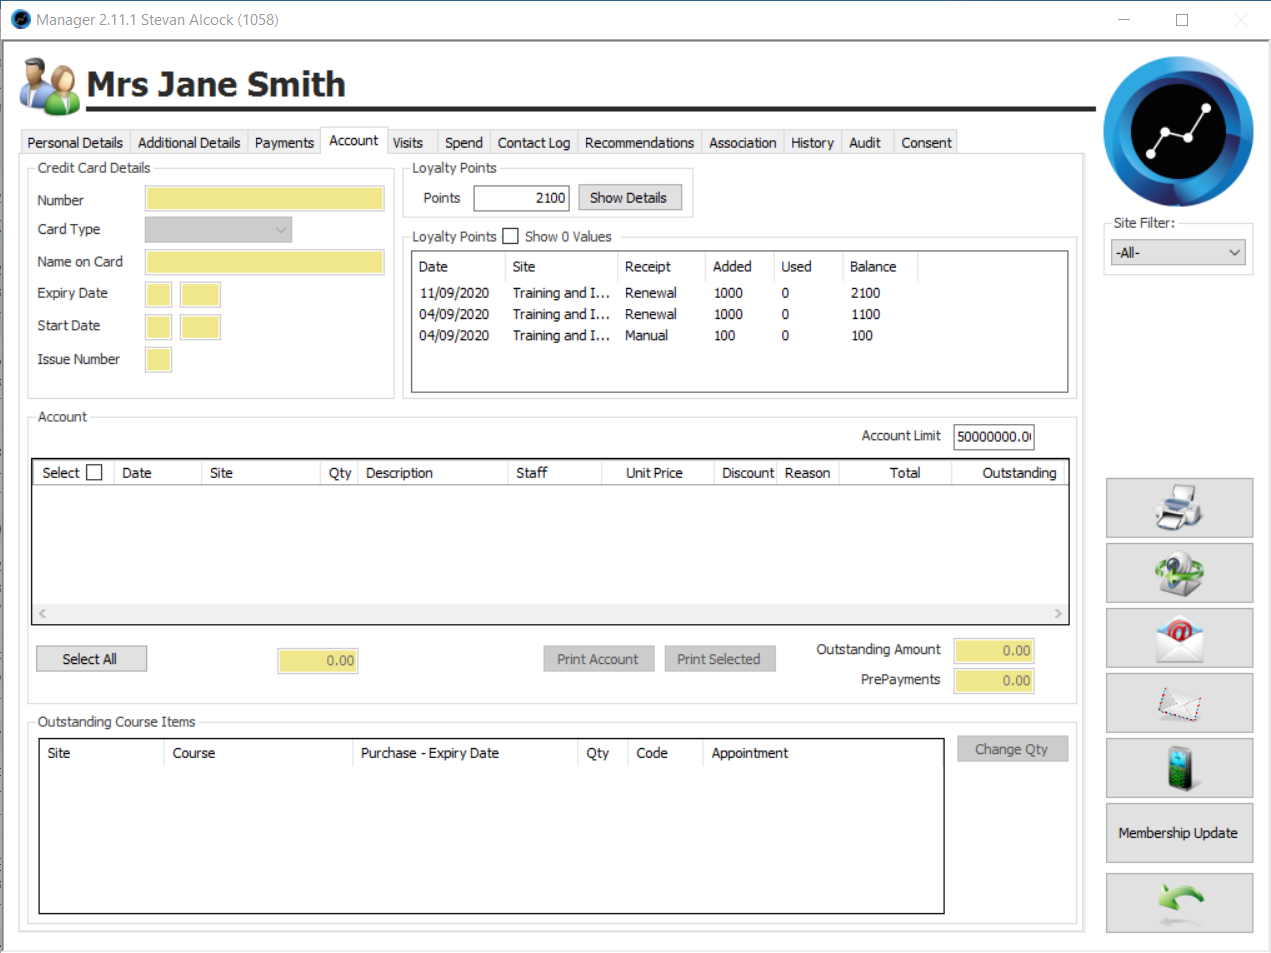
On the Accounts tab, the number of Loyalty Points available to the member will have increased to reflect the renewal.
Figure 27
The total Loyalty Points value will have increased by the default number of Renewal Loyalty Points as configured on the Site Details tab of the selected Membership Type.
To see an audit of the points allocation, click Show Details, see figure 27; it will be marked as “Renewal” in the Receipt column.
Monitoring Outstanding Payments
Membership Arrivals / Fasttrack
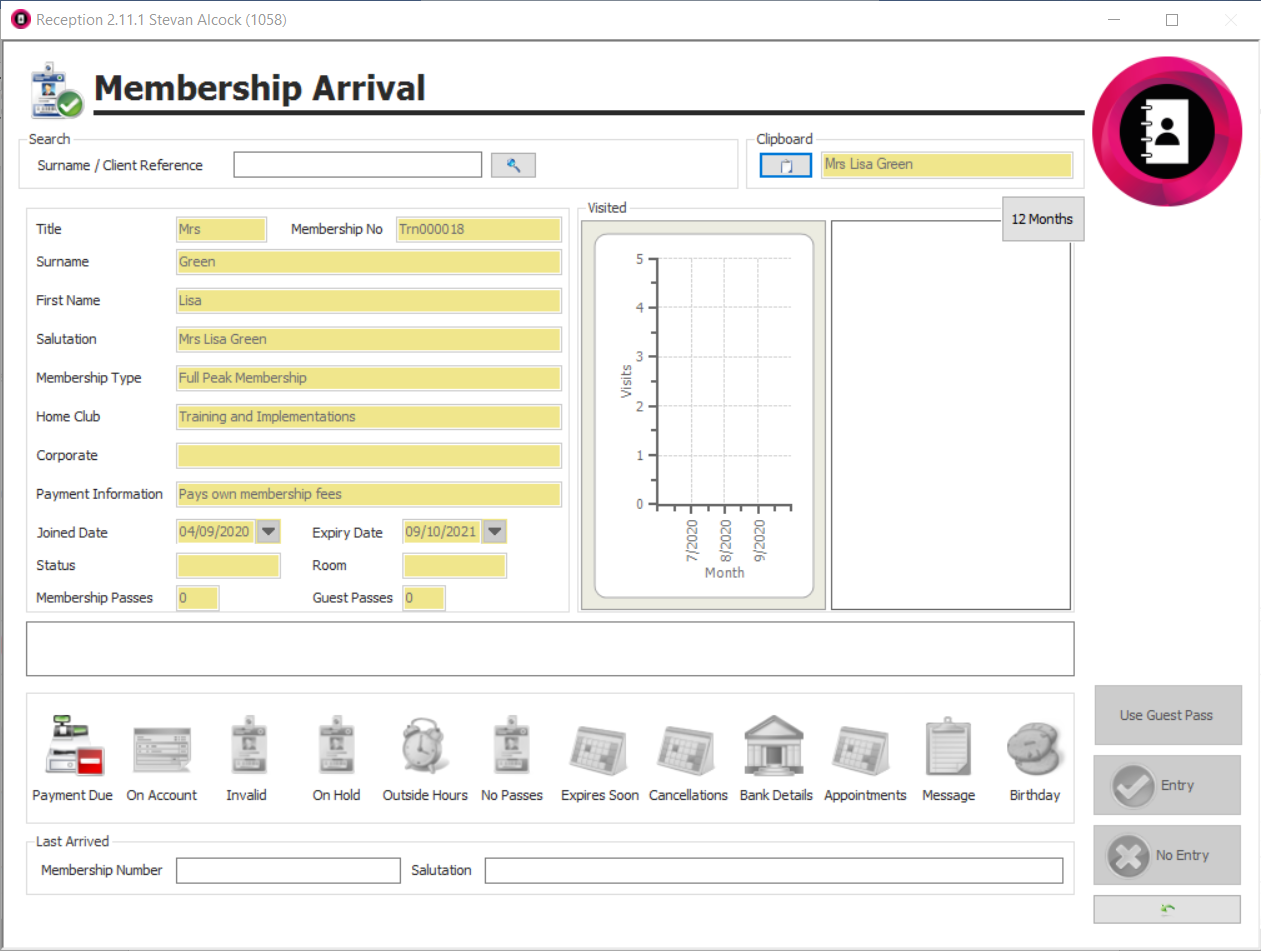
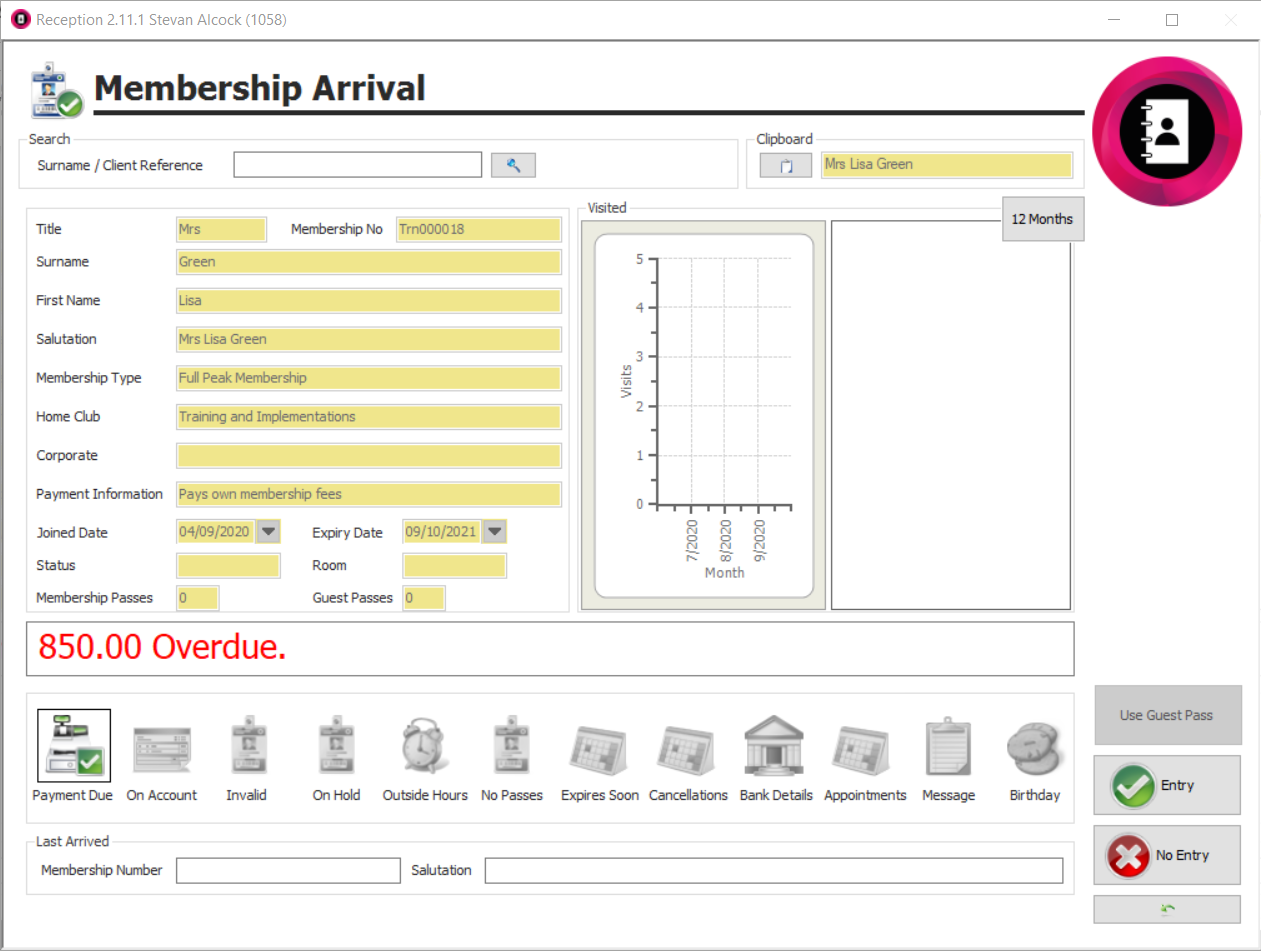
If the member were to arrive between processing the Global Membership Renewal and their making payment, a warning will display in Members Arrivals that their renewal payment is due.
If you have been installed with Fasttrack, the same warning will display, albeit the icons and the screen layout, differs slightly from that shown below.
Figure 28
Click on the Payment Due icon and the payment amount will display, figure 29.
Figure 29
Reports - Members’ Payments
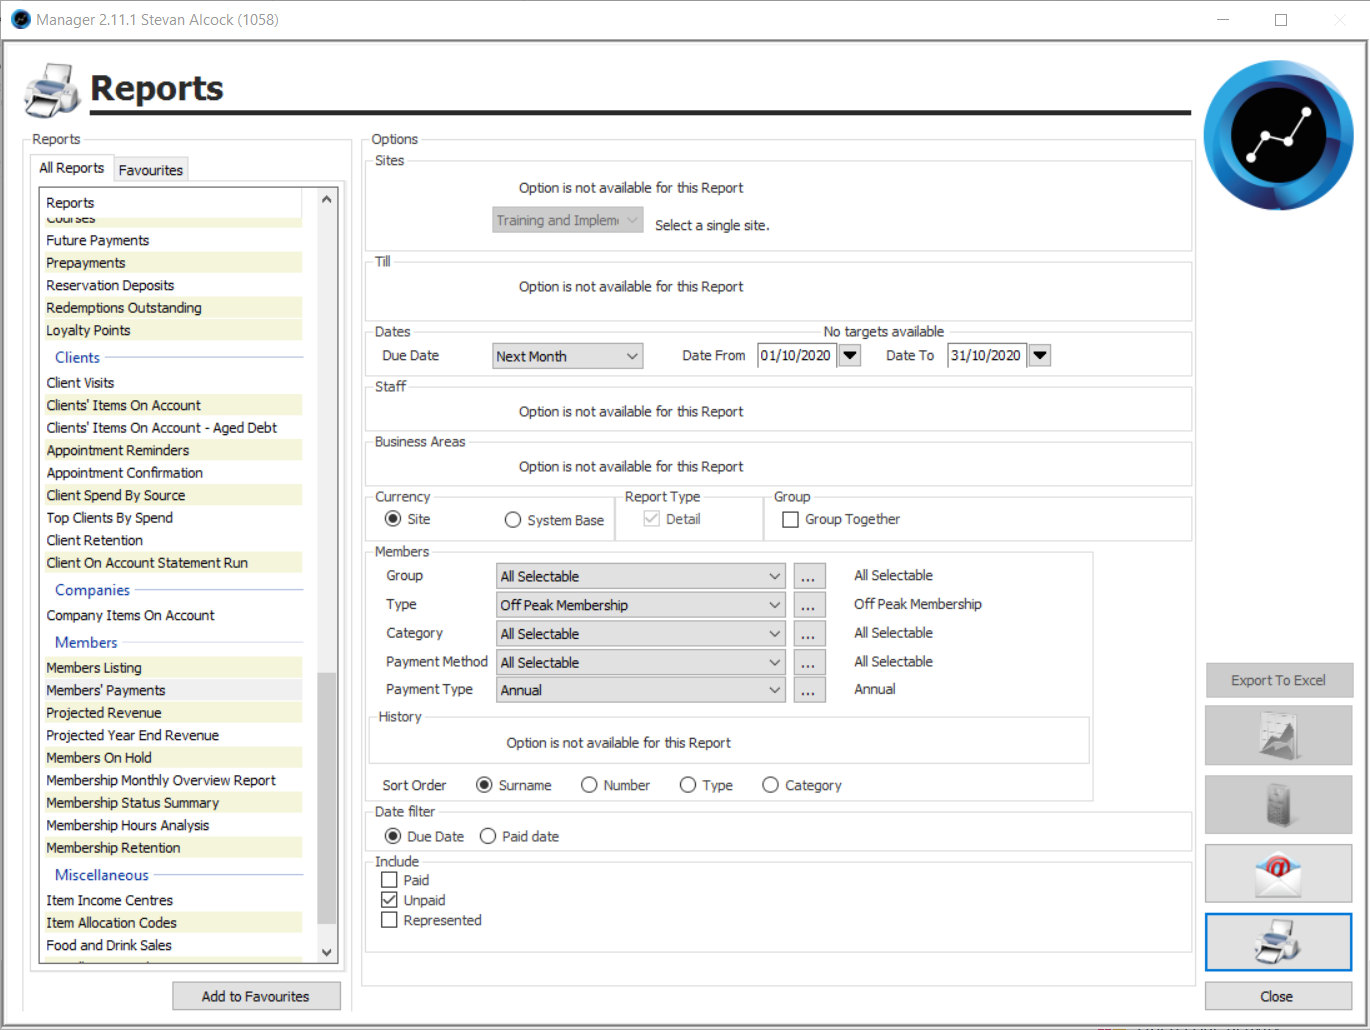
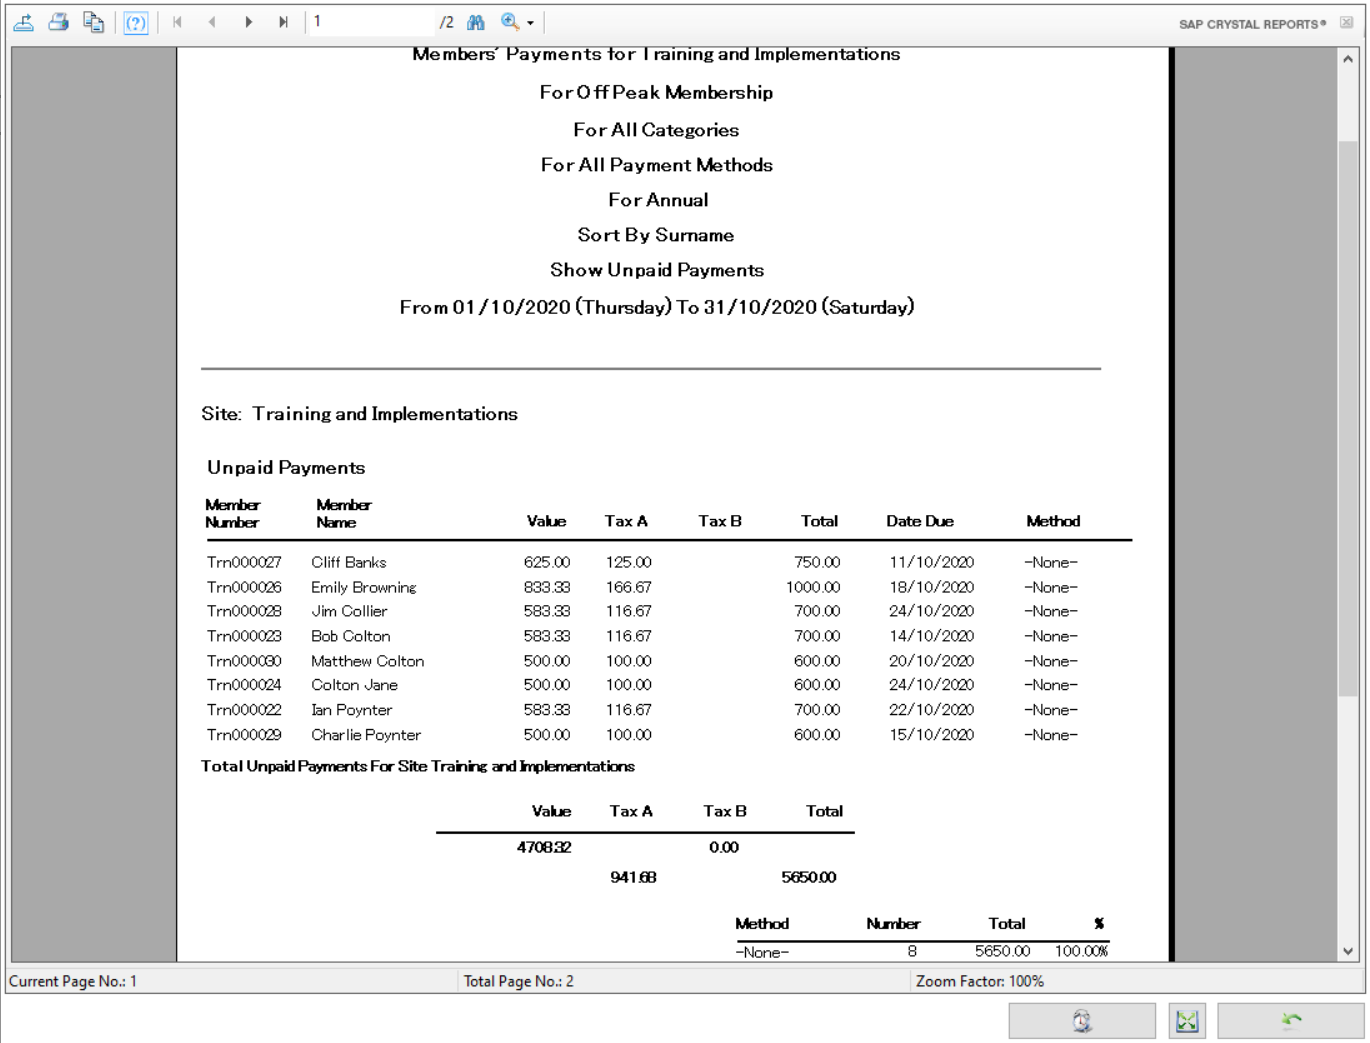
One of the best methods to review any outstanding payments is to regularly review the Members’ Payments report with Unpaid selected. Remember that pretty much any report can be automated to be emailed to key staff at a selected interval - including this one.
- In Manager, or if you are a multi-site business - Administrator, click Reports.
- Scroll down to the Members section and select Members’ Payments.
Figure 30
- Set the report options as follows:
- Due Date - the date range for the expected payments; which will be the date for the start of the new terms of membership.
- Type - select the membership type or types to be included.
- Payment Types - select Annual, so that any direct debit or standing order payments are excluded.
- Include Unpaid - to list just the outstanding payments.
- Once you have made your selections, click Print Preview and the report will display.
Figure 31
From the preview screen, the report can be saved, printed or you can automate its future production as an email.
Invoicing
Once the memberships have been renewed, Core by Premier can print invoices and produce bespoke templated emails and letters to send to the members informing them of the renewal.
Whilst the format of the invoice is largely fixed, to ensure that all the required components are included, you can enter the details of your own logo, header, and footer, and decide on their alignment within the invoice.
The same invoice configuration will apply to both those produced for Global Membership Renewals and directly from the Payments tab of Members Details.
Once produced the invoices can be handed directly to clients or posted along with the post templates detailed below.
Invoice Layout
To enter your logo and add content to the Header and Footer of your invoice, navigate as follows:
- In Manager, or if you are a multi-site business - Administrator, click General Menu.
Figure 32
- From the General Menu, select Site(s).
Figure 33
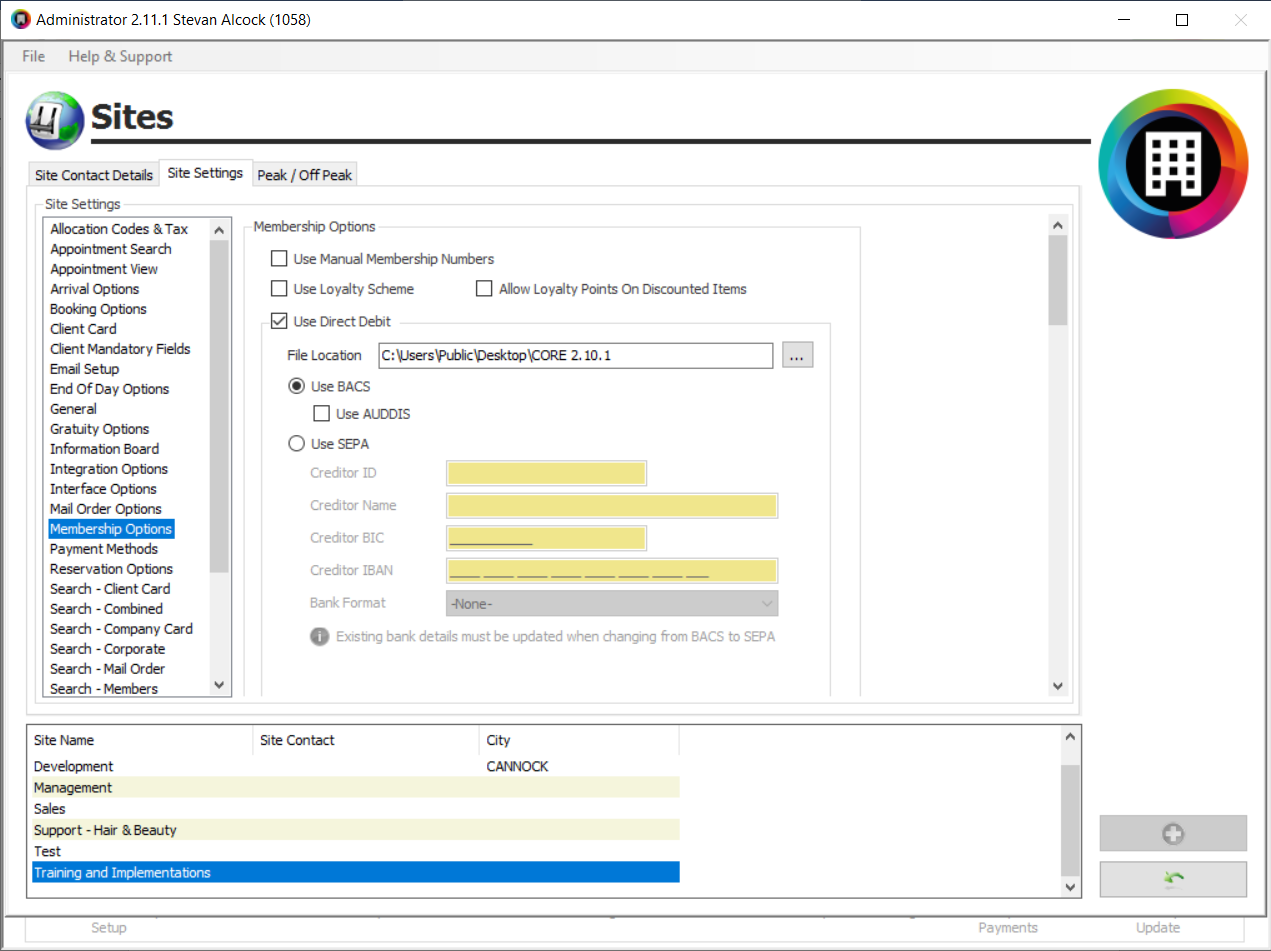
- Click on the Site Settings tab and then select Membership Options in the panel to the left.
Figure 34
If you are a multi-site business, please ensure that you have selected the correct site in the table along the bottom of the screen.
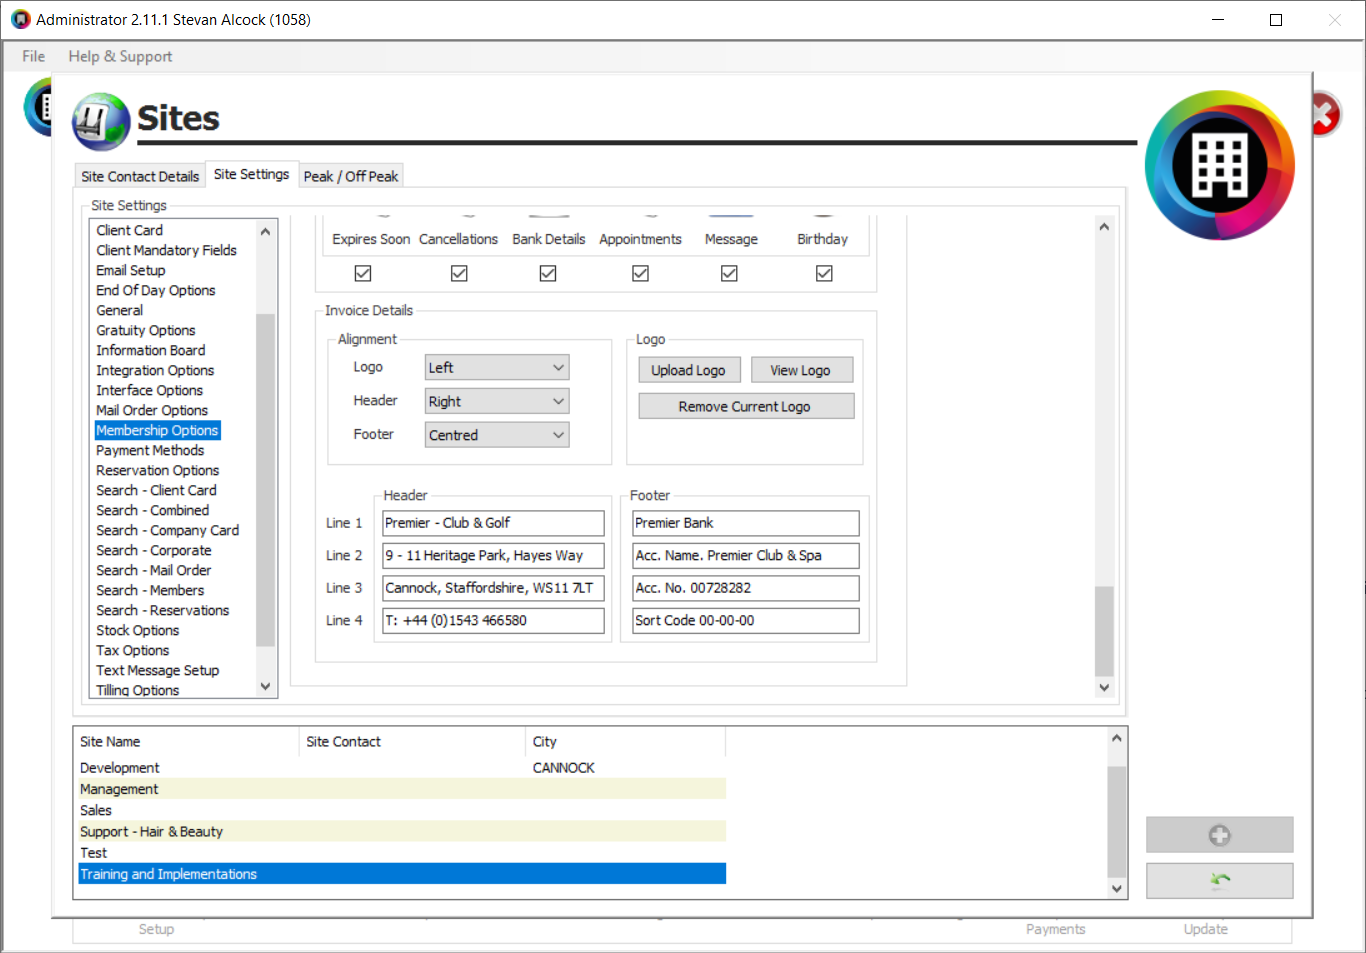
Scroll down to the bottom of the right hand section, using the scroll bar to the right of the main part of the screen.
Figure 35
- Alignment; select the alignment for your:
- Logo,
- Header, and
- Footer.
- Logo; you can Upload a logo, and then subsequently View Logo, and when required, Remove Current Logo.
- Header; please enter your required text; e.g. business name and contact details.
- Footer; please enter you required text; e.g. your bank account details, or VAT Number and further contact details.
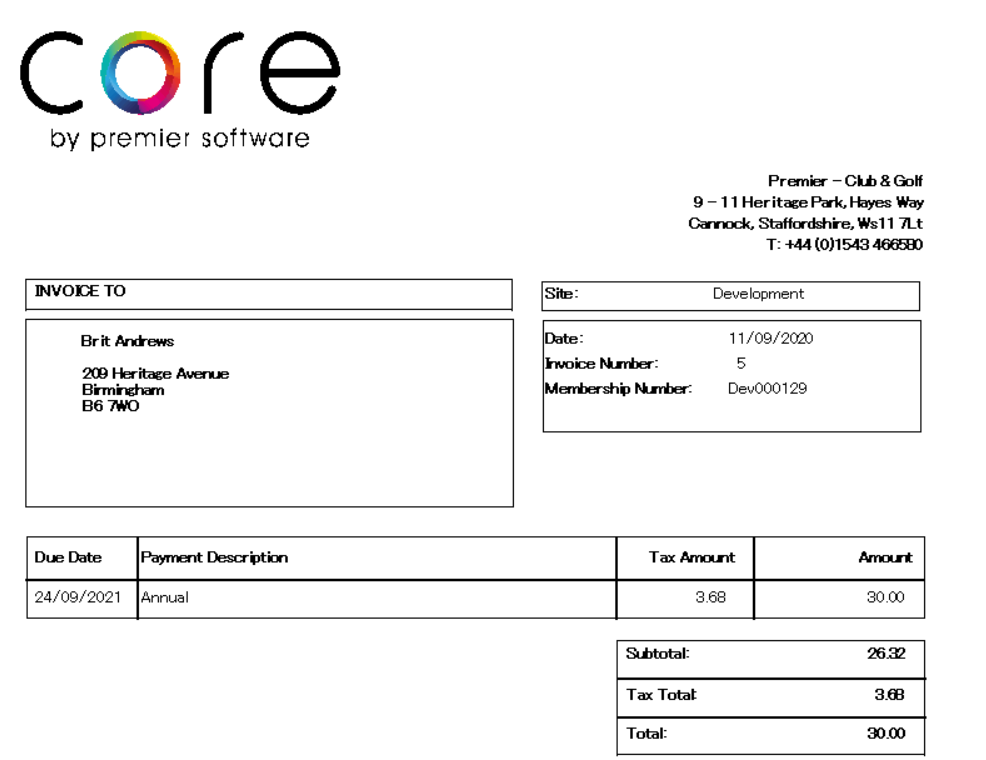
The end result will look something like figure 36.
Figure 36
Printing the Invoices
From the Global Membership Renewals screen, click the Print icon, 
Figure 37
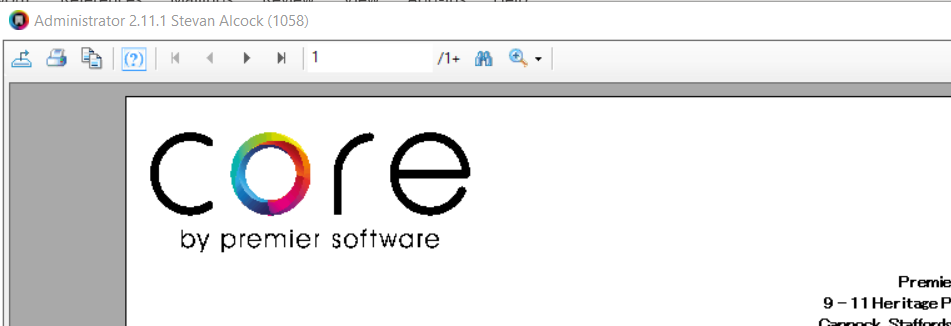
Invoices as shown in figure 36 will be previewed in the order that they appear in the renewal table.
The first time you select either of the print, email or post icons, a processing screen will display.
Figure 38
After which a confirmation screen will appear.
Figure 39
- Click OK.
- Invoices as shown in figure 36 will be previewed in the order that they appear in the renewal table.
To print them click the print icon, figure 40.
Figure 40
Ticks will now appear in the Invoiced column on the Renewal screen, see figure 41.
Figure 41
Creating and Sending Global Membership Renewal Documents
Before you can send an email or print a letter you need to produce a template.
Email and letter templates for Global Membership Renewals are created and produced in the same way. The only practicable differences being their contents and final method of production, print or send. Emails can include hyperlinks; whist letters tend to include addresses. Their essential message and production are the same.
Creating the Email and Letter Templates
- In Manager, or if you are a multi-site business - Administrator, click General Menu.
Figure 42
- Then click Standard Documents.
Figure 43
Figure 44
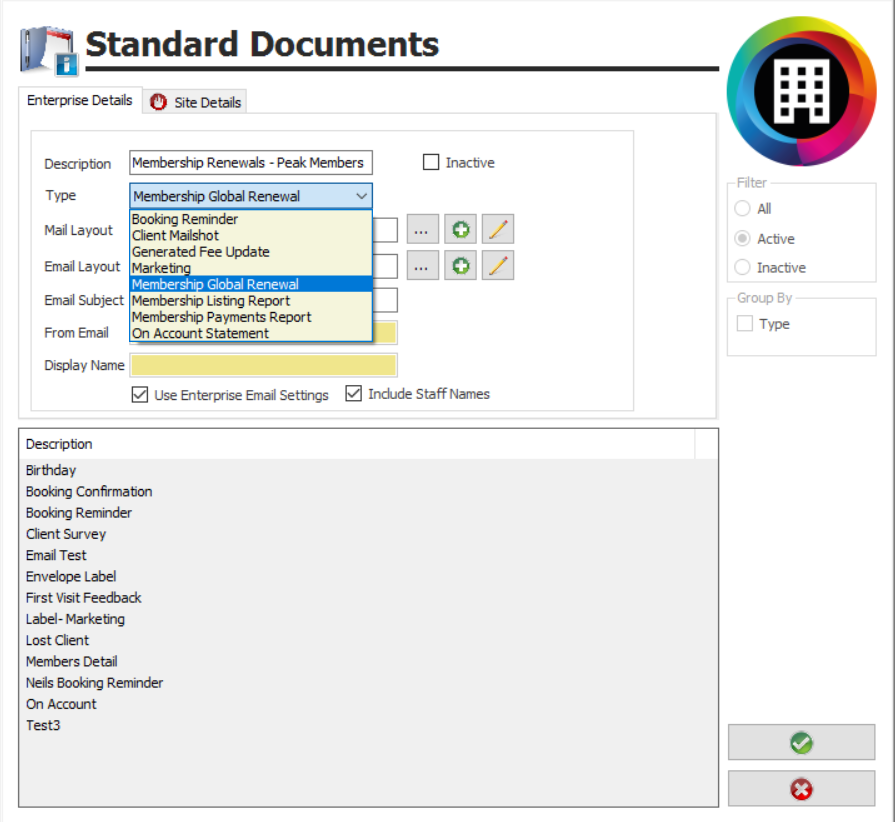
- To create a new standard document, click the “Green +”, see figure 45.
Figure 45
- In the Description box enter a name that will identify the template for future use.
- Select “Membership Global Renewal” as the document Type.
- Click the Greenü to save your changes.
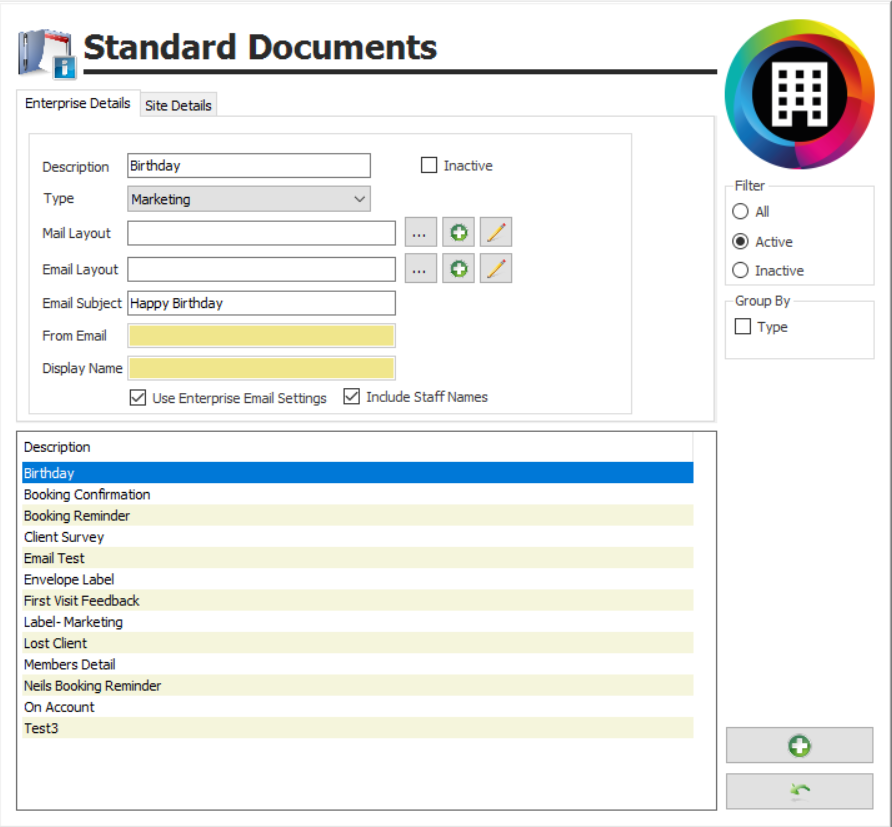
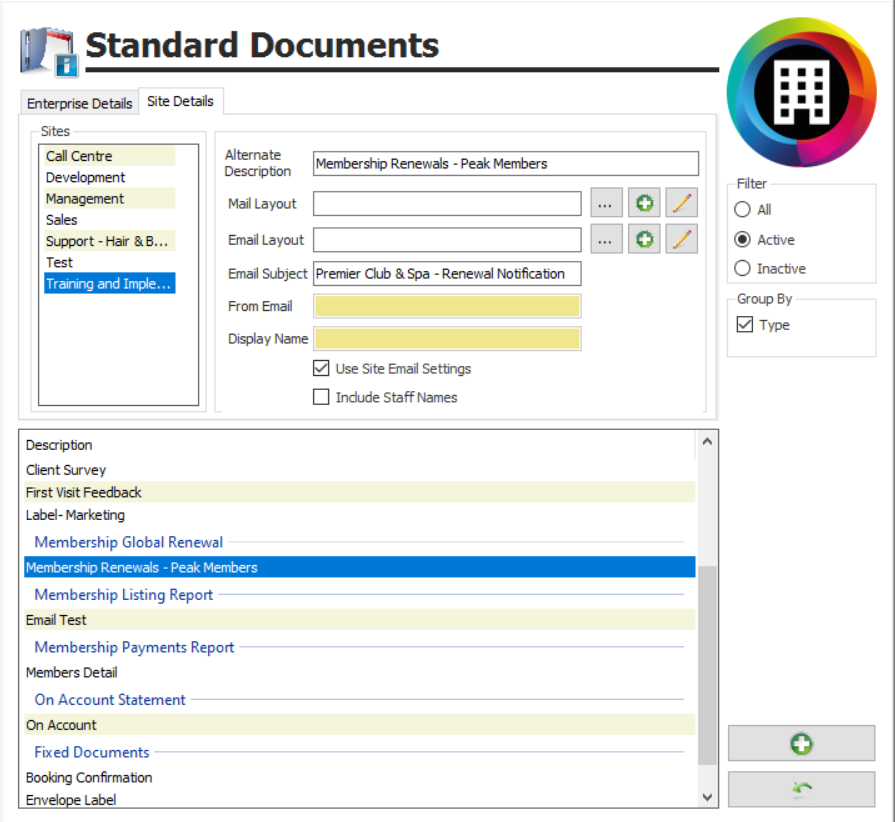
- Select the Site Details tab and the following screen will display, figure 46.
Figure 46
- If applicable please ensure that the correct Site is selected.
- Tick Group By - Type - as shown in figure 46 to group the templates by document type.
Enter the following details, as required:
- Alternate Description – this allows a site specific document name to be entered. This will only be seen within the system by users set up to view Alternate Descriptions in User Manager.
Templates can be created for either posting - Mail Layout - or for emailing to clients - Email Layout.
The Email Subject, From Email and Display Name fields are only required when sending emails.
Mail Layout and Email Layout will show the filename and location of the word document you are linking to the selected template. Instructions on how to create a new template are given below.
You create and manage templates using the three icons adjacent to each layout:
o The Search or Ellipsis (...) button allows you to browse your computer or network to find a template that has already been created and saved.
o The Green + allows you to create and then save a new template.
o The “Pencil” allows you to edit an existing template.
- Email Subject –enter the subject line that you wish to be displayed to the renewing members.
- Use Enterprise / Site Email Settings - with this ticked you will send this template using the default email account created in Email Setup in Site Settings. Un-tick and you can enter a specific From Email account and associated Display Name that you want to use in association with this particular template.
- Include Staff Names - not appliable for this type of template.
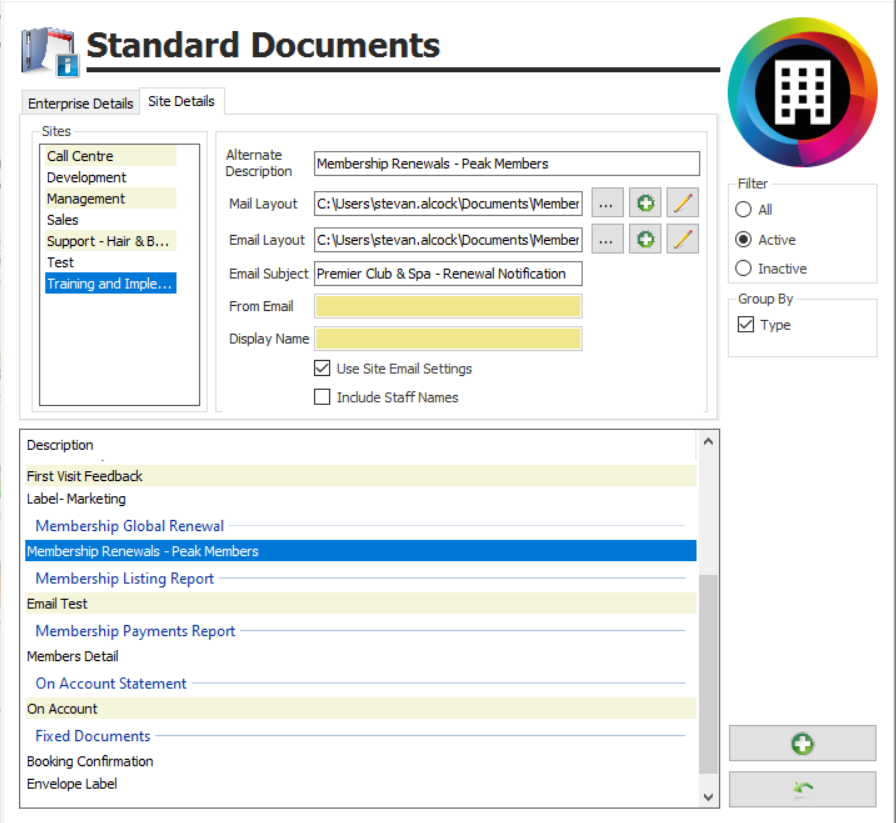
Once the document template is created (see below) and linked using the Search function, the Layout fields will automatically show the documents’ locations, figure 47.
Figure 47
To create a new Standard Document or Email Template
- Click the Green + adjacent to Email Layout.
You will be presented with a blank Microsoft Word document. Using the standard tools available in Word create your template, including for example: text, pictures, images, and links to websites and online content.
Because you have created the Word document through Core by Premier, the document will automatically link to the client database in your Core system.
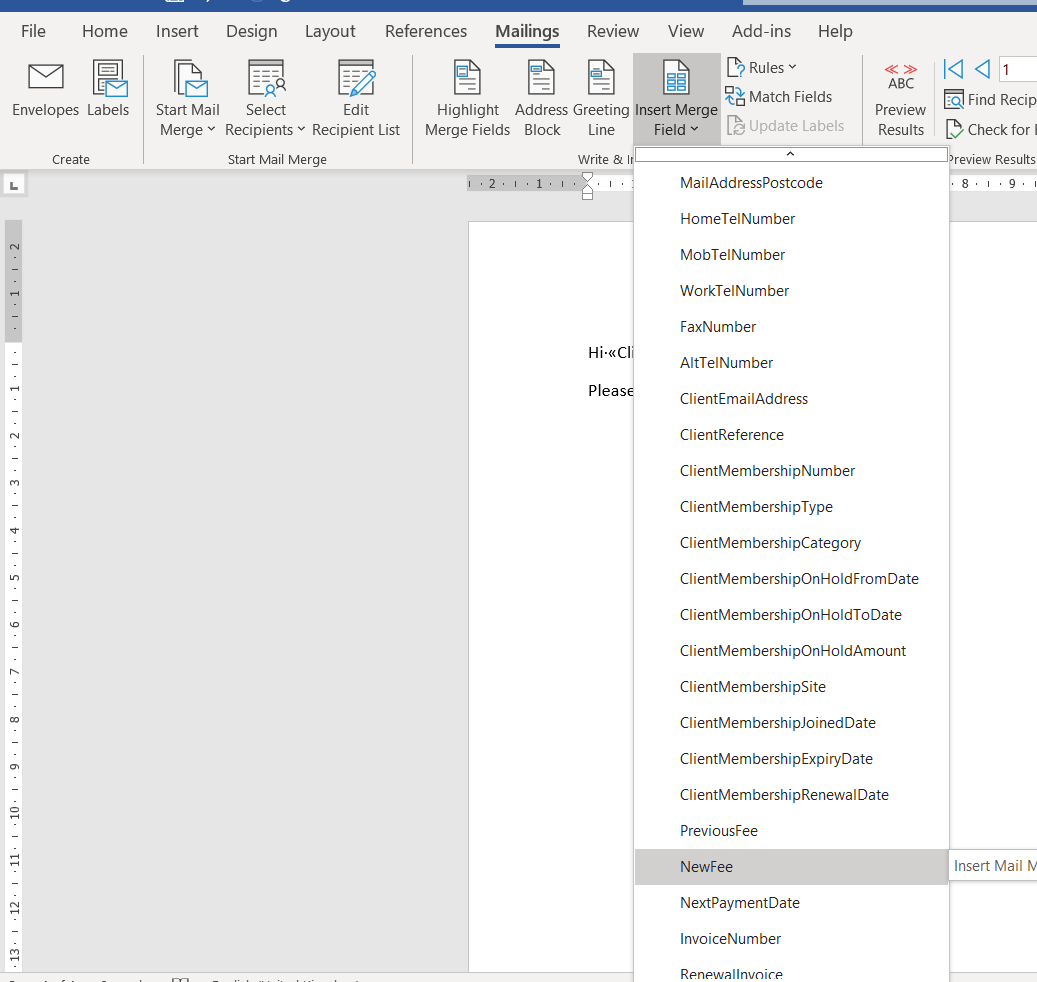
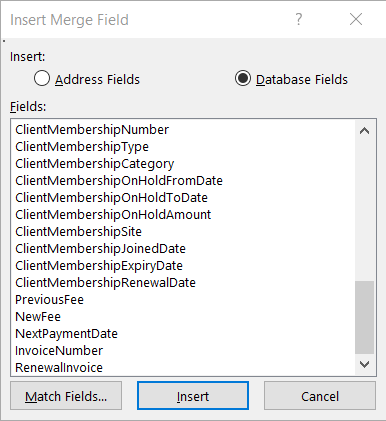
You can also include merge fields, such as the member’s details. Again, as you have created the Word document through Core, a ready-made list of relevant merge fields is available to you. The end result will be emails that contain fixed or generic content as well as client specific information. The membership related merge fields appear towards the bottom of the list.
To add merge fields to your Word document work through the following.
- Click within the document where you want the merge field to display.
- Select Mailings in the Word task bar, figure 48, and then click the down arrow in the bottom part of Insert Merge Field.
Figure 48
- Select your desired merge field and it will be inserted into the Word document, in the chosen location.
Click the upper part of the Insert Merge Field icon and the same list of merge fields display, but in a different format, figure 49.
Figure 49
- In this case, having selected the location for the merge field in the Word document, select the required merge field from the list and then click Insert to add this into your document.
A merge field can be identified by the double angular brackets that surround it, i.e. <<NewFee>>. The name of the merge field and therefore the expected content is displayed within the double angular brackets.
- Continue to add all your required merge fields.
<<NextPaymentDate>> refers to the Due Date for the <<NewFee>>.
To include an invoice table within an email, add the <<RenewalInvoice>> to your template. This is only available for Emails, as letters can be posted with the full A4 invoice.
- Save the Word document as you would any other Microsoft Word document on a shared drive that will be accessible to any computer likely to produce the emails. The name used does not need to match the name of the template within your Core system.
- Use the “…” button to browse to the Word document you have just created and saved.
- Select the name of the Word document in the displayed list and then either double click or click Open.
You have now linked the Word document with the Standard Document template.
- Once completed click the
to leave the screen.
Sending Global Membership Renewal Documents
From the Global Membership Renewals screen, click the Email or Post icons, figure 50.
Figure 50
The first time you select either of the print, email or post icons, a processing screen will display.
Figure 51
After which a confirmation screen will appear.
Figure 52
- Click OK.
- Ticks will subsequently appear in the Invoiced column on the Renewal screen, see figure 41.
Sending Emails
- Click the Email icon,
.
- After the message confirming the number of new invoices generated appears, click OK.
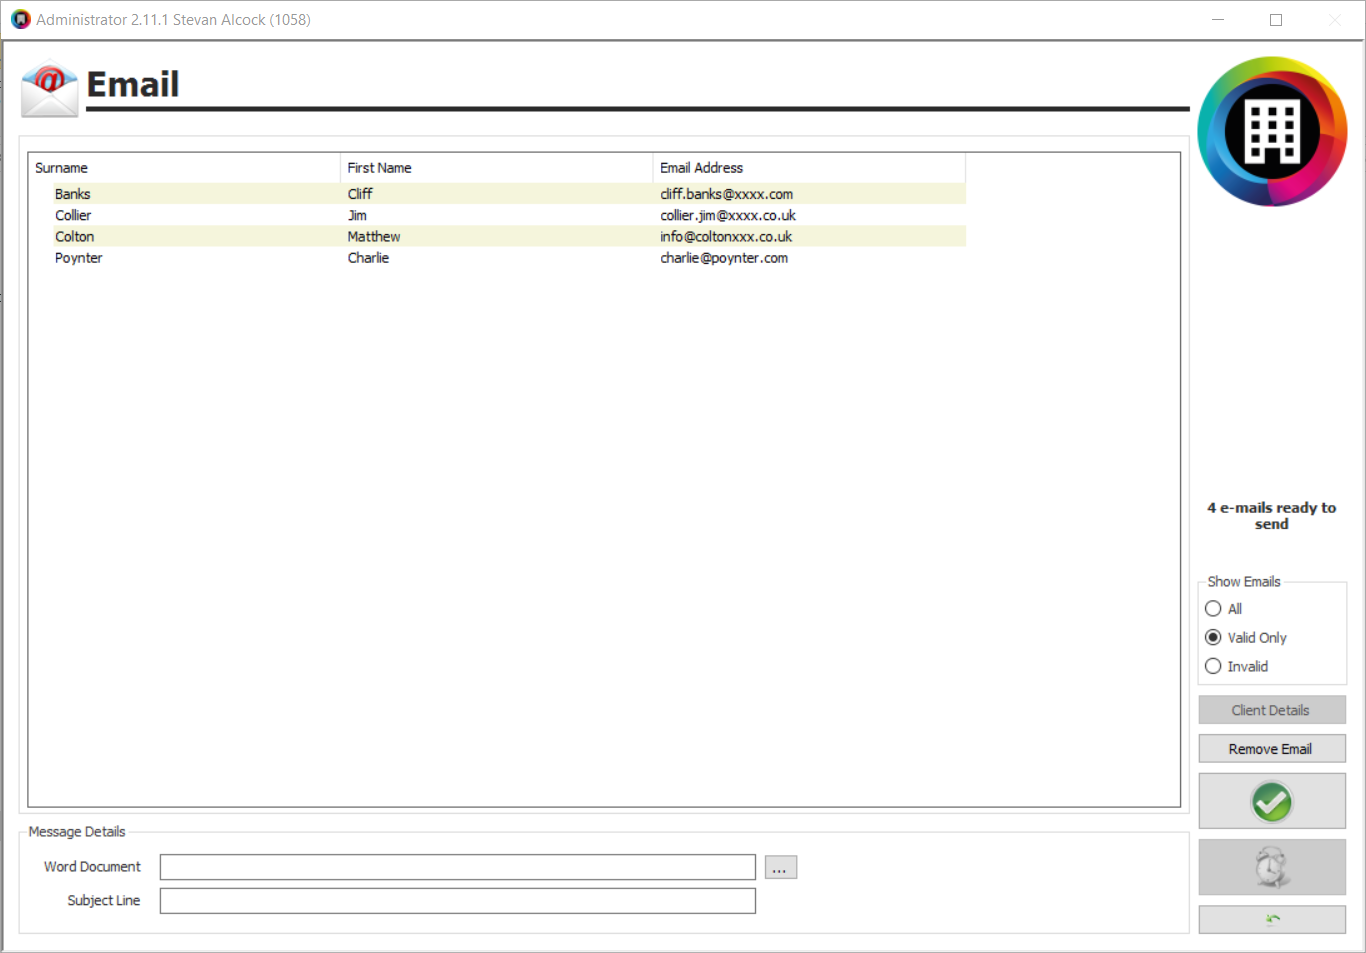
A list of those members with invalid email addresses will display.
- Change the Show Emails option to Valid Only.
Figure 53
- If you wish to remove a client from the list, highlight the member’s name and then click Remove Email.
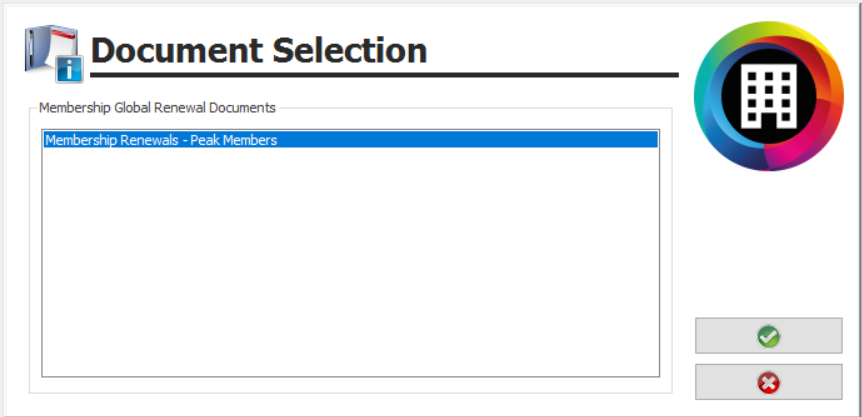
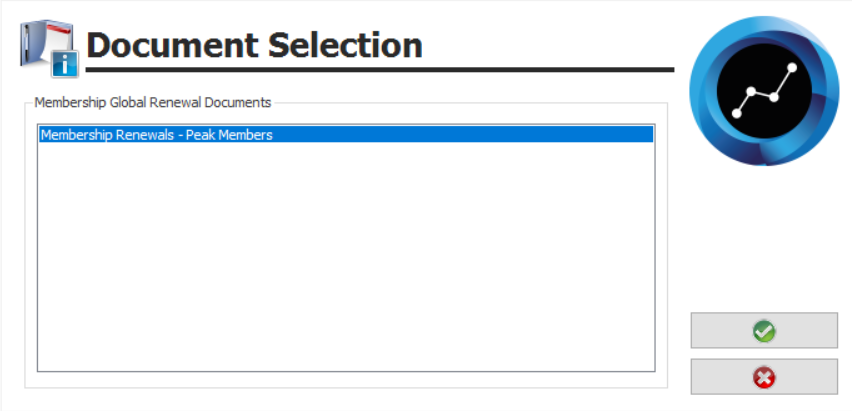
- in the Message Details section click the “Search” (“…”) button adjacent to Word Document and your Membership Global Renewal email templates will be listed, figure 54. A template must already exist for it to be emailed.
Figure 54
- Select the appropriate document and then click the Greenü.
- Enter a Subject Line for the email, unless one was created when the template was saved.
- Click the Greenü.
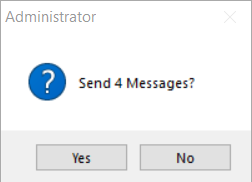
A final confirmation window will display, showing the number of emails to be sent.
Figure 55
- Click Yes to send the emails.
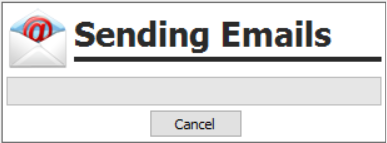
A window will appear stating that your emails are being sent.
Figure 56
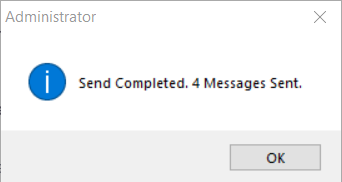
Confirmation that the emails have been sent, or not, will then display.
Figure 57
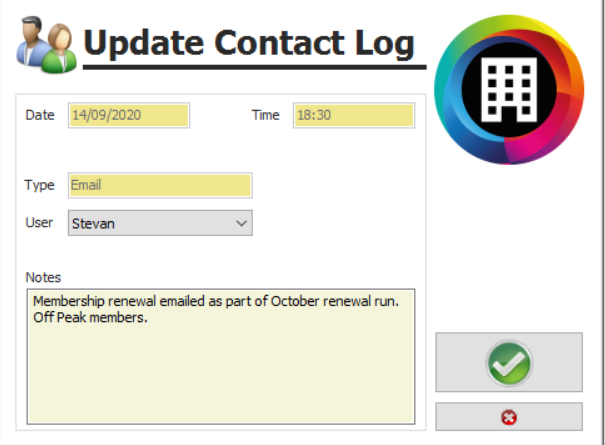
- Click OK and you will be prompted to update the members’ contact logs with additional notes on the emails just sent. The same note will be added to all the members’ records.
- The User will default to the person logged on but can be manually amended if required.
Figure 58
Regardless of whether you enter any notes, a record will be placed onto the Contact Log tab of the members’ records cards. This will include the date and time the email was sent, that it was an email rather than text or letter and the user responsible.
- If so desired, add your Notes.
- Click the Green ü.
A client’s email history can be reviewed whenever desired from the Contact Log of either their Client card, or Members Details.
E-mail will now appear in the Notified By column on the Renewal screen, see figure 59.
Figure 59
Printing Letters
- Click the Mail icon,
.
- After the message confirming the number of new invoices generated appears, click OK.
- A list of your Membership Global Renewal mail templates will be presented, figure 60. A template must already exist for it to be printed.
Figure 60
- Select the appropriate document and then click the Greenü.
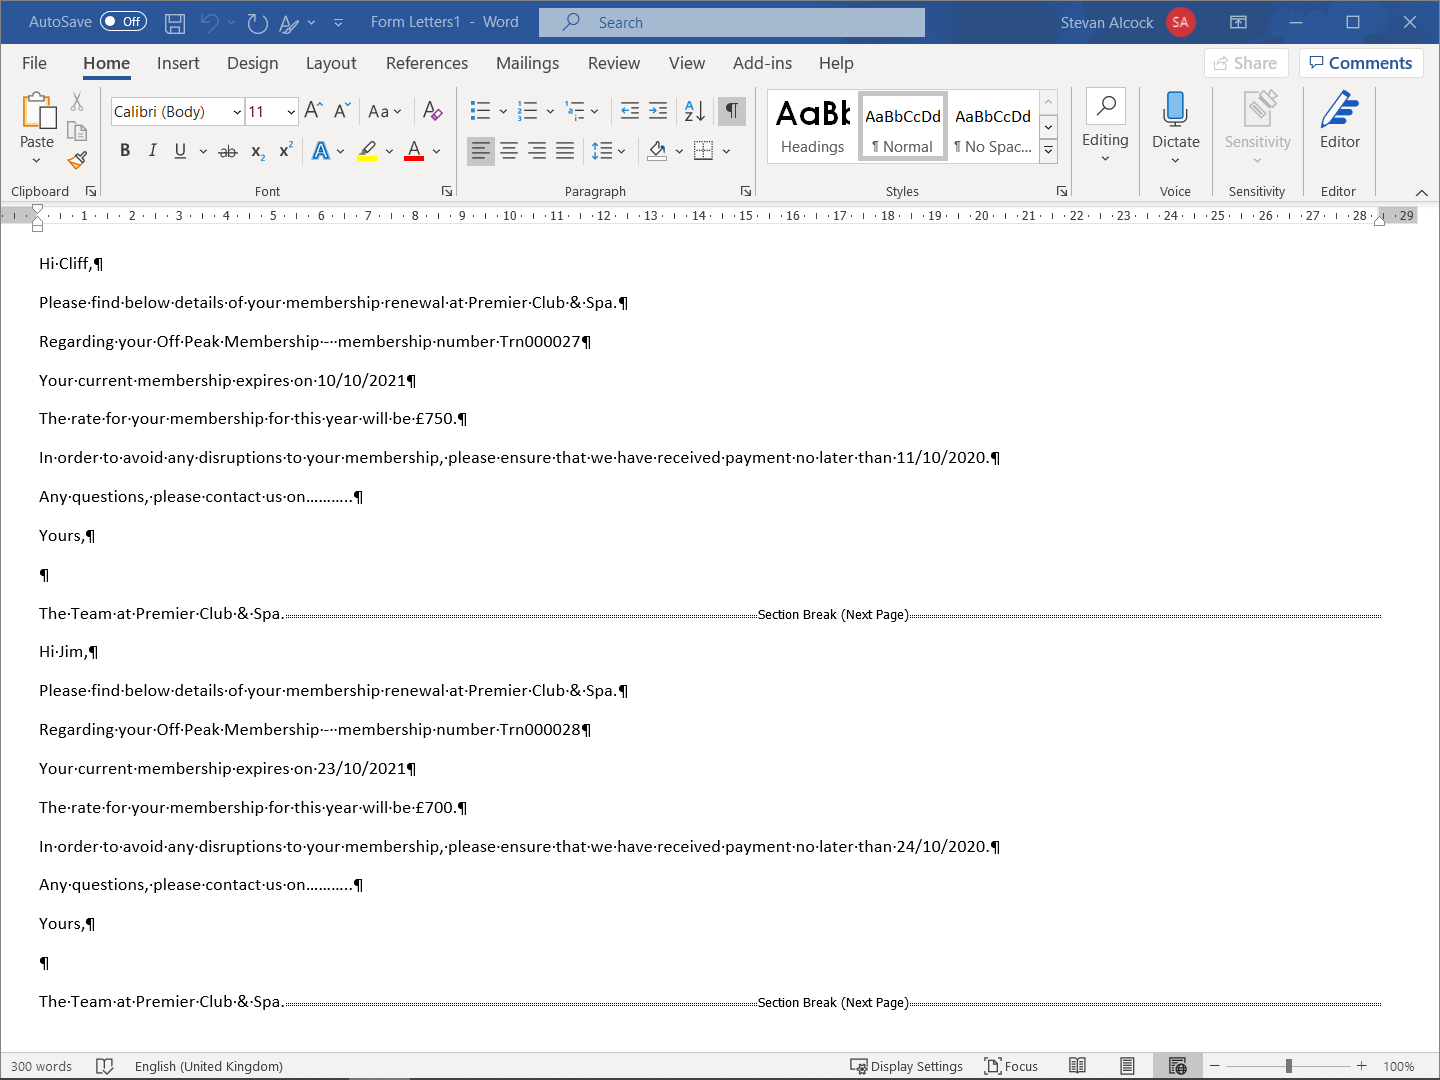
Word will now automatically open and display a preview of the letters to be printed; the merge fields will have been processed and will now show as the members’ individual details, see figure 61.
The letters will again be in the same order as that listed on the Global Membership Renewal screen, meaning that the letters and the invoices will be easy to compile.
Figure 61
- Print the letters as you would any other Microsoft Word document.
- Close out of Microsoft Word.
Back to your Core by Premier system.
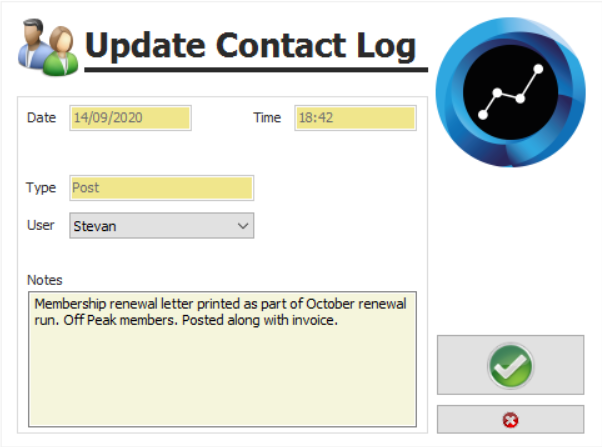
- You will now be prompted to update the members’ contact logs with additional notes on the letters just printed. The same note will be added to all the members’ records.
- The User will default to the person logged on but can be manually amended if required.
Figure 62
Regardless of whether you add any notes, a record will be placed onto the Contact Log tab of the members’ records cards. This will include the date and time the letter was printed, that it was a letter rather than text or email and the user responsible.
- If so desired, add your Notes.
- Click the Green ü.
A client’s communication history can be reviewed whenever desired from the Contact Log of either their Client card, or Members Details.
Refresh the page and Post will now appear in the Notified By column on the Renewal screen, see figure 63.
Figure 63
Once you have started to notify members by letter or email of their upcoming renewals, you can filter the Global Membership Renewal screen to exclude members who have already been notified.
Figure 64
- Tick, Exclude Notified:
- Post, and / or
- Email.
See figure 64.
Processing Payments following a Global Membership Renewal
The memberships have been renewed and the renewal documents sent, the last part of the process is to process the payments when they are received.
As with all membership payments, this is a two stage process. The money is taken through Membership Payments in Reception and then the payment reconciled against the outstanding fee in Members Details in Manager.
Reception - Membership Payments
- From Reception click Membership Payments.
Figure 65
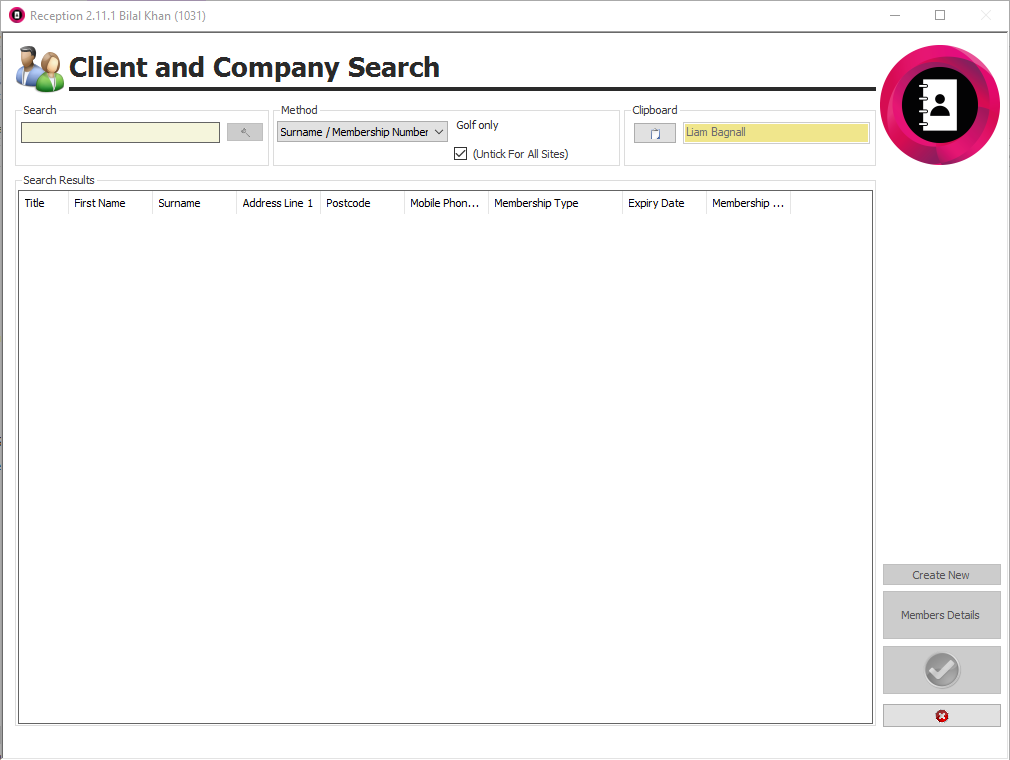
The Client and Company Search screen will display, figure 66.
Figure X66
- Enter details in the Search box that match the option in the Method dropdown.
- Then, select the member from the list of members that match the details entered.
- Click the Greenü or double click on the name in the search results.
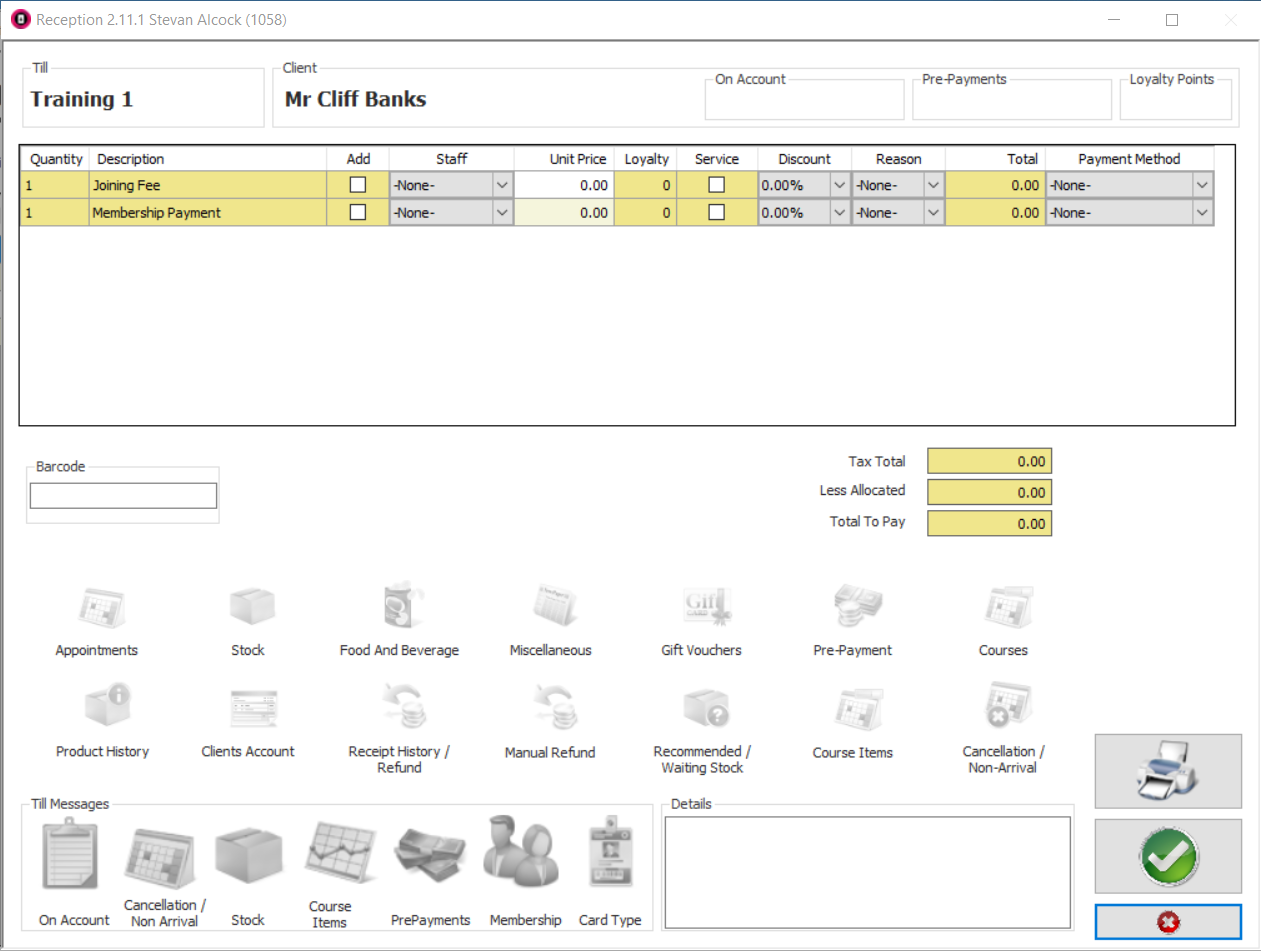
The Memberships Payment screen will display.
Figure 67
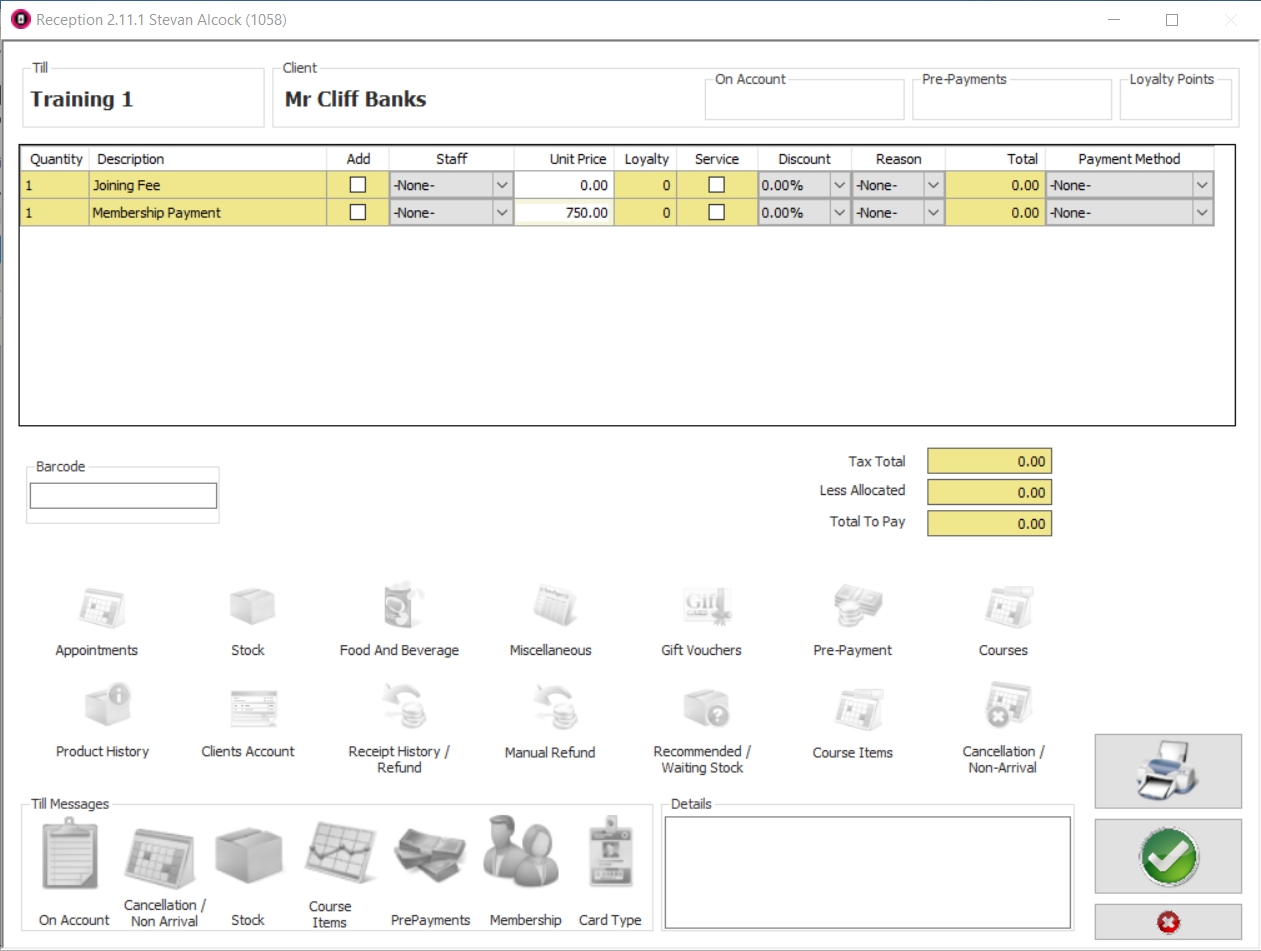
- Enter the Renewal Fee as the Membership Payment.
Figure 68
- Click the Greenü.
- Process the payment, confirming the amounts against the available payment methods.
- Click the Greenü to complete the transaction.
Complete the membership signup or renewal process through the Membership Update function.
Manager - Members Details
- From Manager, or if you are a multi-site business - Administrator, click Members Details.
Figure 69
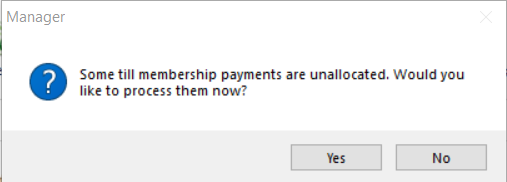
As there will be outstanding Membership Payments awaiting processing you will receive a prompt asking if you would like to process them now.
Figure 70
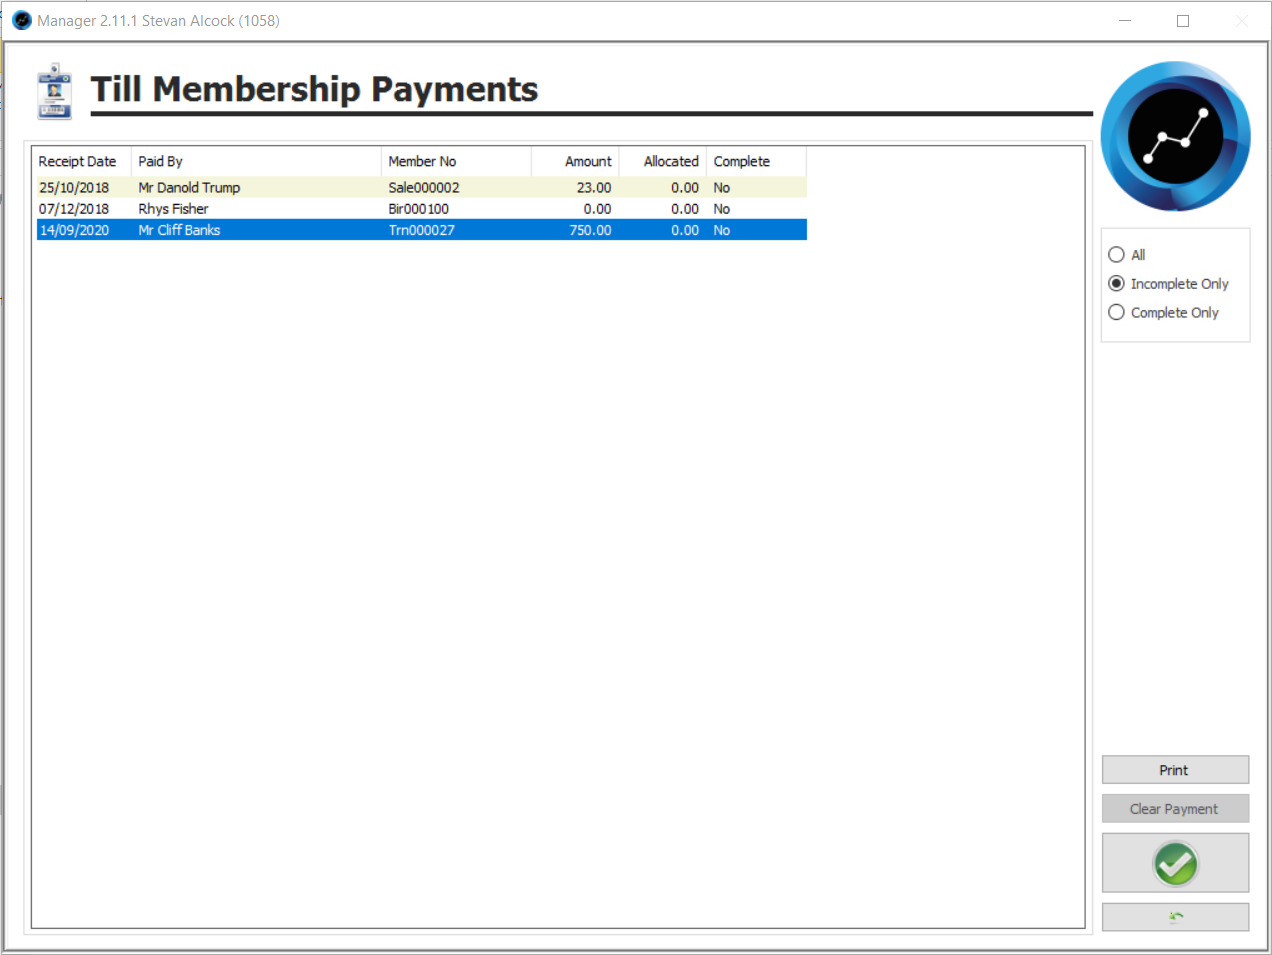
- Click Yes.
Figure 71
- Select the renewing member from the list presented, figure71.
- Click the Greenü.
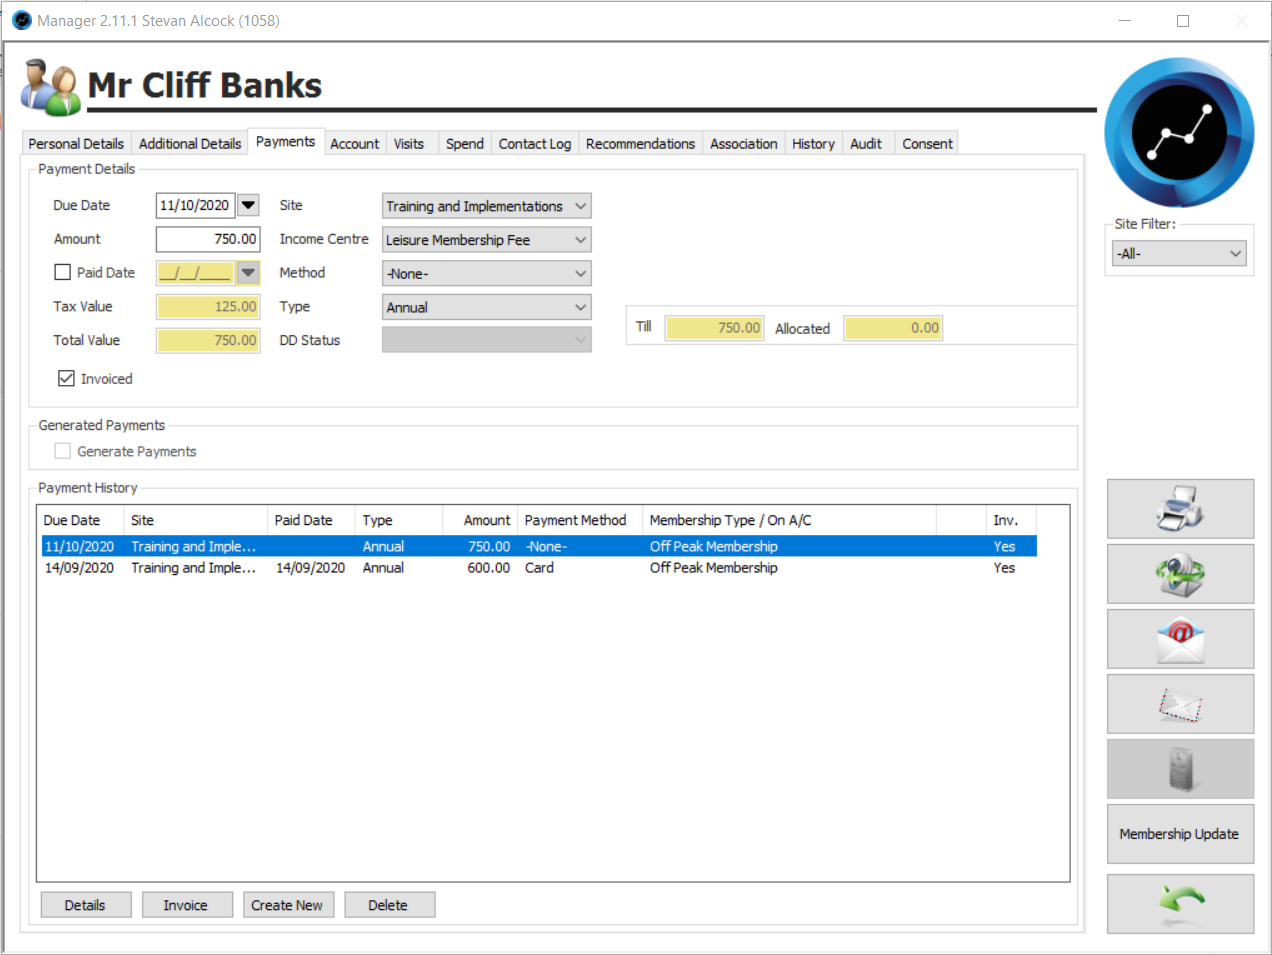
The screen will refresh twice, taking you to the member’s Payments tab.
Figure 72
- Select the outstanding Renewal Payment - identifiable as the paid date column will currently be blank, in the Payment History section.
The Inv. - Invoice - column will already be marked Yes, and the Invoiced tick box already ticked, confirming that an invoice was produced from the Global Membership Renewal screen.
Figure 73
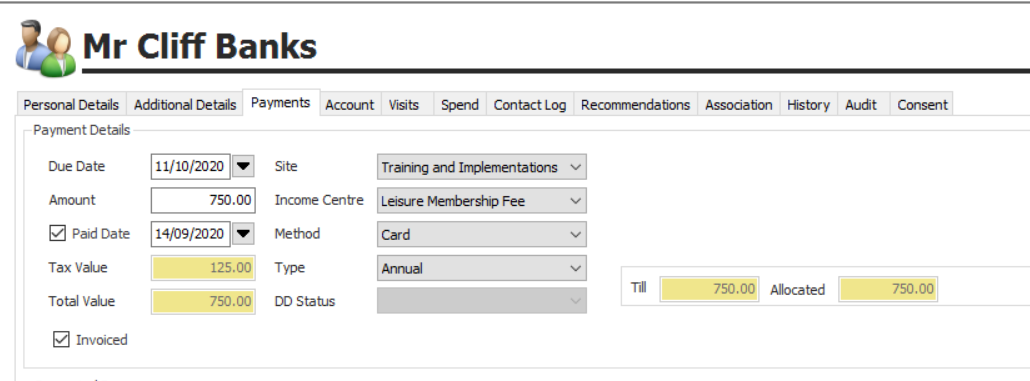
- In the Payment Detailssection, enter the following details:
- Tick the box adjacent to Paid.
- Amend the Date if the payment was received on a previous date.
- Enter the payment Method from the dropdown list.
The Allocated amount will update to match the Till payment, see figure 73.
The payment line in the Payment History section will update to show this information.
Figure 74
- Click the Greenü.
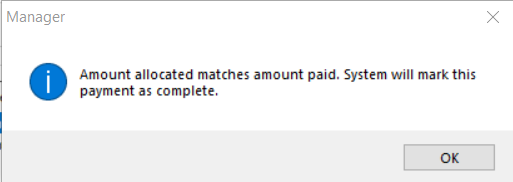
Provided the Till payment and the Allocated amount match, a confirming message will display, figure 75.
Figure 75
- Click OK.
You will be returned to the Till Membership Payments screen, and the payment just processed will have been removed from the Incomplete list.
The payment process is now complete.
Related Articles
Premier | Membership Settings
? Summary Site Settings in Premier allow you to define rules and defaults for creating and managing memberships. Configuring these settings ensures consistent membership management, payment processing, and loyalty programs before adding new members. ...Premier | Membership Types
Description Membership Types creation defines the rules for the business rules and fees associated with members Resolution In "Administrator" or via "Manager" click onto “Initial Membership Setup” and then “Membership Types” Creating Membership Types ...Premier | Corporate Membership
Description Corporate Membership The Corporate Membership function allows for members to be linked to a corporate organization. Members can either pay their own membership fees, or the cost can be attributed to the corporate organisation. Resolution ...EMS | Members - Single Membership
Description When create a new member this will utilise the "Membership Update" process which provides reh ability to select the membership type and the payment options. The ability to create or edit a members record can be completed via the back ...Premier | Membership Categories
Description Membership categories provides the ability to add an additional attribute to a members record, which can then be used when reporting or marketing specific segments of your membership. For example the member may be joined on a full ...

