Premier | Enquiries
Description
An Enquiry allows you to search and store new contact details of potential clients along with the areas of the business they have shown interest in. The function allows you to store actions/contact details against the potential client’s details to show the history of contact through to sale/lost sale, booking, or Membership.
Resolution
- In “Enterprise Reception” click on “Enquiries” (Figure 1).
Figure 1 |
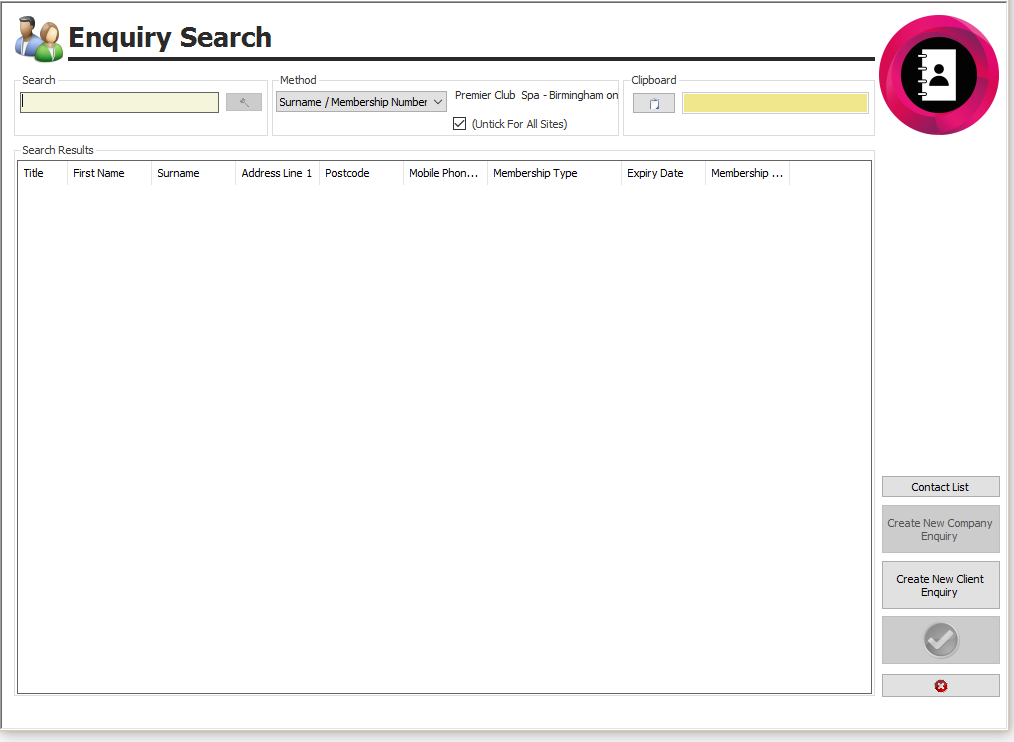
- This will display the “Enquiry Search” screen (Figure 2).
- Click on “Create New Client Enquiry”.
Figure 2
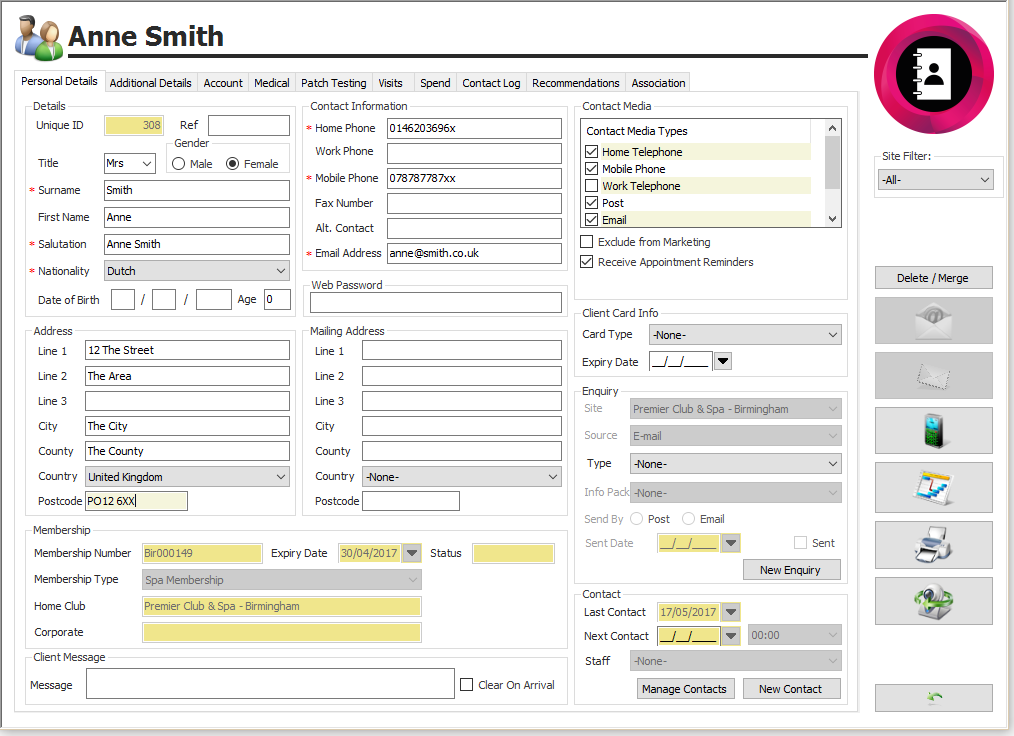
- This will display the “Create New Client Enquiry” screen (Figure 3).
- Enter the details of the client.
- Click on the “Green Tick” to save.
Figure 3
- Click on “New Enquiry” on the same screen.
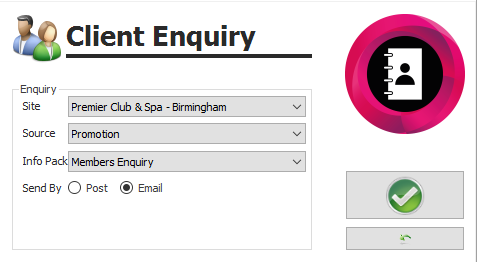
- The “Client Enquiry” screen will be displayed (Figure 4).
Figure 4
- Select the “Source”.
- Select the “Info Pack” to be sent to the client.
- Click on the “Green Tick”.
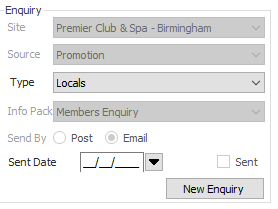
- The information is saved and shown on the screen below (Figure 5).
Figure 5
- Once the Enquiry has been saved you may want to add an action that has been undertaken or define a follow-up action for the future this is defined as a CONTACT within the system.
- To record this information, select “New Contact” at the bottom of the screen.
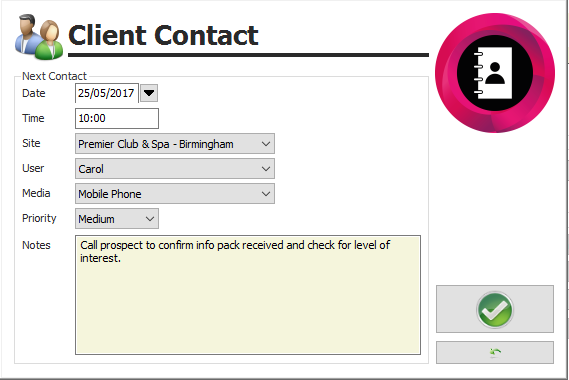
- The “Client Contact” screen will display the “Date”, “Time”, “Site”, “User”, “Media”, “Priority”, and “Notes” for the action/contact (Figure 6).
Figure 6
To review or manage the contact select.
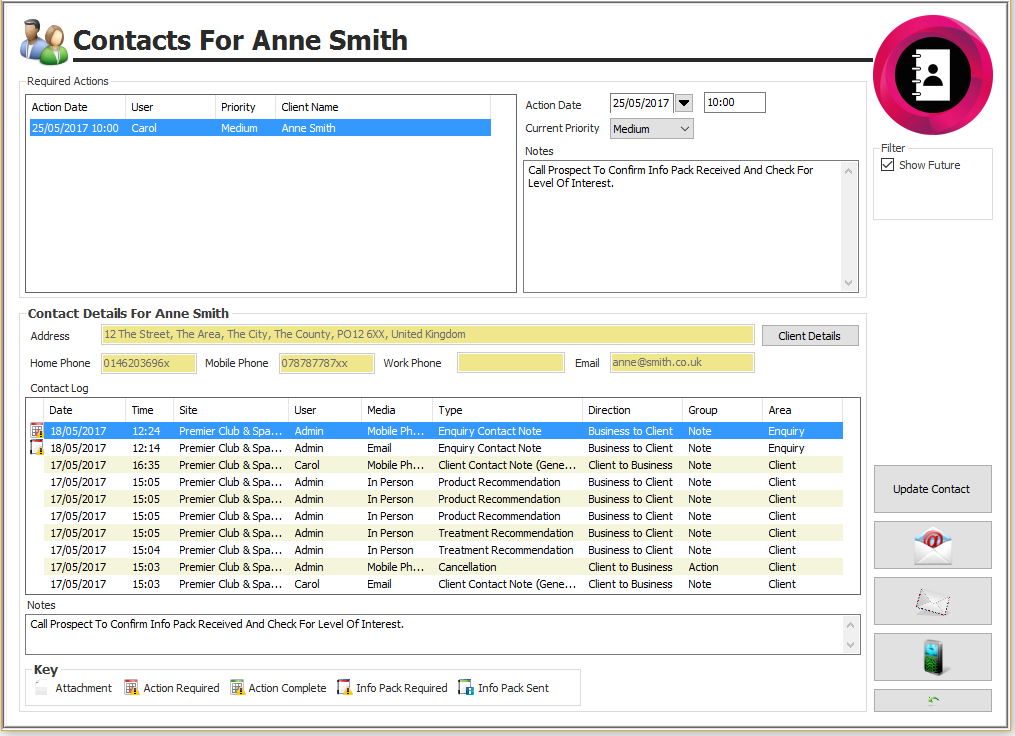
- The contacts screen will display (Figure 7) to display each action/contact for that client.
Figure 7
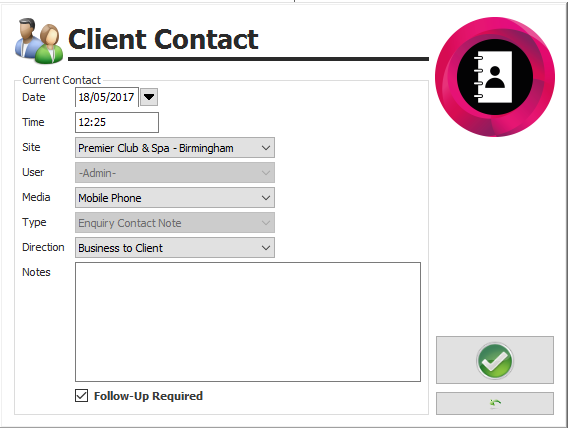
If the notes require follow-up, select the relevant contact at the bottom of the screen and click on “Update Contact”.
- The “Client Contact” screen will display where you can record the direction and tick to say if a follow-up is required (Figure 8).
- If you tick to say that a follow-up is required, when logging on a prompt will appear if the user has any tasks/contacts allocated for that day (Figure 8).
Figure 8
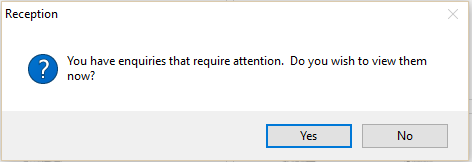
- When a Contact / Follow-up action has been assigned to a user, the next time they log into the system the following message will appear (Figure 9).
Figure 9
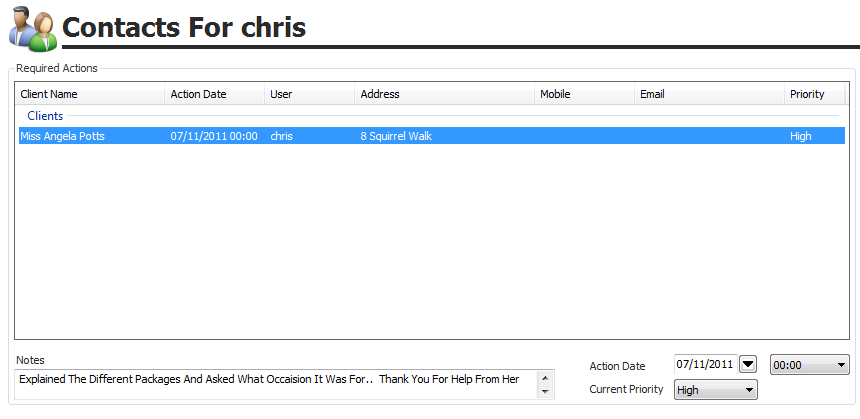
- Selecting “Yes” will display the Contact List for the user that is logged on (Figure 10).
Figure 10
The screen will display each client's name, action date, User, Address, Mobile, Email and priority. By highlighting the relevant contact, the detail will be displayed in the notes section.
The action date can be amended, with any additional notes to be added and the priority changed.
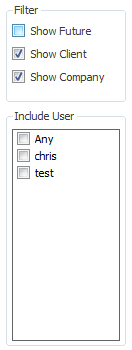
If the user has the necessary permissions created it will allow them to view tasks scheduled for other users, to do this click on the relevant names in the list under “Include User” (Figure 11).
Creating Information Pack Documents
The “Enquiries” facility within Core allows you to capture the details of any enquiry clients when they call and request information, for example, they may wish to receive membership information or a current copy of your current treatment menu. Within the “Administrator” or “Manager” programs you must define the email that will send them the information they need.
The process is identical to “Reservation Documents” with the exception that this is performed within the “Enquiry Info Packs” section.
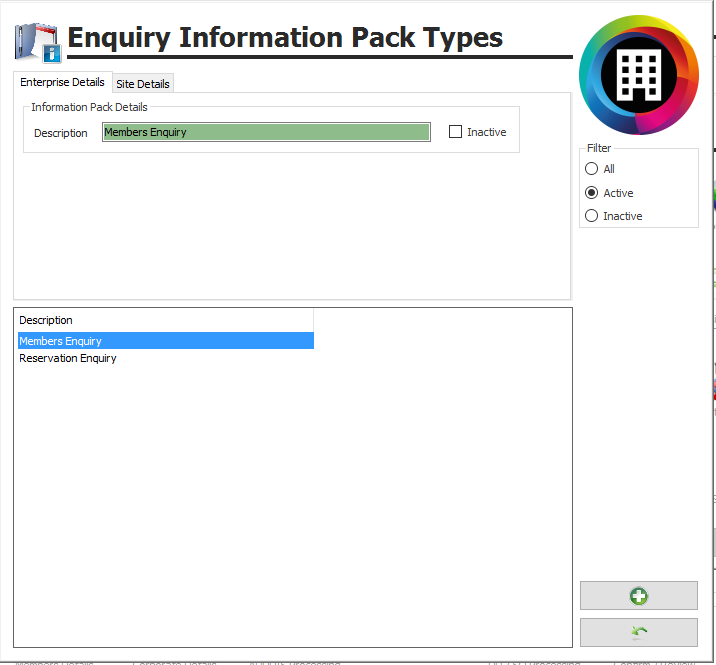
- Click on the “Enquiry Info Packs” icon and the following screen will appear (Figure 12).
Figure 12
- To create a new “Enquiry Information Pack” click on the “Green Plus” icon.
- In the “Description” box type in a name you will recognise to identify the template for future use.
- Click on the “Green Tick”.
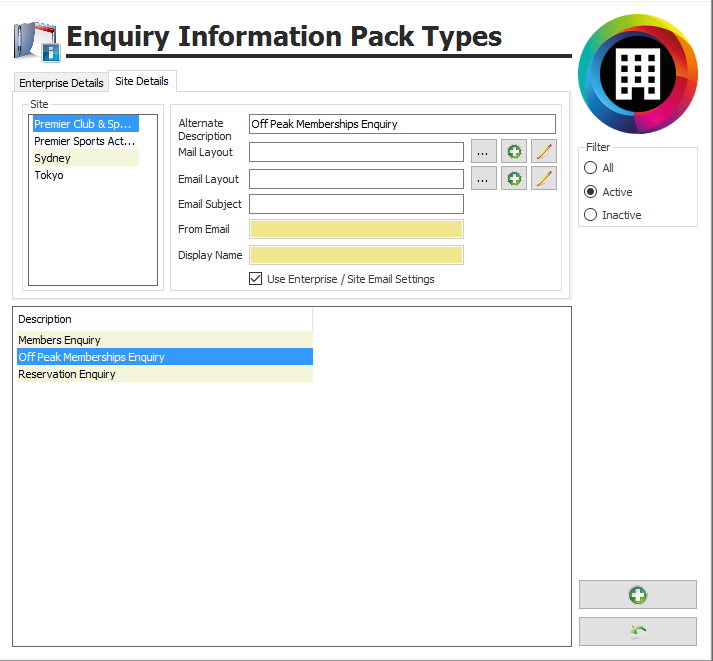
- Click on the “Site Details” tab and the following screen will display (Figure 13).
Figure 13
- “Email Layout” – the name of the document that will be sent for the selected enquiry type is shown here. If the template has already been created but is not shown in the box, click on the “Ellipsis” button and browse the location of the document.
- If you wish to create a new document click on the “Green Plus” icon.
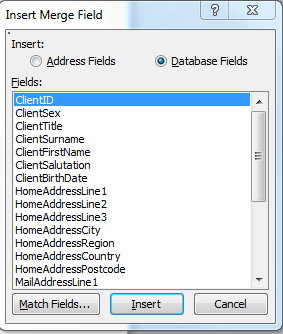
- You will then be presented with a blank Word document where you can create a new email. At this stage, you can click on the “Insert Merge Field” and the following screen will display (Figure 14).
Figure 14
- Click on the required merge field and then click on “Insert” to add the value to your document template.
- You can continue until all required fields are inserted.
- Once the formatting is complete save this document in a location where you will be able to find it
- Within “Administrator” or “Manager” use the “Ellipsis” button to browse the template which you have just created and saved.
- Once completed click on the “Green Back Arrow” to leave the screen.
Related Articles
Premier | Global Membership Renewals
Description Global Membership Renewals The Global Membership Renewal function within Core by Premier, allows you to renew single payment term members as a group. This applies to all members who make a single payment for their membership, and which ...Premier | Automatic Pricing
? Summary Premier’s Automatic Pricing allows discounts to be applied automatically based on a customer’s status, removing the need for staff to manually adjust prices. Discounts can be applied to Residents, Client Card Holders, and Members with ...Premier | AUDDIS Processing
Description AUDDIS simply replaces the paperwork which is sent to the bank once a member has joined your facility, it negates the posting of forms and all information is sent to the bank electronically. Resolution In "Administrator" or via "Manager" ...Premier | Creating and Sending Emails
Description Creating Templates and Configuring your System Technical Information In all installations there will be a degree of technical setup required in order for the integrated email merge facility to function. The level of complexity will depend ...Premier | Membership Types
Description Membership Types creation defines the rules for the business rules and fees associated with members Resolution In "Administrator" or via "Manager" click onto “Initial Membership Setup” and then “Membership Types” Creating Membership Types ...

