Premier | Automated Marketing and Reports
Description
With version 2.2 onwards Premier Core includes automated marketing, automated reception reporting and automated appointment reminders and confirmations.
A small number of changes have been made to the system to support this: The 2 auditing icons in Manager – Audit Profiles and Audit Log – have been merged into a single icon “Auditing”.
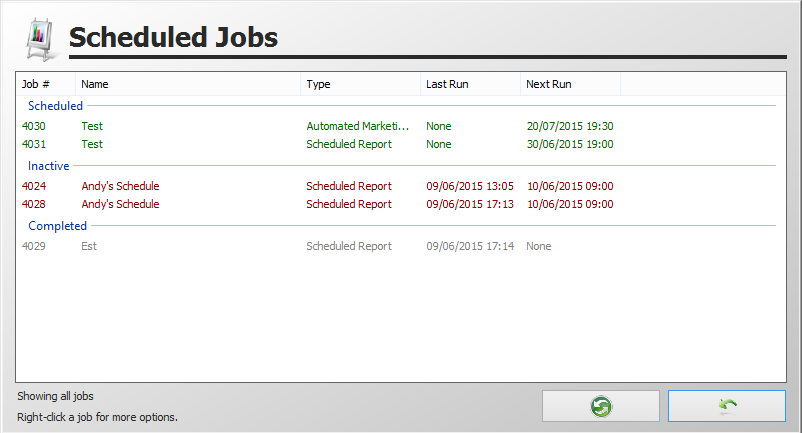
A new “Scheduled Jobs” icon has been added next to Marketing to allow you to view, enable, disable and delete scheduled tasks.
Resolution
General Marketing
In Administrator or Manager select “Marketing” (figure 1).

Figure 1
The Marketing section of Premier Core still works as before, with the software allowing you to identify a targeted group of clients that you may wish to email, post to, text, leave a message for, or export as a .CSV file.
In addition you can now save a regularly used marketing selection and choose to automatically run the campaign on a daily, weekly or monthly basis.
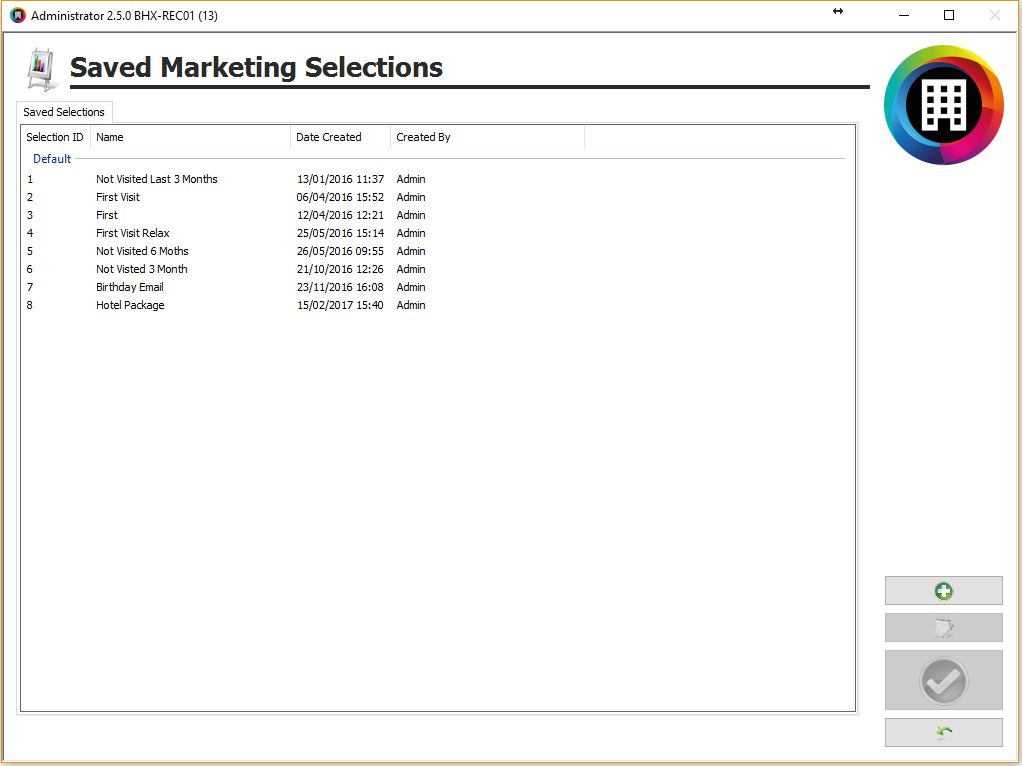
Figure 2
Upon selecting Marketing, you will now see a list of saved Marketing campaigns.
(If this is the first time you have accessed Marketing, or you have not previously saved any marketing campaigns, the list will be empty)
The following options are available:


Building your Marketing Campaign
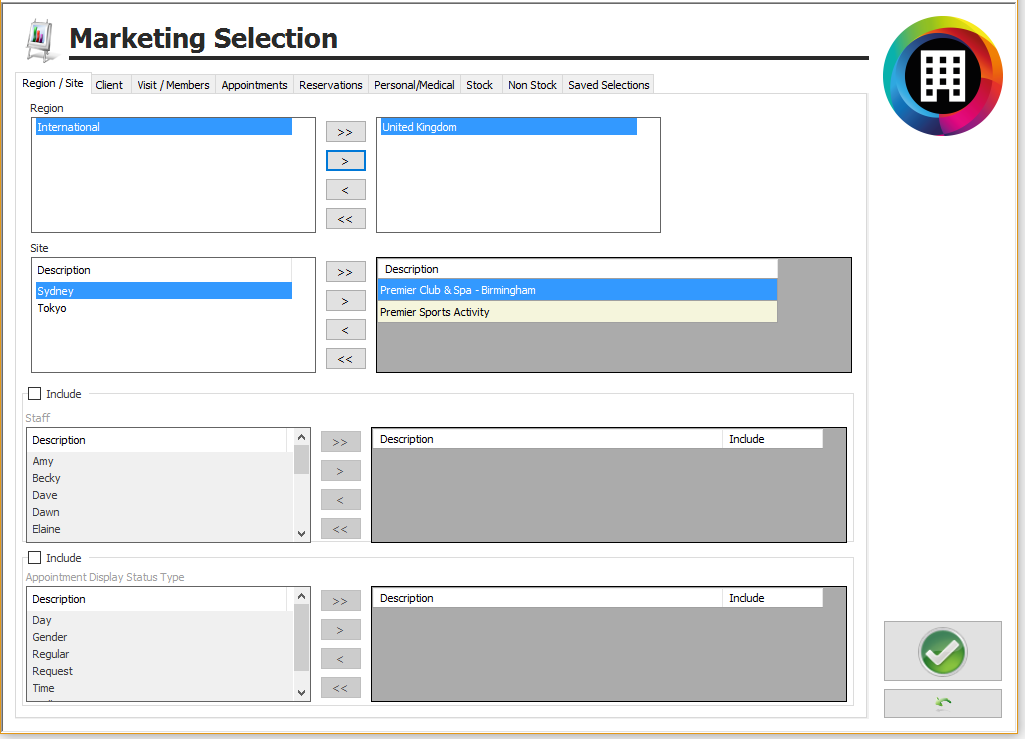
Clicking the ‘+’ button takes you to your Marketing Selection screen.
Figure 3
As with previous versions Premier Core, you can target your marketing campaigns based on a wide range of client / member details and visit and purchase histories.
A field in which you can select clients’ “Birthday in Date Range” has been added within the Client tab, to facilitate automated marketing based on birthdays.
Work through the available tabs and the options they contain, when you are happy with the criteria selected, click the GREEN tick.
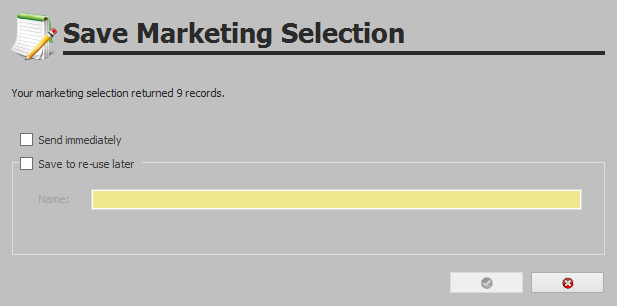
Figure 4
The number of records selected based on your criteria will be displayed and two options are presented:
Send immediately – best for campaigns to be run once only. Whilst it is possible to postpone their sending and even schedule the campaign to run regularly, no amendments to the selection criteria or scheduling will be possible.
Save to re-use later – and then enter a name for your selection / campaign. You will receive confirmation that “The selection was saved successfully as “......” to which you should click OK, and you will be taken back to the Scheduled Marketing Selections screen in which you will now see your saved selection.
Select the required option, or both options, and click on the ‘GREEN’ tick.
Figure 5
If you opted to “Save to re-use later” you will be taken to a list of your saved marketing queries. Click on the green tick and you will be shown a list of all clients that match the selection criteria.
Decide on the output method you wish to use: Email or SMS Text message.
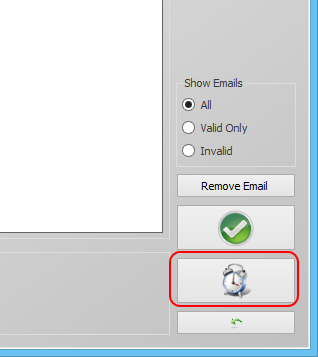
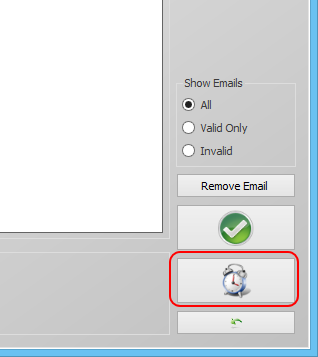
Select the pre-existing word template for emailing, or in the case of texts, either type in the message directly, or copy it from a saved word document. You must then select either the Show Emails “All” or “Valid Only” view; refer to the figure below.
Click the Green Tick to send immediately, or the Alarm Clock icon to schedule for the future.
SCHEDULING your Marketing Campaign
Figure 6
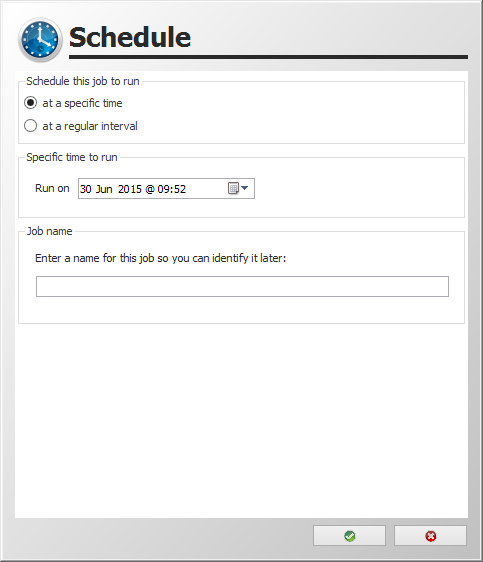
There are 2 scheduling options, a one off “at a specific time”, or regularly “at a regular interval”:
Option 1 – “at a specific time”
You can save your marketing criteria and it can be sent at a specific time – this will only run once.
Simply select the time and the date you would like the email or text to be sent out, i.e. for the scheduled event to run.
Give the Job a name so that you can identify it later.
Figure 7
Option 2
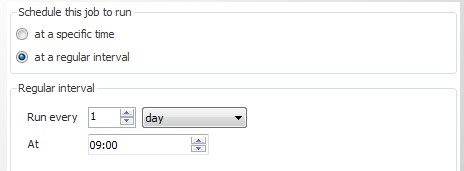
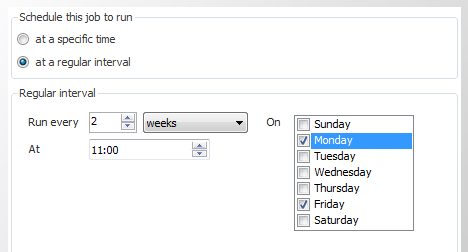
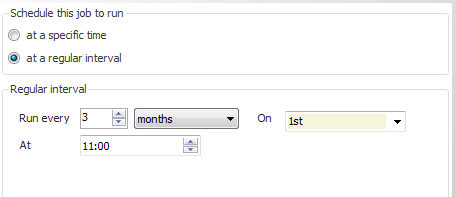
You can save your marketing criteria so that it can be sent out at regular intervals – this will run many times at a frequency that you set as follows, either daily, weekly or monthly.
It can be scheduled to run every X number of days at a specific time
Figure 8
- It can be scheduled to run every X number of weeks at a specific time on one or more days of the week
Figure 9
- It can be scheduled to run every X number of months at a specific time on a specific day of the month
Figure 10
Appointment Reminders & Confirmations
This follows a similar process to that used in Marketing. To schedule reminder and confirmation emails and texts, select the Reports icon in Reception.
Select either the Appointment Reminders or Appointment Confirmations report.
Choose the period for the report – automated confirmations will only really be useful with “today” selected – and the scheduled job set up to run daily.
For appointment reminders, the period must make sense with the schedule. For example:
- a weekly schedule set to run on a Monday morning: a period of “this week” would make sense
- a daily job running first thing in the morning: the period “today” would be appropriate
- a daily job running in an evening: the period “tomorrow” would be appropriate
- You can also set a few days before, for example "next two days" or "next three days" etc
Note: if you set up a schedule where an appointment may match multiple times (e.g. a schedule set to run daily, with a period of “this week”) the system will only send a reminder once for each appointment.
In the include options, you can choose the different types of appointments to include:
Click the e-mail or SMS icons to send the reminders as normal.
To schedule the task, click the Alarm Clock to obtain the same scheduling options as in Marketing.
Figure 11
Scheduled Reports
Reports can be scheduled in Manager or Reception. The process allows reports to be emailed to selected recipients on a regular basis.
To schedule the emailing of a report, select the Reports icon in Reception; then select the desired report from the list presented and click the Printer icon.
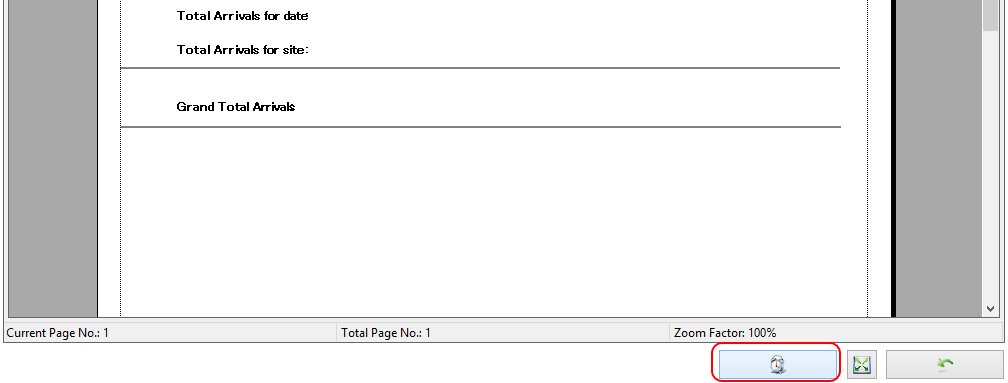
At the bottom of the print preview screen will be the usual Alarm Clock.
Figure 12
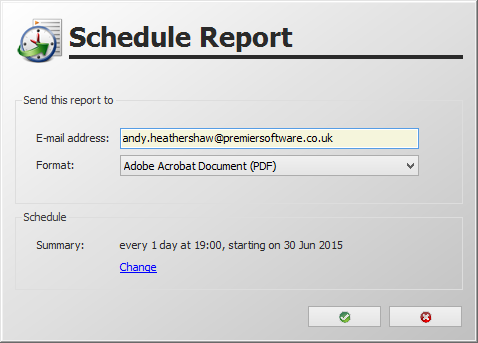
Clicking this prompts for an e-mail address and allows you to select a format in which to save and ultimately attach the report (options are: PDF, Excel, Word, CSV).
Clicking the Change link provides the scheduling window and the same options as in marketing).
Figure 13
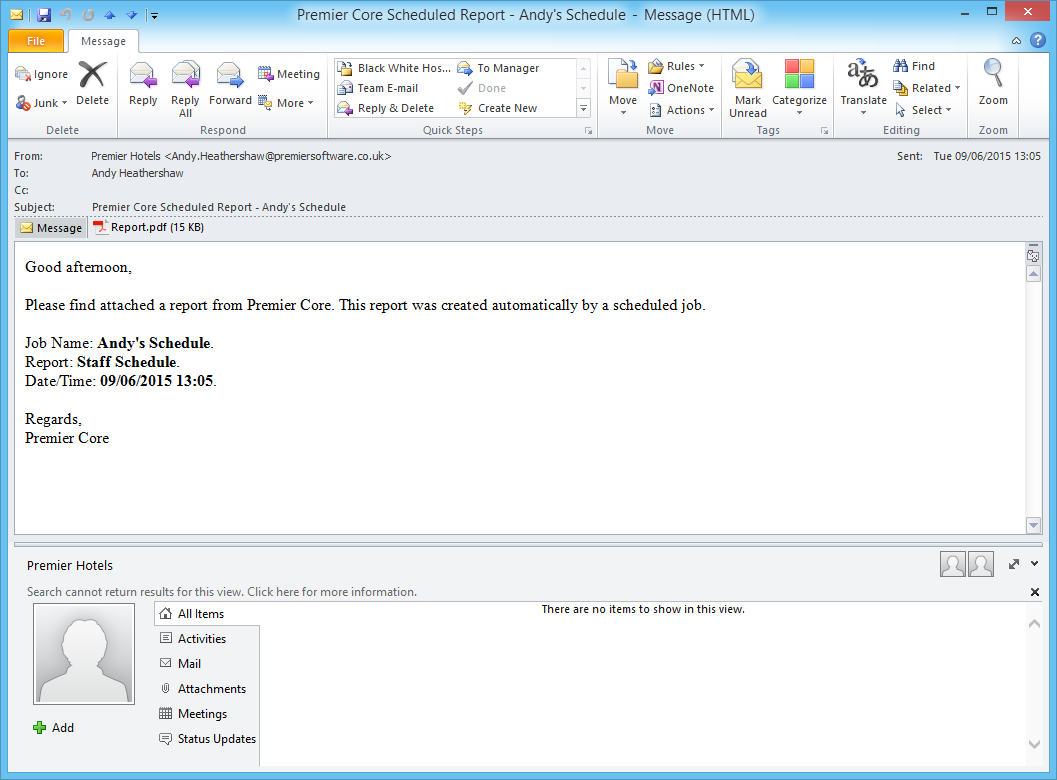
The automated e-mail includes:
- the Job Name,
- the name of the Report attached,
- the date/time the email was scheduled to run, and
- the attachment itself (the format will depend on what is selected in the job).
Figure 14
Managing Scheduled Jobs
Go to Manager or Administrator and click the Scheduled Jobs icon.
Figure 15
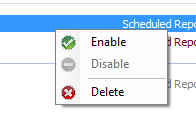
Jobs can be disabled (to temporarily stop them running), re-enabled or deleted from the Scheduled Jobs screen:
Figure 16
Right-clicking on a job reveals a menu with the appropriate options for the selected job.
Figure 17
If a scheduled task is running whilst the Scheduled Jobs screen is displayed; the screen can be refreshed to update the “Last Run” and “Next Run” details.
Figure 18
Related Articles
Premier | Marketing
Description The Marketing section of your Premier software allows you to specify a select group of clients that you wish to target for a particular mail shot. Once the clients have been selected you then have the option to mail merge, email merge or ...Premier | Reception Reports
Description Reception Reports Resolution In “Reception” Click onto “Reports”, see figure 1 Figure 1 Bills “Bills Analysis “ “Dates” – this report can be ran for selected date ranges simply by clicking on the downwards arrow located at the end of the ...Prmeier | SMS Text Reminders
Description SMS Text Reminders Resolution SMS TEXT MESSAGING The following screen will appear (see Figure 1): Figure 1 “Greeting” – input the greeting that you wish to start the text message with. “Include Salutation” – tick this box if you wish to ...Premier | Exporting Reports
Description Often when running reports there is the requirement for the information to be exported to either send to other personnel or to third parties or other software in order to import the information. The following prompt sheet defines how to ...Premier | Creating and Sending Emails
Description Creating Templates and Configuring your System Technical Information In all installations there will be a degree of technical setup required in order for the integrated email merge facility to function. The level of complexity will depend ...
