Premier | Appointment Waiting List
Description
The “Appointment Waiting List” enables the user to store appointment requests. The system will continually search through your diary and alert you when an appointment on the list is available to be booked.
Resolution
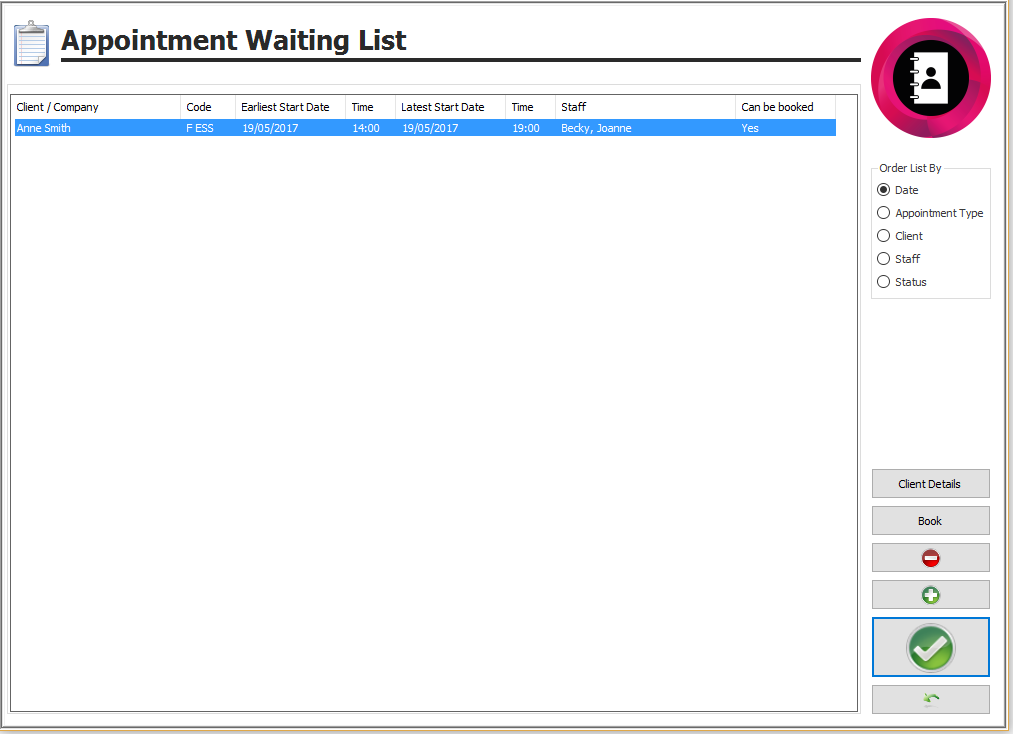
In "Reception" click onto “Appointment Waiting List"
Configuring the settings
For the “Appointment Waiting List” to function correctly some settings need to be configured.
In “Administrator” select the “General Menu” and Select the “Sites” icon
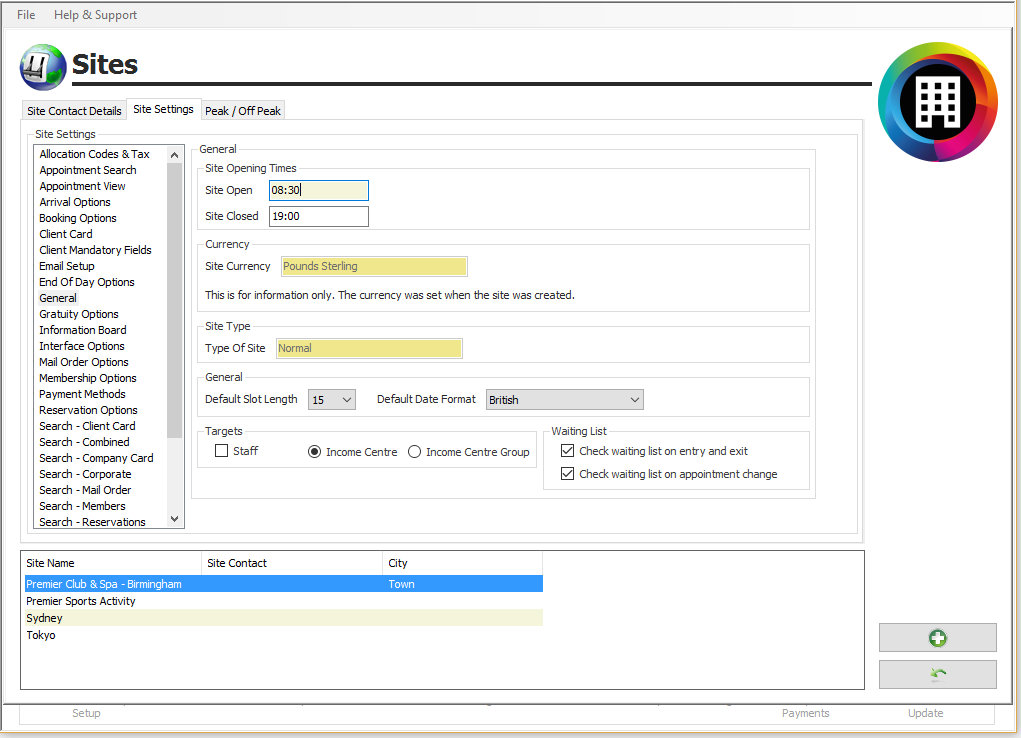
- Select the site that you are setting up
- Select “Site Settings” tab
- Select “General” from the list on the left-hand side
- Ensure that both tick boxes located at the bottom of the screen under the “Waiting List” heading are ticked
Add to Appointment Waiting List
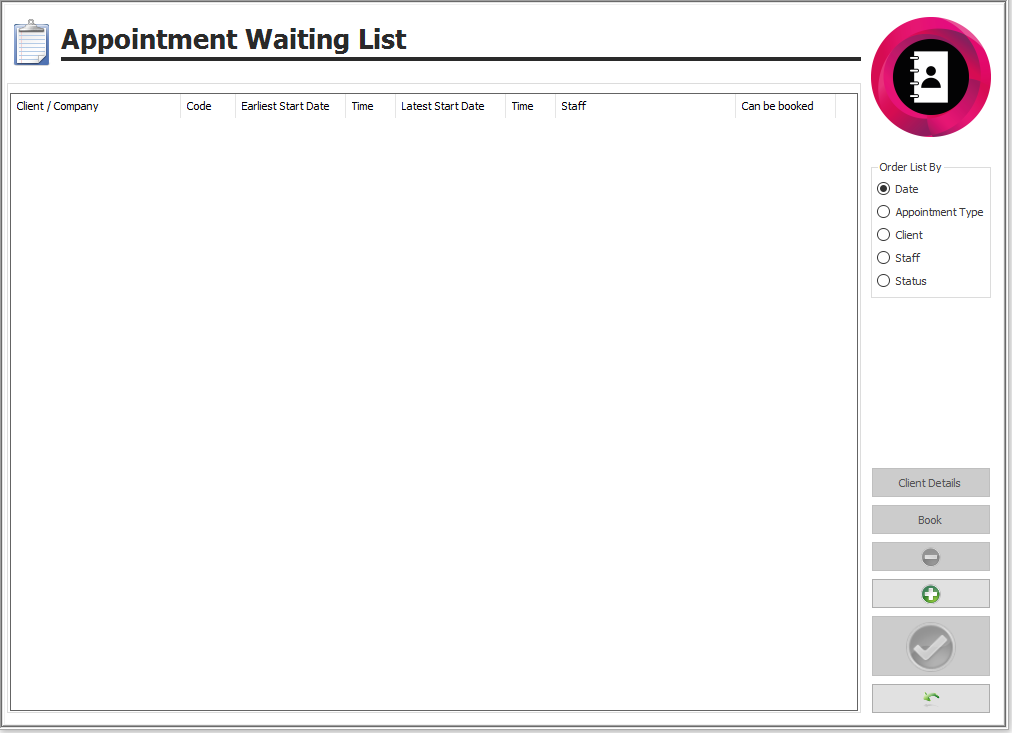
- In Reception select the “Appointment Waiting List” icon on the main screen, this will display the waiting list
- Click onto the "Green Plus" to create a new waiting list entry
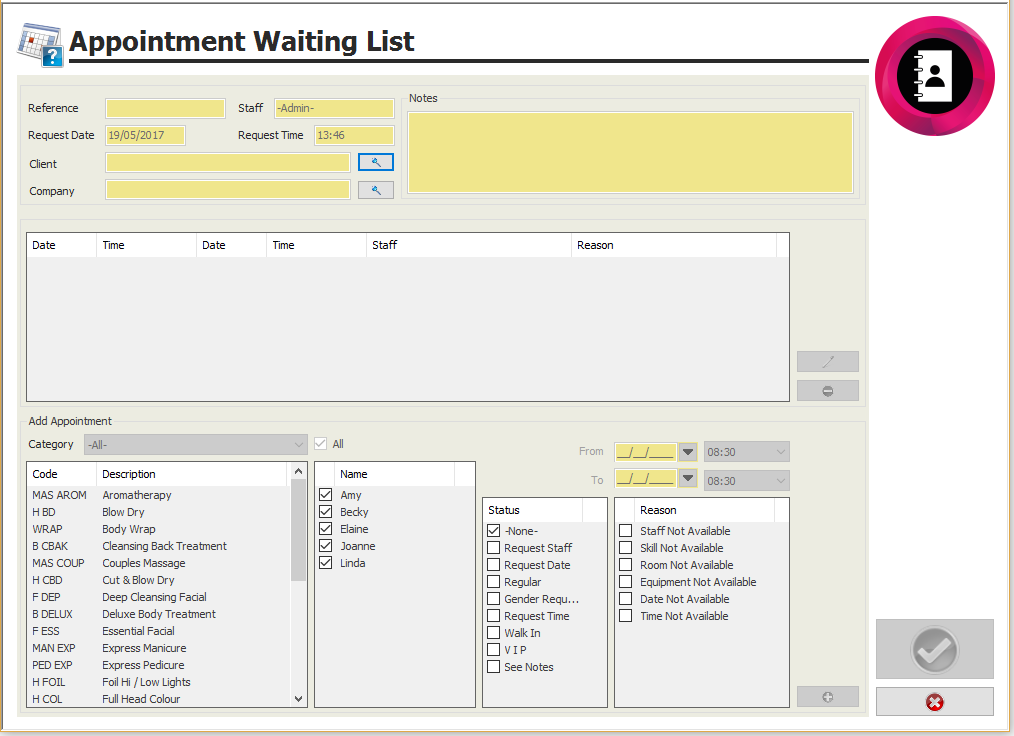
- Select the relevant client by clicking on the search box marked
next to the “Client” field
- Once selected click on the “Green Tick”
- Select the appointment the client has requested by highlighting the treatment on the bottom left of the screen.
- You can select which staff member has been requested by ticking the box next to the relevant staff name.
- Place a tick in the box next to the relevant appointment Status.
- Before you can select the date that the client would like the appointment, you must specify the reason that the appointment is not available. You can select more than one reason but at least one must be selected
- You now need to specify the dates and times the client has requested.
- You must specify a “Date From”, “Earliest Start Time”, “Date To” and “Latest Start Time” depending on what the client’s requirements
- Example if the client can come any time on a Saturday you would select the Saturday in the “Date From” and “Date To” fields. The “Earliest Start Time” would be the time your salon opens and the “Latest Start Time” might be an hour before you close if it is an hour-long appointment
- Once this has been completed click on the “Add” button.
- Click onto the “Green Tick” to save the details.
Using the Appointment Waiting List
The client will then be on the waiting list until the appointment is available to be booked or it is deleted from the “Appointment Waiting List”. When the appointment is available to be booked, you will see a “Yes” in the “Can Be Booked” column
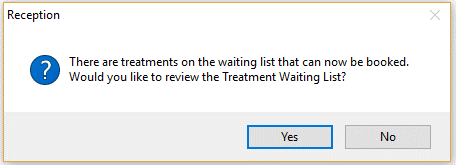
The system will continue to search through your appointment diary and when the appointment is available a prompt will appear
- If you select “No” the system will prompt you each time you log in or out of Reception until you either book the appointment or delete it from the “Appointment Waiting List”
- If you select “Yes” the “Appointment Waiting List” screen will display and the option of “Book” will be available to you on the right hand side of the screen. Select “Book” and this will display your booking screen
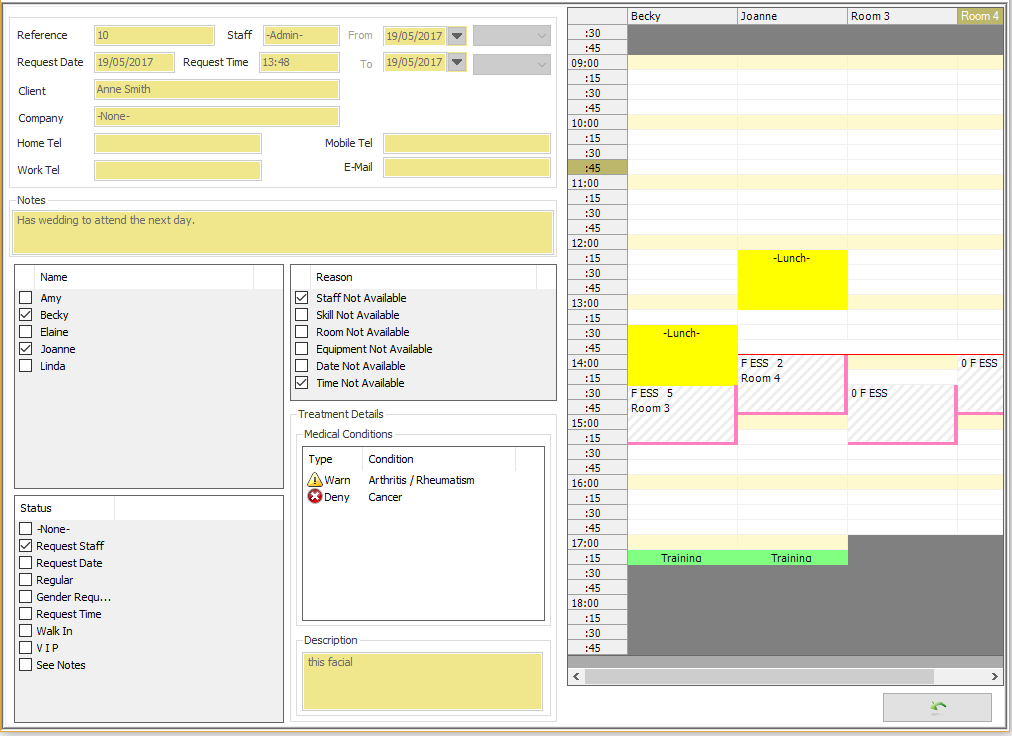
On the booking screen (figure 8) you can see the diary and where the appointment can be booked, giving the appointment details, the staff, the room and the client details.
If you want to book the appointment
- Click on the “appointment” on the diary on the right-hand side of the screen.
- Double check the client details.
- Click on the “Green Tick”.
Your appointment has now been booked in the diary.
If you do not want any of the appointments available, click on the “Back Button”.
Related Articles
Premier | Product Waiting List
Description The product waiting list allows the user to record requests for specific products that are currently out of stock. You will be prompted upon entry and exit of the system when the products are available to sell. Resolution To add a request ...Premier | Appointment Code Setup
Description Appointment Code Setup creates the booking rules for all staff based appointments. The initial code creation defines the dependency on "Rooms" or "Facilities" and sets the fundamental business rules for the organisation. ? Important Note ...Premier | Appointment Booking
? Summary The Appointment Book allows staff to view, book, and manage client appointments. It provides features for scheduling, searching, billing, and managing availability, along with a comprehensive screen layout for daily operations. ❓ Likely ...Premier | Group Activity Timetable
Description The ability to define the timetable of activities, including the ability to specify the size of the group, optional waiting list and the instructor . Resolution Creating Group Activity Codes In "Administrator" or via "Configuration" click ...Premier | Appointment Search
Description The appointment search facility is an alternative to the “Diary View” as a method of booking an appointment into the diary. Instead of manually looking through the diary you specify the booking details and the system will search through ...
